Deployment Endpoints
What are Deployment Endpoints
Deployment Endpoints are used to identify the location of a Deployment (i.e., the definition where an Instance is executed). With the Deployment Endpoints, you can create and maintain those locations. This feature can only be accessed by a user with the administrator role.
How to access
Follow the steps bellow to access the Deployment Endpoints:
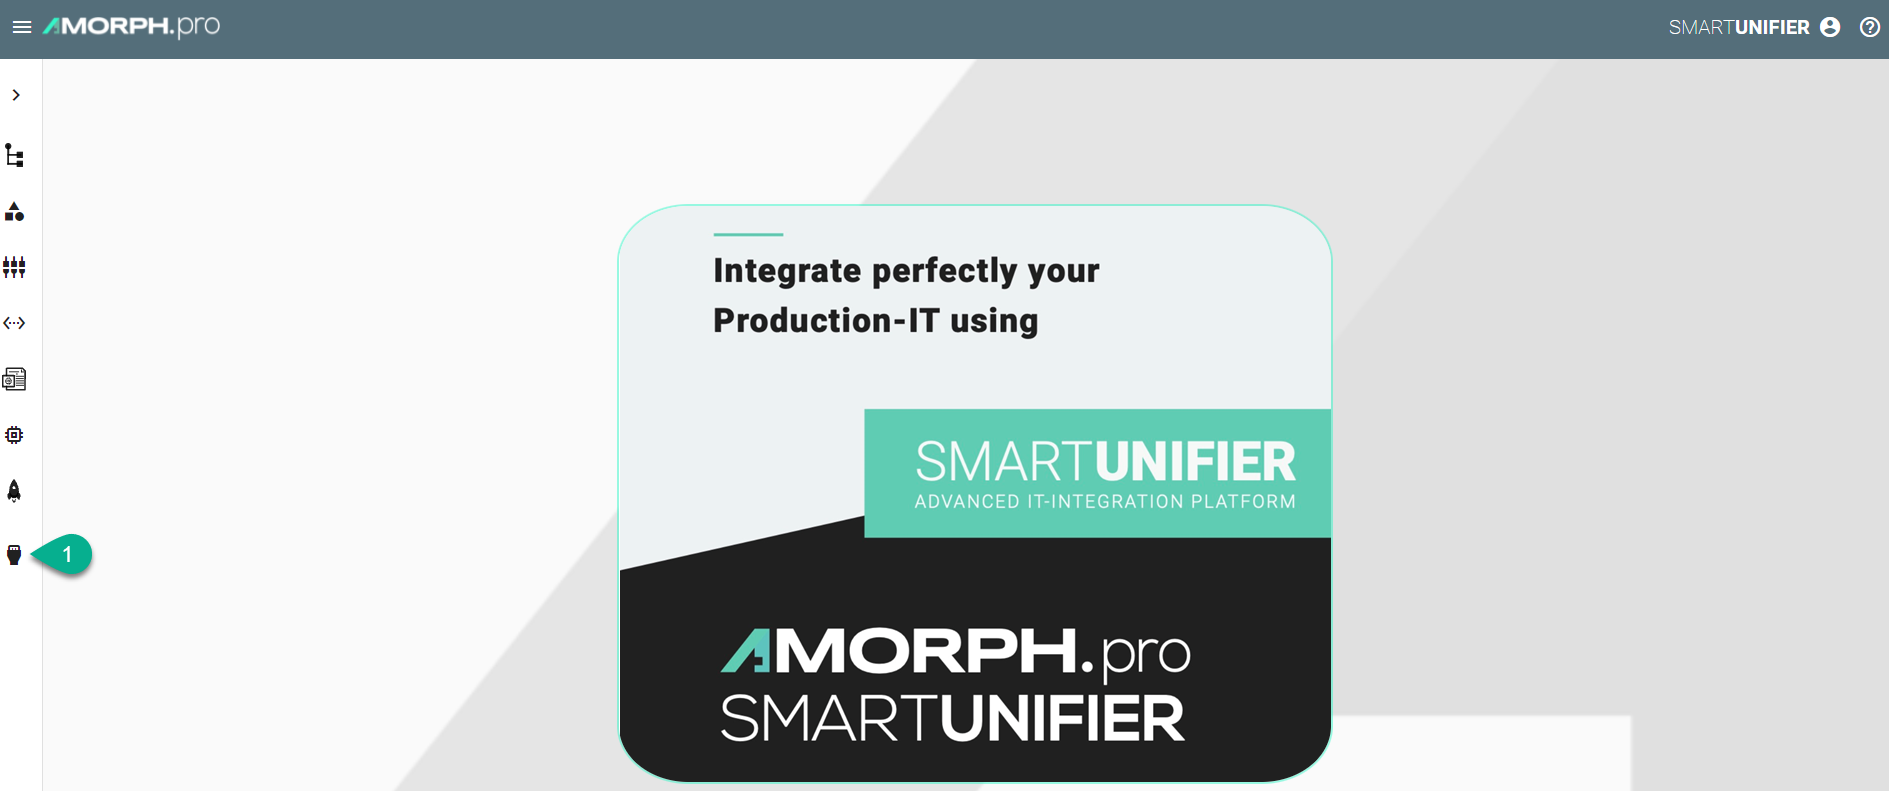
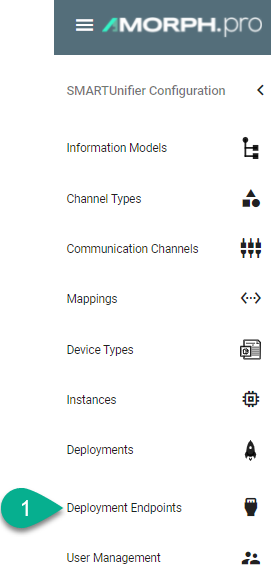
Click on the Deployment Endpoints button (1) to open the Deployment Endpoints perspective.
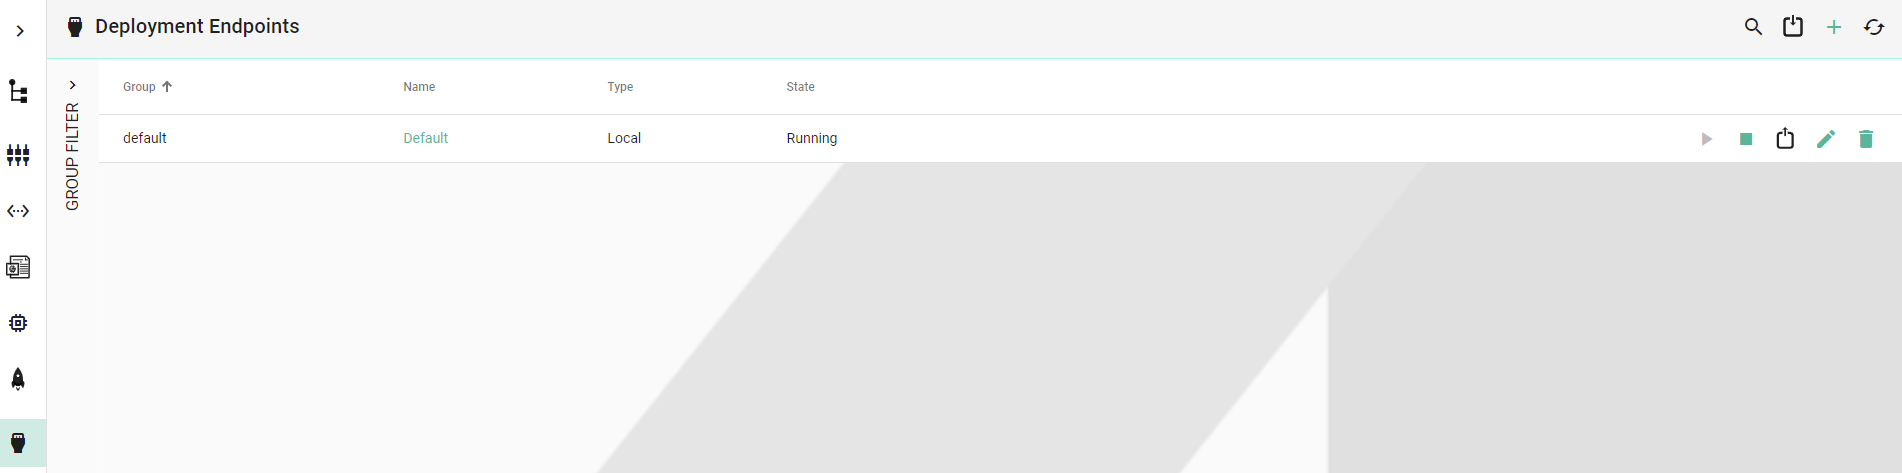
The main view of the Deployment Endpoints is visible.
Note
The Deployment Endpoints can only be accessed by user accounts with an administrator role assigned.
Deployment Endpoints Types
Local
SMARTUNIFIER supports Endpoint for Local Deployment. A Default Local Endpoint is preconfigured.
Follow the steps described below to create a Local Deployment Endpoint:
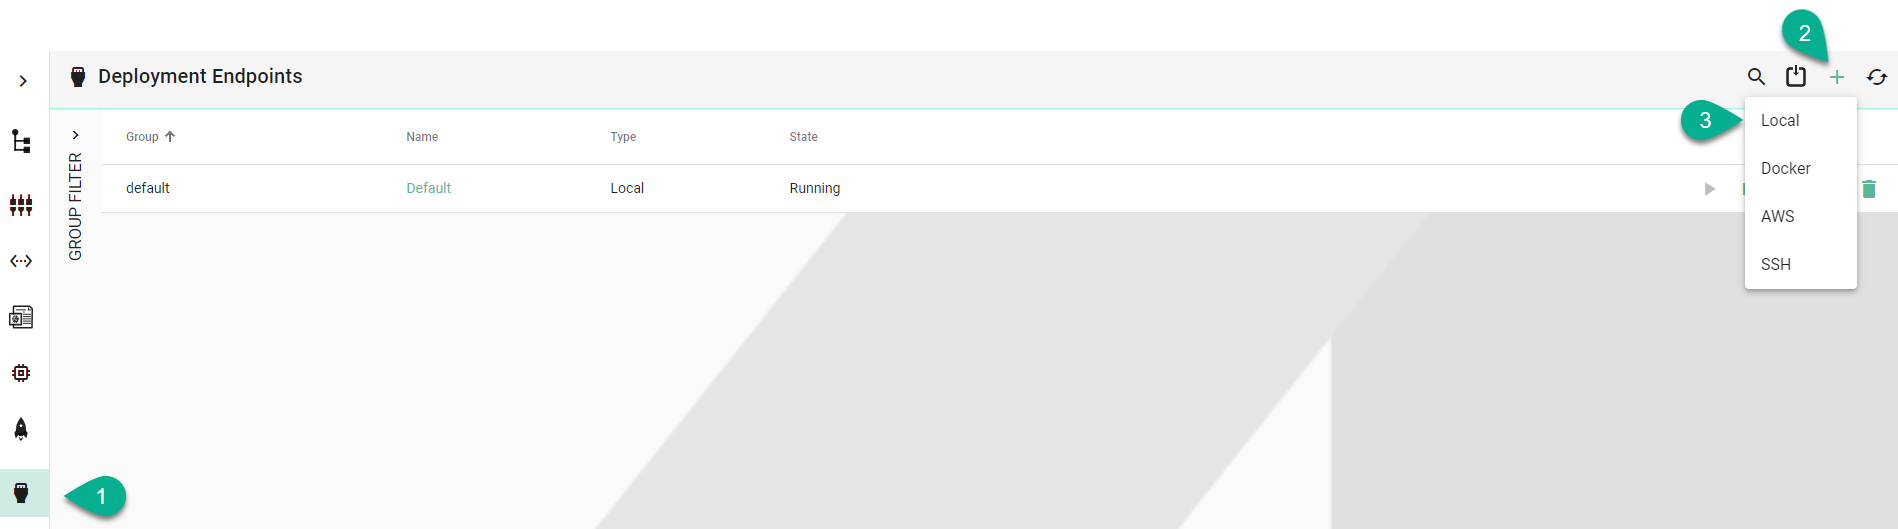
Navigate to the SMARTUNIFIER Deployment Endpoints perspective (1).
Click on the Add Endpoint button (2).
Select the Deployment Type Local from the pop-up (3).
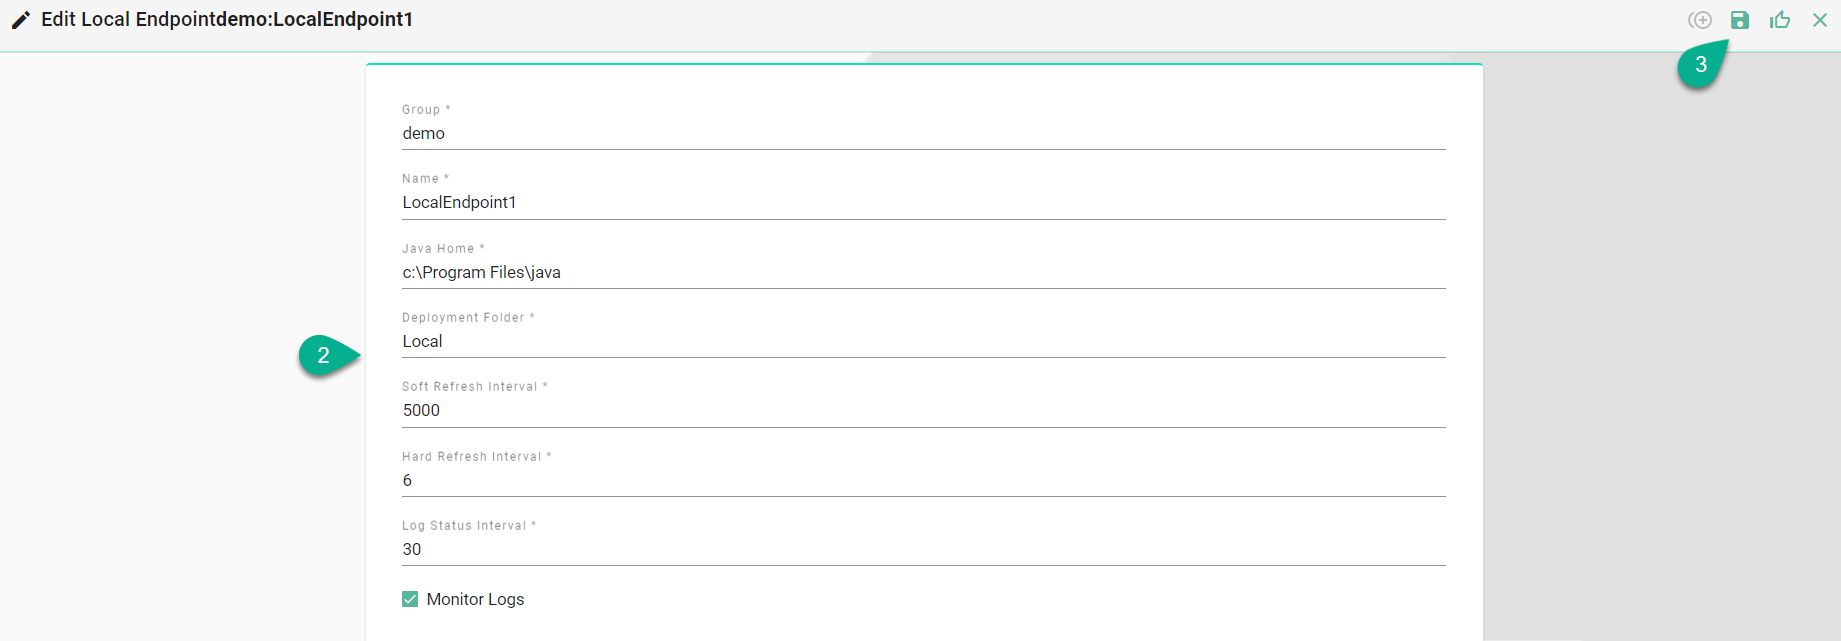
In the Add Endpoint view a set of configuration parameters is required (4)
Provide a Group and a Name
Input the path for Java
Provide the Deployment Folder
Configure the Soft/Hard Refresh Interval and the Log Status Interval (in milliseconds)
Enable Monitor Logs (optionally)
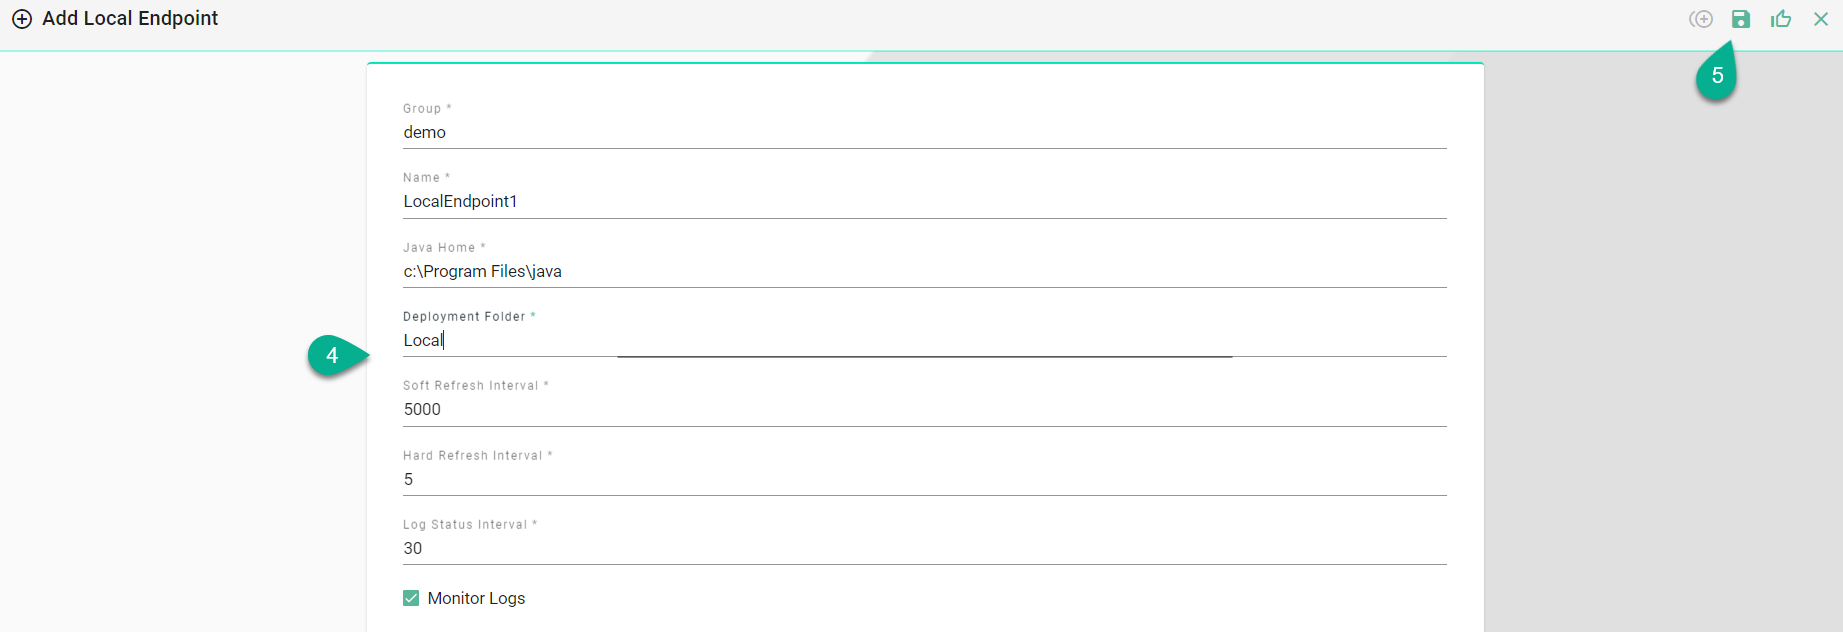
After all mandatory fields are filled in, click the Save button (5).
Agent
SMARTUNIFIER allows Communication Instances to be deployed on any machine with an active Agent process.
Note
By default the agent requires an api key that can be generated in the SMARTUNIFIER Manager settings where the Agent endpoint is added (see Creating an Agent Deployment Endpoint)
Setup order
Install agent
Add agent as new endpoint in SMARTUNIFIERManager and generate the ApiKey
Copy api key into the agent.conf
Start agent
Copy fingerprint from Agent into the endpoint settings
Save the endpoint settings and start the endpoint
Agent configuration
 agent {
   agentName = "smart-unifier-deployment-agent"
   tlsEnabled = true
   apiKey = ""
   port = 8080
   deploymentDirectory = "deploy"
   showStatusPage = false
   statusPagePort = 9999
   versionInfoFile = "version.info"
   softRefreshIntervalSeconds = 1,
   hardRefreshIntervalSeconds = 10,
   processMonitoringIntervalSeconds= 5,
   logStatusIntervalSeconds = 60,
   instanceStopTimeoutSeconds = 5,
   instanceManagement{
       startSettings {
           throttling {
               enabled = false
               maxRequests = 1
               interval = 15 seconds
           }
       },
       processMonitoring {
           monitorMethod = "wmi" // possible values: "wmi", "powershell"
       }
   },
   errorDeduplication {
       maxRecentErrors = 10       // Maximum recent errors kept per instance
       maxSeenHashes = 1000       // Maximum unique error hashes tracked for deduplication
   }

   # System monitoring configuration
   systemMonitor {
       enabled = true
       checkIntervalSeconds = 30
       alertCooldownSeconds = 300  # 5 minutes between repeated alerts

       thresholds {
           diskMinFreeBytes = 10737418240   # 10 GB
           cpuMaxPercent = 80.0
           memoryMinFreeBytes = 1073741824  # 1 GB
       }

       # path to monitor for disk space (empty = deployment directory or system drive)
       diskPath = ""
   }
 }
Field |
Description |
|---|---|
agentName |
Name of the agent (e.g., "smart-unifier-deployment-agent"). |
tlsEnabled |
Boolean flag to enable/disable TLS for secure communication. |
apiKey |
API key for authentication Required. |
port |
Port number for the agent (default: 8080). |
deploymentDirectory |
Directory where deployments are stored (e.g., "deploy"). |
showStatusPage |
Boolean flag to enable/disable the status page. |
statusPagePort |
Port for the status page (default: 9999). |
versionInfoFile |
File containing version information (default: "version.info"). |
softRefreshIntervalSeconds |
Interval (in seconds) for soft refresh checks (default: 1). |
hardRefreshIntervalSeconds |
Interval (in seconds) for hard refresh checks (default: 10). |
processMonitoringIntervalSeconds |
Interval (in seconds) for process monitoring (default: 5). |
logStatusIntervalSeconds |
Interval (in seconds) for logging status information (default: 60). |
instanceStopTimeoutSeconds |
Timeout (in seconds) for stopping an instance (default: 5). |
instanceManagement.startSettings.throttling.enabled |
Boolean flag to enable/disable throttling. |
instanceManagement.startSettings.throttling.maxRequests |
Maximum allowed requests in the throttling interval. |
instanceManagement.startSettings.throttling.interval |
Throttling interval (e.g., 15 seconds). |
instanceManagement.processMonitoring.monitorMethod |
Method for process monitoring (e.g., "wmi" or "powershell"). |
errorDeduplication.maxRecentErrors |
Maximum number of recent errors kept per instance (default: 10). |
errorDeduplication.maxSeenHashes |
Maximum unique error hashes tracked for deduplication (default: 1000). |
systemMonitor.enabled |
Boolean flag to enable/disable system monitoring (default: true). |
systemMonitor.checkIntervalSeconds |
Interval (in seconds) for system checks (default: 30). |
systemMonitor.alertCooldownSeconds |
Cooldown period (in seconds) between repeated alerts (default: 300). |
systemMonitor.thresholds.diskMinFreeBytes |
Minimum free disk space threshold (e.g., 10 GB). |
systemMonitor.thresholds.cpuMaxPercent |
Maximum CPU usage threshold (e.g., 80.0%). |
systemMonitor.thresholds.memoryMinFreeBytes |
Minimum free memory threshold (e.g., 1 GB). |
systemMonitor.diskPath |
Path to monitor for disk space (empty = deployment directory or system drive). |
Installation as a Windows Service
Follow the steps below to install and operate SMARTUNIFIER Agent as a Service under Windows:
Move the SMARTUNIFIER Agent package to a suitable location
Extract the .zip-archive
Open a terminal window with Administrator privileges within the package
Execute the following commands in the terminal window to:
SmartUnifierAgentService.bat install
SmartUnifierAgentService.bat start
SmartUnifierAgentService.bat stop
SmartUnifierAgentService.bat uninstall
Installation as a Java Process
Follow the steps below to install and operate SMARTUNIFIER Agent as a Process under Windows:
Move the SMARTUNIFIER Agent package to a suitable location
Extract the .zip-archive
Execute the SmartUnifierAgent.bat script
Note
The console is for information purposes only. It can be moved to any suitable location on your screen or it can be hidden. Nevertheless, do not close it, because the related processes will also be terminated.

Example of an Agent running on a remote machine
Creating an Agent Deployment Endpoint
After installing the agent, you need to register the endpoint with the SMARTUNIFIER Manager. Follow the steps below to create the deployment endpoint:
Navigate to the SMARTUNIFIER Deployment Endpoints perspective (1).
Click on the Add Endpoint button (2).
Select the Deployment Type Agent from the pop-up (3).

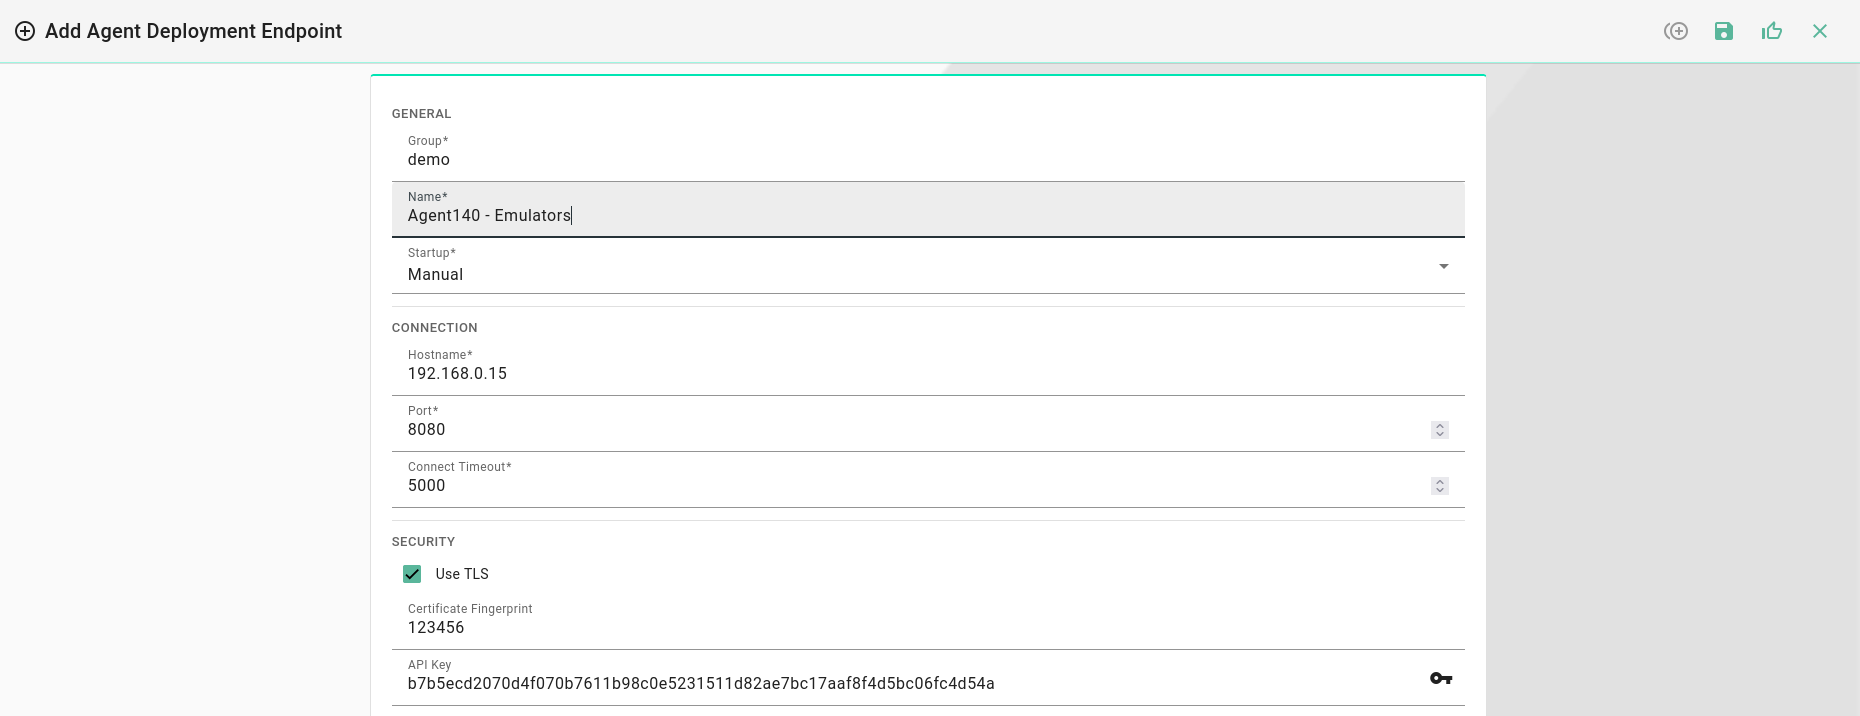
In the Add Endpoint view a set of configuration parameters is required (4)
Provide a Group and a Name
- Select the Startup Type [Manual|Automatic|Disabled], Manual is set as default.
Manual: The endpoint can be started and stopped manually. The last state is not persisted and the endpoint needs to be started again when the SMARTUNIFIER Manager is restarted or when restoring from a backup
Automatic: The endpoint will be start automatically after restart of the SMARTUNIFIER Manager or when restoring from a backup
Disabled: The endpoint is disabled and cannot be started
Provide the Hostname and Port where the Agent is running (Default port is: 8080)
Set the Connection Timeout
Use TLS For using encrypted communication. Required the fingerprint of the Agent for certificate validation
API Key Api key for controlling the agent. Can be generated here and needs to be set on in the Agent configuration
After all mandatory fields are filled in, click the Save and Close button (5).
Deployment Endpoints States
- A Deployment Endpoint can have the following states:
Stopped - The Stop command has been sent and the Deployment Endpoint is stopped
Starting - The Start command has been sent
Running - Deployment Endpoint is up and running
Failure - The Start command has been sent and the Deployment Endpoint has failed to start

For the Failure state, hover over it (1) and a pop-up will display the error (2).

Deployment Endpoints Operations
Start Endpoint
After a Deployment Endpoint is created, its default state is Stopped. To start it, click on the Start button (1). The state will change into Starting and if it succeeds, the state becomes Running (2).

If the Deployment Endpoint fails to start, the state changes into Failure (3) and an error message will be displayed (4).
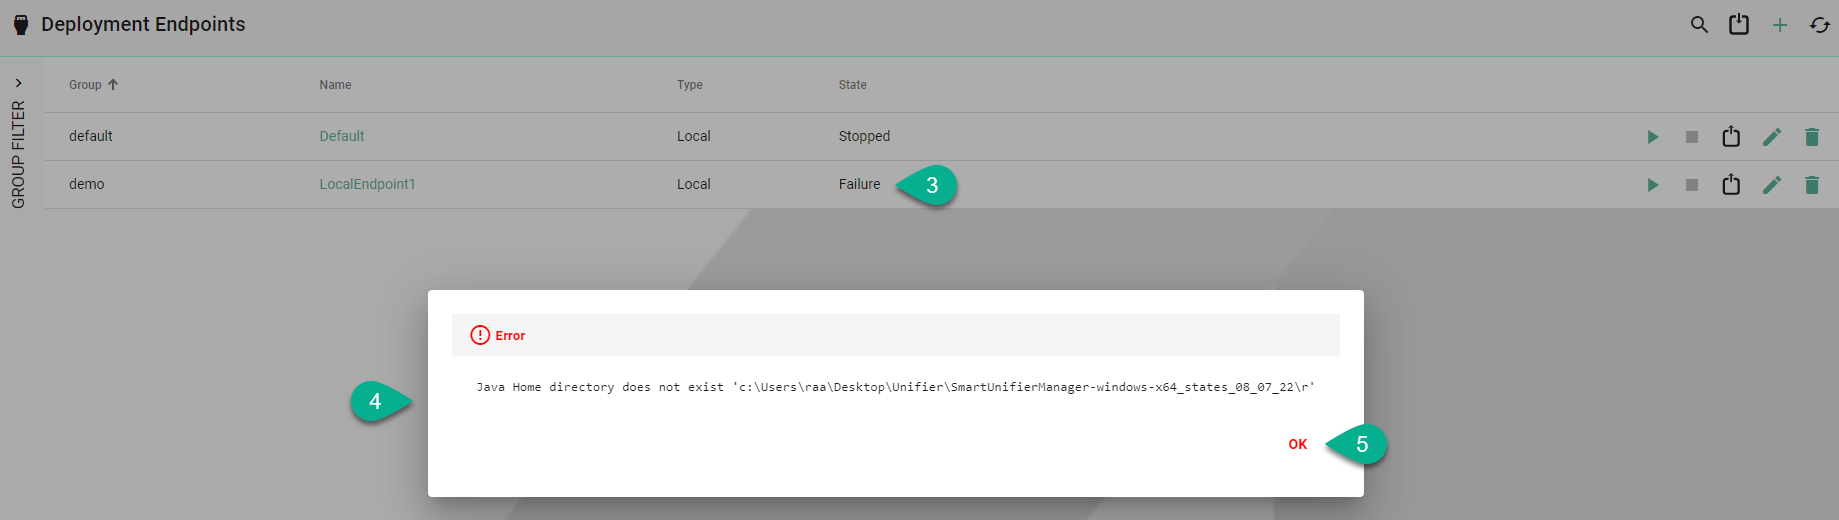
Click on the OK button (5) to close the error message.
Stop Endpoint
To stop a Deployment Endpoint, click on the Stop button (1) and the state will change accordingly (2).

Delete Endpoint
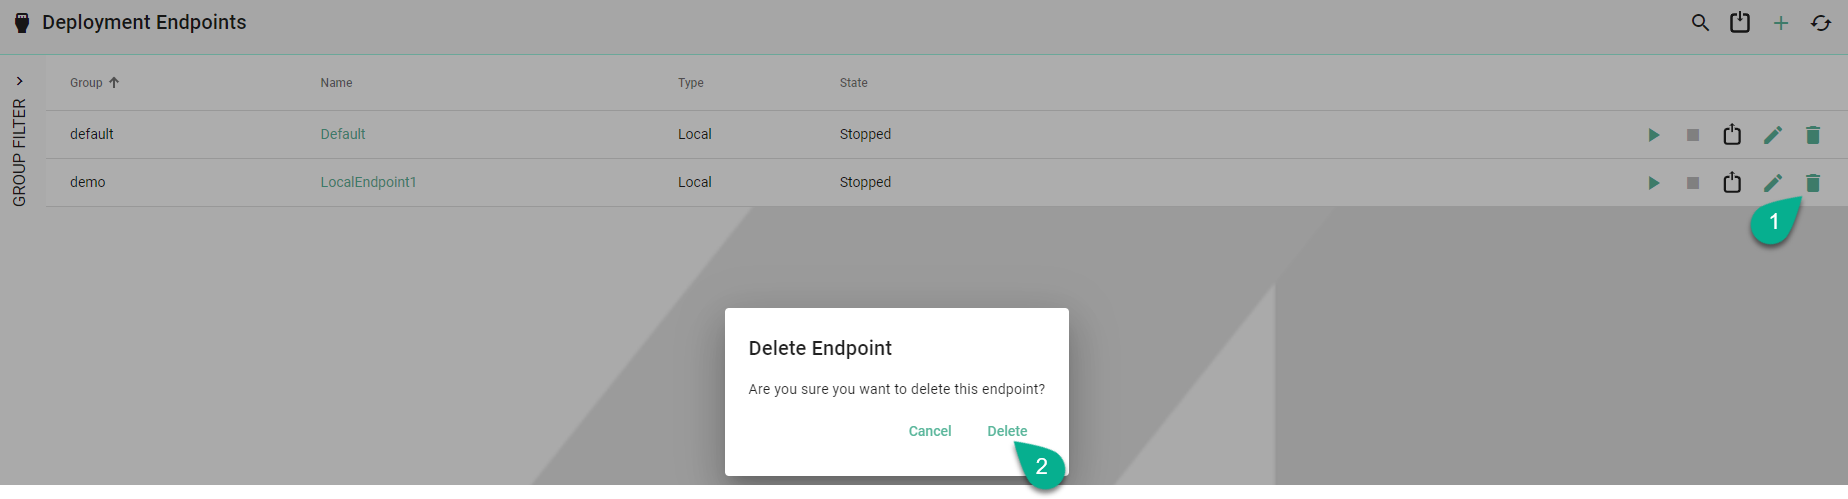
To remove a Deployment Endpoint, click on the Delete button (1) and confirm the action (2).
Edit Endpoint
To edit a Deployment Endpoint, click on the Edit button (1).

In the Deployment Endpoint edit view update the configuration (2) and click on the Save button (3).