File-based data - CSV to REST-Server
Overview
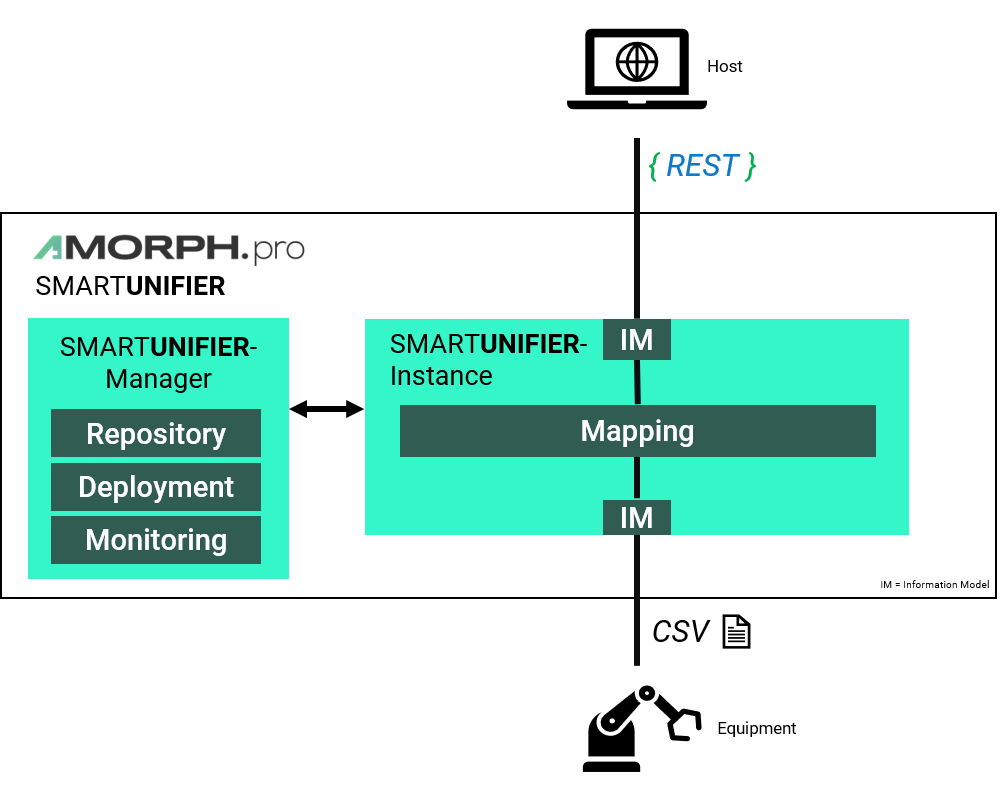
This Scenario describes step by step how an integration of equipment data to any kind of REST-server is done. The next steps guide you through the creation of Information Models, Channels, Mappings, Device Types, Instances and Deployments.
The CSV, which represents the equipment data, in this demo scenario contains four parameters that are all comma-delimited. Below you can find the sample data. Create a new CSV-file on your local machine and copy and paste the sample data.
"PARTNR","TIMESTAMP","TEMPERATUR","PRESSURE"
"4595","2020-05-01 07:00:43","62","222"
"4596","2019-05-01 07:01:43","62","223"
"4597","2019-05-01 07:02:43","63","223"
"4598","2019-05-01 07:03:43","61","225"
"4599","2019-05-01 07:04:43","66","228"
"4600","2019-05-01 07:05:43","64","223"
"4601","2019-05-01 07:06:43","66","223"
"4602","2019-05-01 07:07:43","62","222"
"4603","2019-05-01 07:08:43","62","228"
Information Model
Information Model - CSV-file
The first step is to create an Information Model that represents the structure of your CSV-file. What Information Models are and how to create them is described in chapter Information Models.
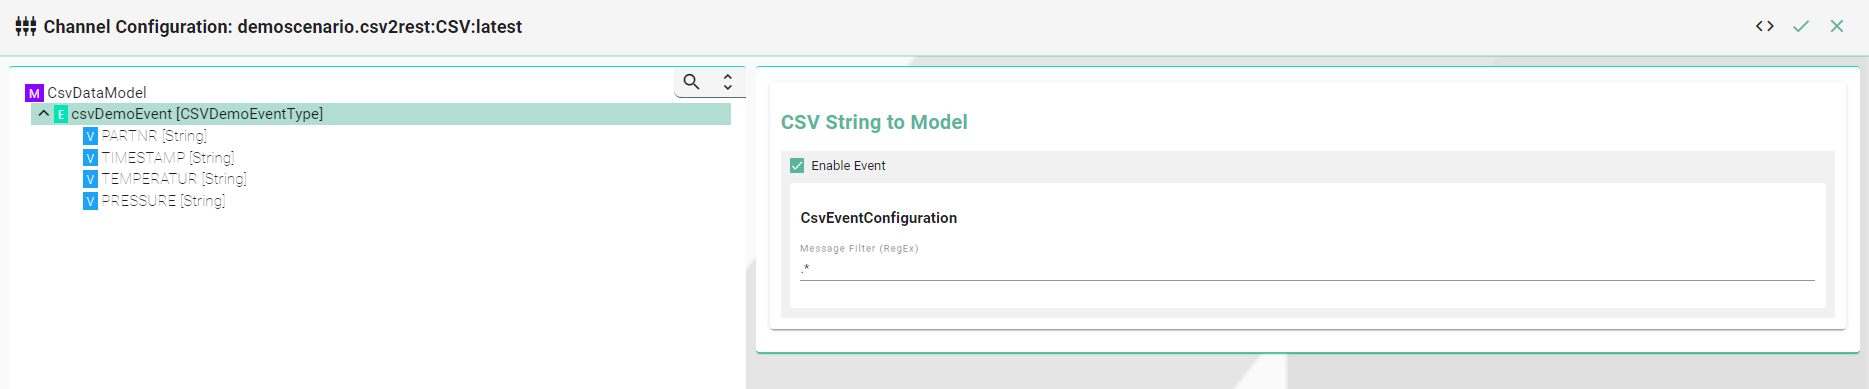
You can see the Information Model for the data of the CSV-file below. The Model “CsvDataModel” has an Event “csvDemoEvent”. Inside the Event you find the same parameter as in the CSV-file.
We recommend using the same “Group” name throughout the scenario. For example, to identify the created Artifacts for this scenario the group name “demoscenario.csv2rest” is used in this documentation.

ID |
Node Type |
Data Type |
|---|---|---|
csvDemoEvent |
Event |
CSVDemoEventType |
csvDemoEvent/PARTNR |
Variable |
String |
csvDemoEvent/TIMESTAMP |
Variable |
String |
csvDemoEvent/TEMPERATUR |
Variable |
String |
csvDemoEvent/PRESSURE |
Variable |
String |
Information Model - REST-Server
There must be also a second Information Model for the REST-Server.
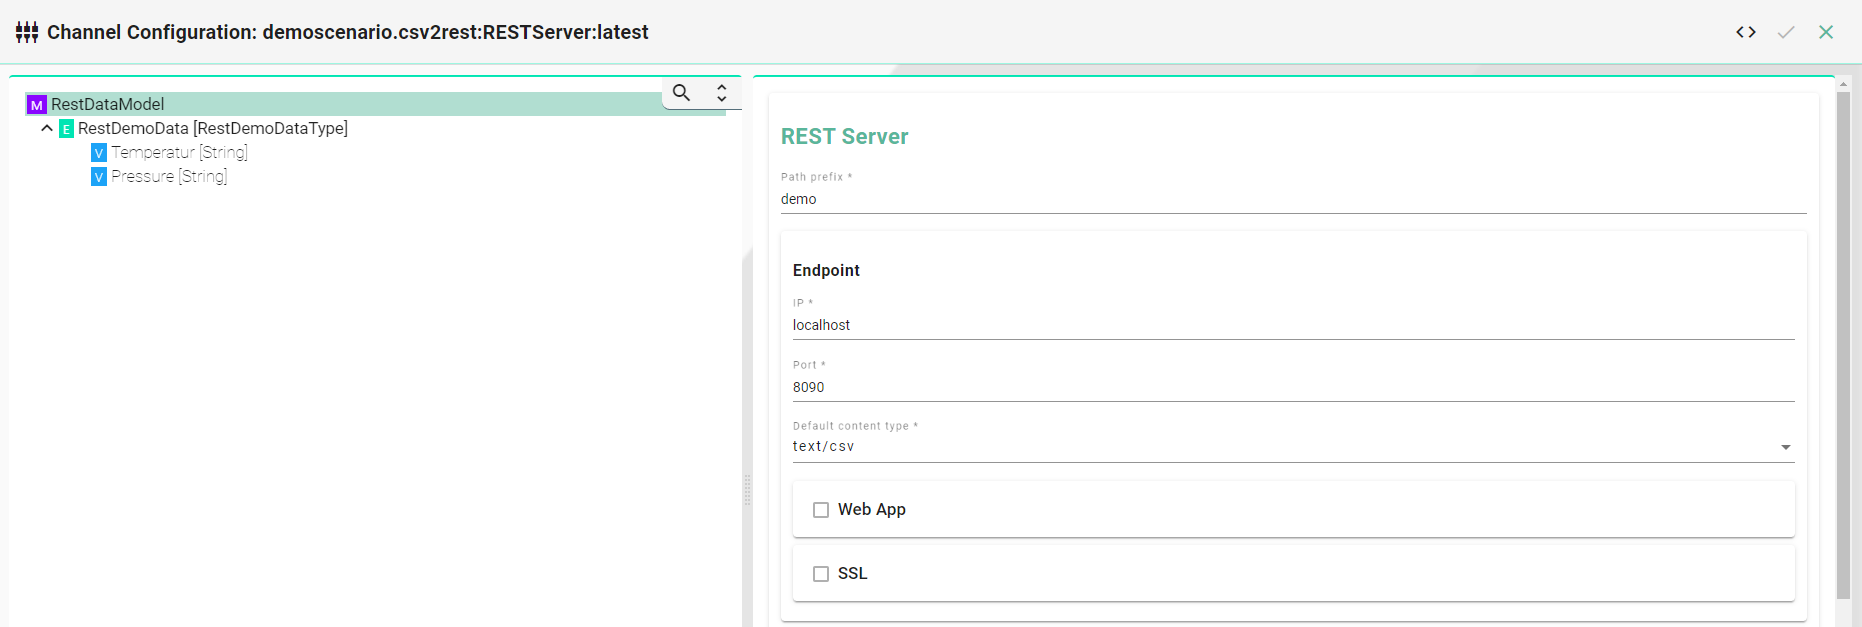
The “RestDataModel” has a structured Variable called “RestDemoData”, which holds the variables “Temperatur” and “Pressure”.
Since only these two values are sent from the CSV-file to the Rest Server, it is not necessary to add the other parameters of the CSV-file.
You can see the Information Model in the screenshot below as well as the values used in the table.

ID |
Definition Type |
Data Type |
|---|---|---|
RestDemoData |
Variable |
RestDemoDataType |
RestDemoData/Temperatur |
Variable |
String |
RestDemoData/Pressure |
Variable |
String |
Communication Channel
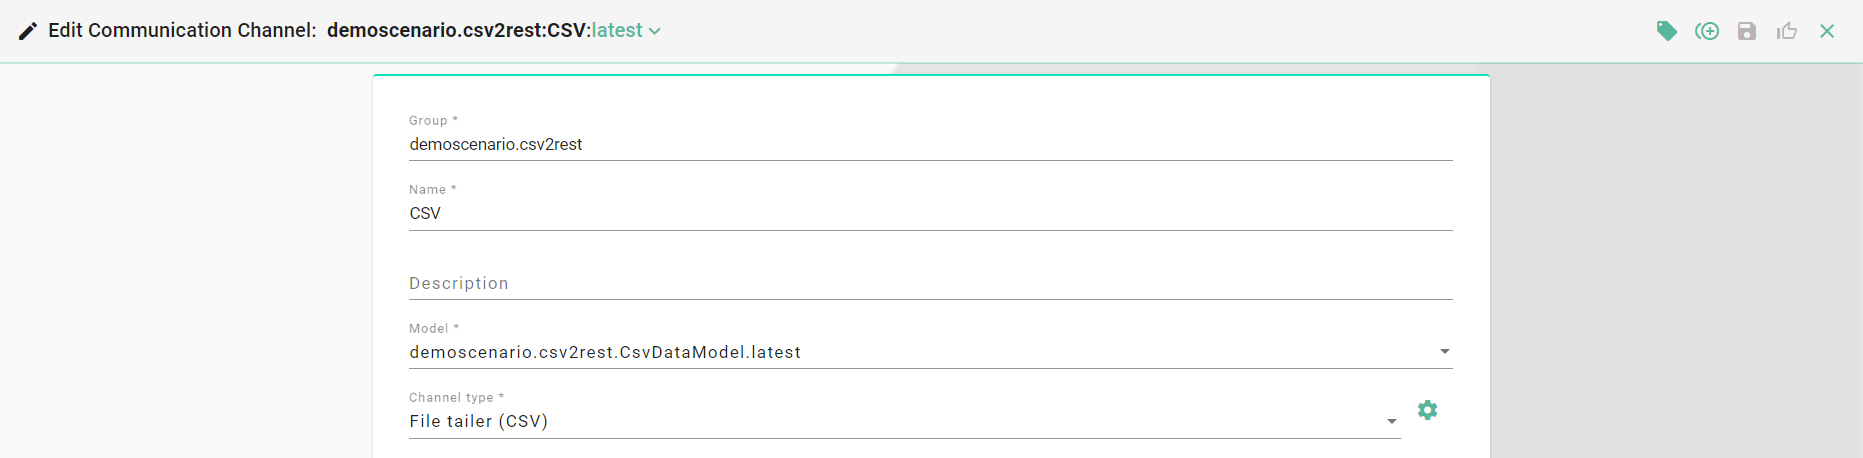
Communication Channel - File Tailer
Next step is to create a Communication Channel for the CSV-file.
1.) Enter values for group, name and version like in the screenshot below.
2.) Select the model for the CSV-file as the Information Model connected to this Channel.
3.) Select “File tailer (CSV)” as the Channel Type.
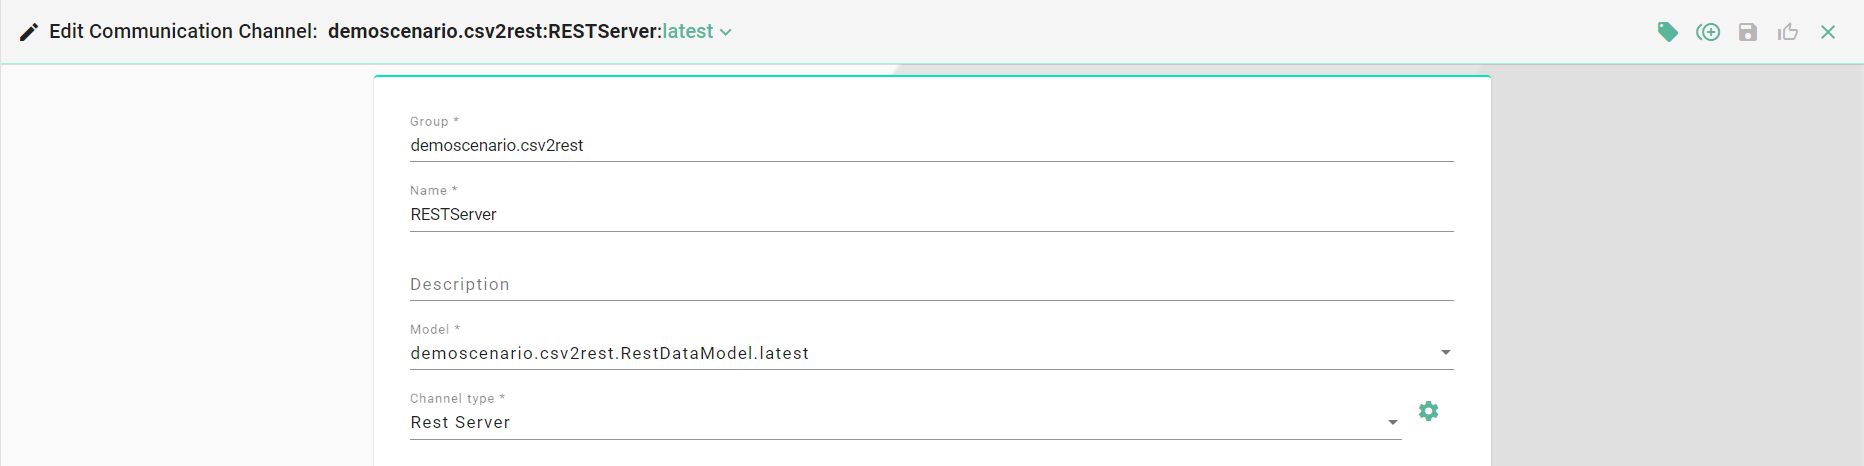
Communication Channel - REST-Server
Similar to the CsvDataModel, create a Channel for the RestDataModel.
1.) Enter values for group, name and version like in the screenshot below.
2.) Select the Model “demoscenario.csv2rest:RestDataModel:latest”.
3.) Lastly, select as a Channel Type the “RestServer” Channel.
The configuration of the CSV-Channel, as well as the REST-Channel, is done in the section Create Instance.
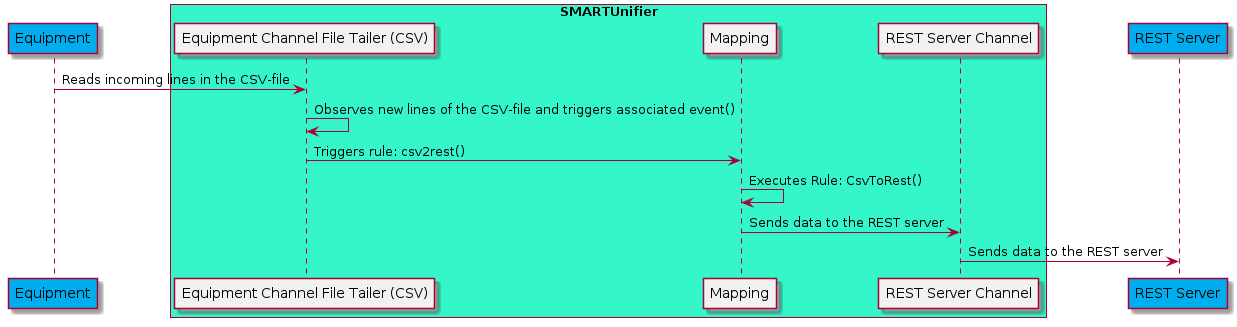
Mapping
After the creation of Information Models and their dependent Communication Channels create in the next step the Mapping.
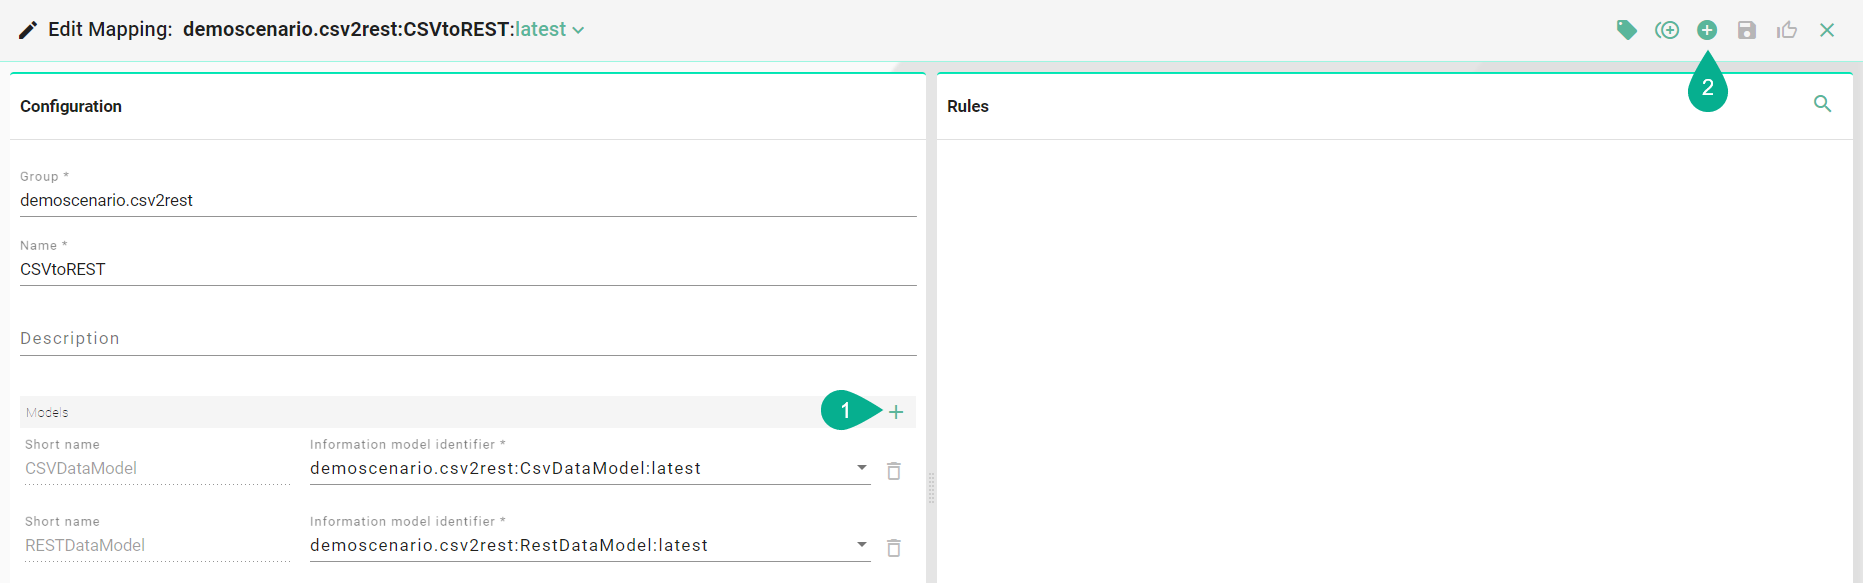
1.) Enter values for Group, Name and Version like in the screenshot below.
2.) Select the Information Models created earlier. Click the “Add” button (1) and select the Information Model “demoscenario.csv2rest:CsvDataModel:latest”. Enter a Name for the Information Model, e.g., “CsvDataModel”.
3.) Click again the “Add” button (1) and select the Information Model “demoscenario.csv2rest:RestDataModel:latest”. Enter a Name, e.g., “RestDataModel”.
4.) Next, add a Rule to the Mapping. Click the “Add Rule” button (2).
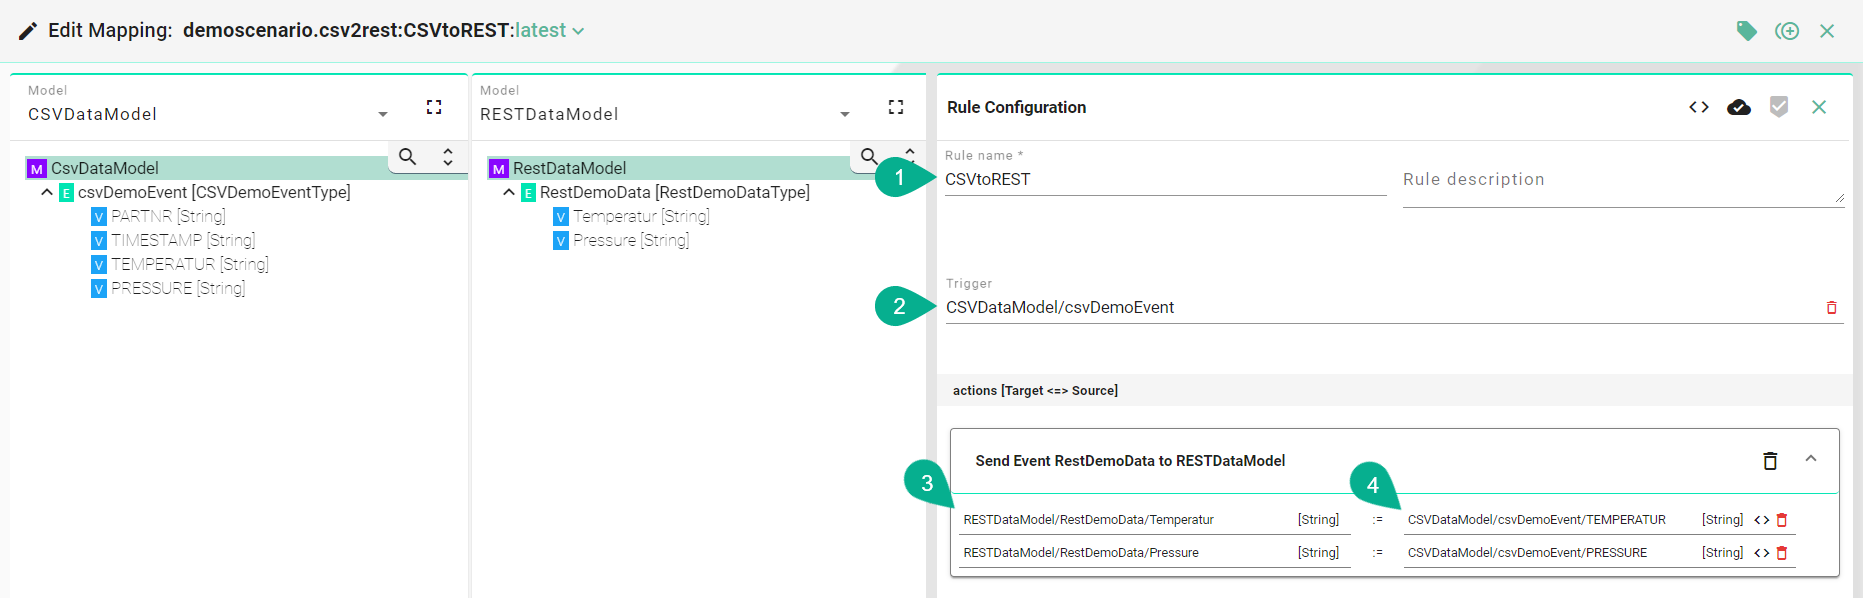
5.) Enter a Name for the new Rule (1) like “csv2rest”.
6.) As Trigger drag and drop the “csvDemoEvent” of the CsvDataModel into the Trigger field (2). This Event is going to be triggered if any changes appear inside the CSV-file.
7.) Drag and drop the “Temperature” and the “Pressure” variable from the “RestDataModel” as a new Target (3)
8.) Drag and drop the belonging variables “TEMPERATURE” and “PRESSURE” from the “CsvDataModel” into the Source fields (4)
Device Type
Next, assign the Mapping to a new Device Type.
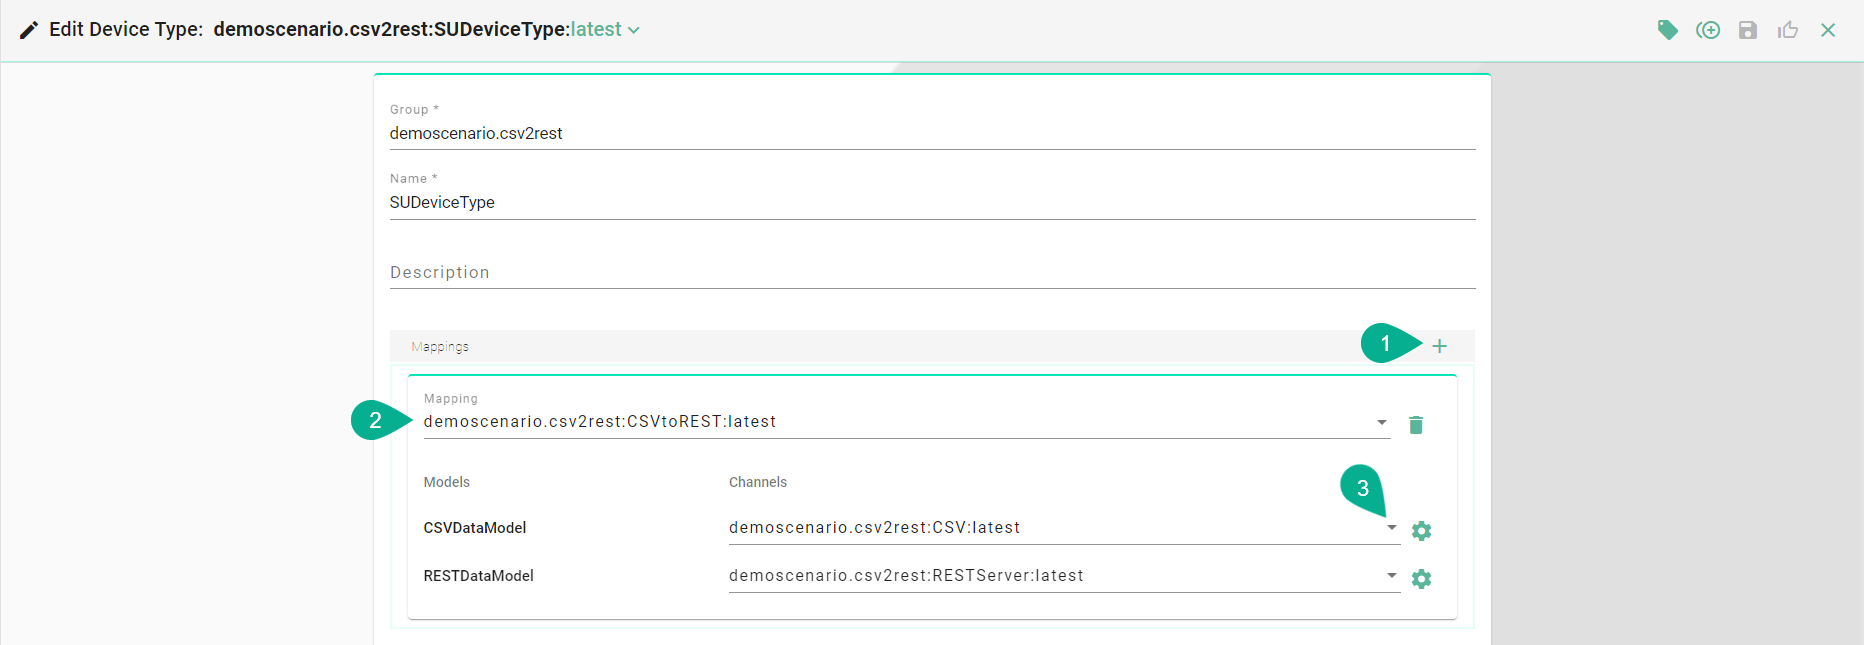
1.) Enter values for Group, Name and Version like in the Screenshot below.
2.) Click the “Add Mapping” button (1).
3.) Select the Mapping “demoscenario.csv2rest:CSVToREST:latest” previously created (2).
4.) Assign the correct Channels to the Information Models (3).
5.) Save the new Device Type.
Instance
Last step of this Scenario is the creation of the Instance.
1.) Select the Device Type “demoscenario.csv2rest:SUDeviceType:latest” previously created.
2.) Values for Group, Name and Version are already set from the Device Type. Although, we recommend changing the Name.
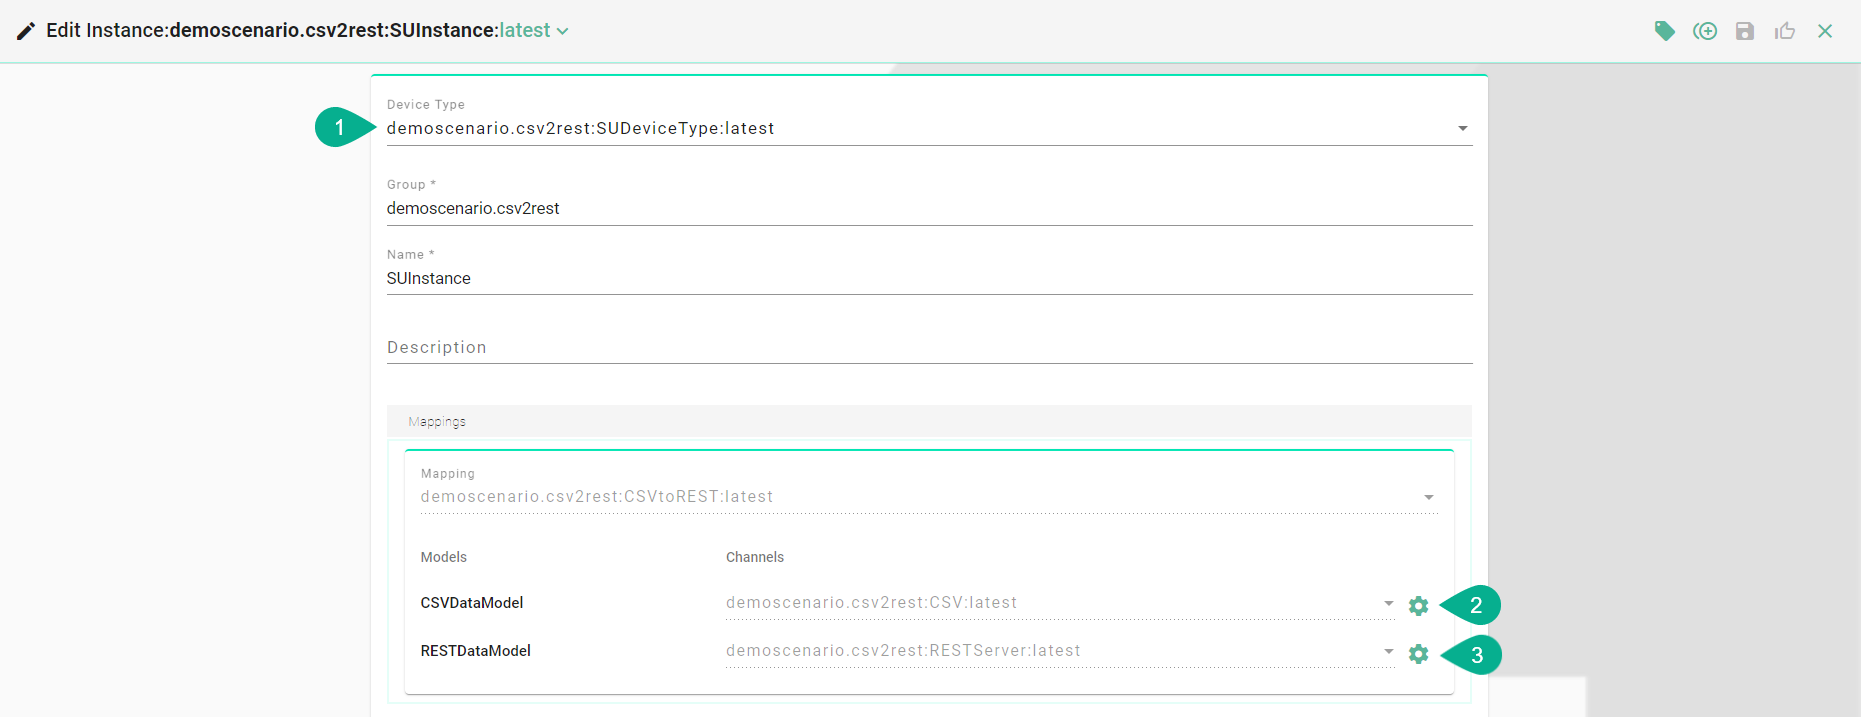
3.) Click the configuration button for the “demoscenario.csv2rest:CSVChannel:latest” configuration (2):
3.1) Set the “file path” for the location of the CSV-file on your device.
3.2) Enter a value in milliseconds for the “delay between checks” of the CSV-file for new content.
3.3) In order to tail from the end set “tailFromEnd” to true.
3.4) Set “reopenBetweenChunks” to true to close and reopen the file between reading chunks. In this example it is set to false.
3.5) Since the CSV-file is comma-delimited enter , as separator
3.6) Since the values in the CSV-file each start and end with double quotation marks, enter “ as String Delimiter.
3.7) Since the Timestamp values are not used in the CSV-file, the use of a Timestamp format is not necessary.

3.8) Select the “csvDemoEvent” node in the Information Model on the left side. Enter “.*” as the message filter RegEx.
4.) Lastly, it follows the configuration of the Rest Server Channel (3):
4.1) Enter a value for the path prefix like “demo”.
4.2) Leave the default settings for the Rest Server Endpoint as it is. We recommend changing the “Port” if the default is occupied.
After all steps have been executed the Instance “demoscenario.csv2rest:SUInstance:latest” is fully configured and ready for Deployment.
Deployment
1.) Select the Instance “demoscenario.csv2rest:SUInstance:latest” previously created.
2.) Select “Local” as Deployment Type. This deploys the Instance on the machine you are working on.
3.) Leave “LogfileConfiguration” on “default”.

4.) Click the “Deploy” button (1)
5.) Click the “Start” button (2)

The Instance is now running on your local machine. You can now see the data inside a Browser. Therefore you can either show both values or only one value.
Open any Browser and enter http://localhost:8091/demo/Variable/RestDemoData as an URL to receive the latest values for both Pressure as well Temperature.
Open any Browser and enter http://localhost:8091/demo/Variable/RestDemoData/Variable/Temperatur as an URL to get the latest value for the value Temperature.
Open any Browser and enter http://localhost:8091/demo/Variable/RestDemoData/Variable/Pressure as an URL to get the latest value for the value Pressure.
Warning
Please note that the URL must match the naming of the prefix set in the configuration (Step 5.1) as well as the naming of variables in the Information Model for the REST-Server. E.g., If the custom variable RestDemoData is changed to RestDemo the URL must be changed accordingly: <http://localhost:8091/demo/Variable/RestDemo>.