The extension shows how to retrieve specific data from a database, which can then be utilized to provide context for the XML data obtained from the equipment.
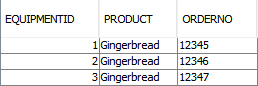
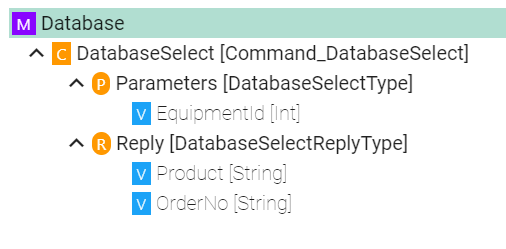
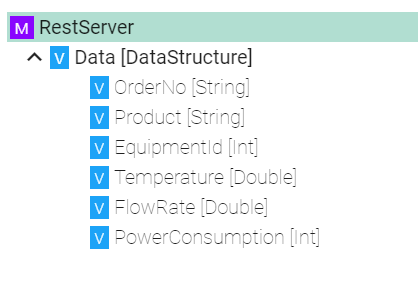
The goal of this exercise is to retrieve a database entry identified by the EquipmentId and to add two more fields from the database (OrderNo and Product) to the structure, which will then be output on a REST server.
We need to use the Node Type Command because we will utilize the following SQL statement in the Mapping later: SELECT*FROMContextWHEREEquipmentId=${EquipmentId}, which requires a result to be returned.
To create the SQL Database Communication Channel we need to proceed with the steps outlined below:
1. Create the REST Server Channel:
Enter the group name: demo.xml-rest.extention
Enter a name: e.g. Database
Select the Database Information Model created previously
Select Sql Database as Channel Type
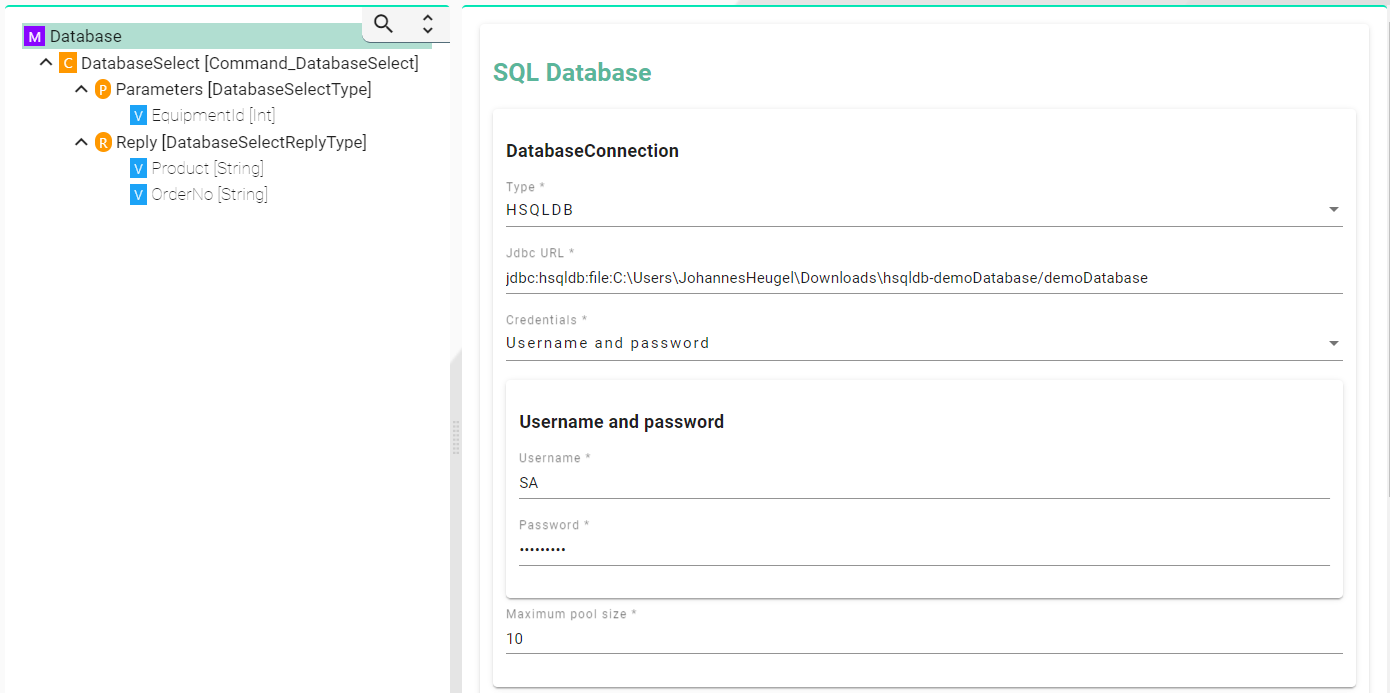
2. Configuration of the SQL Database Channel:
a. Select the root node to configure:
Select HSQLDB as Type
Enter the JDBC Url jdbc:hsqldb:file:<Path_to_HSQLDB_files>/demoDatabase
Enter the Username SA and Password Test-1234
Hint
In this instance, the names of the database columns match exactly with those specified in the information model. However, should there be any discrepancies, you have the option to align the names correctly by activating the Extended Column Configuration feature.
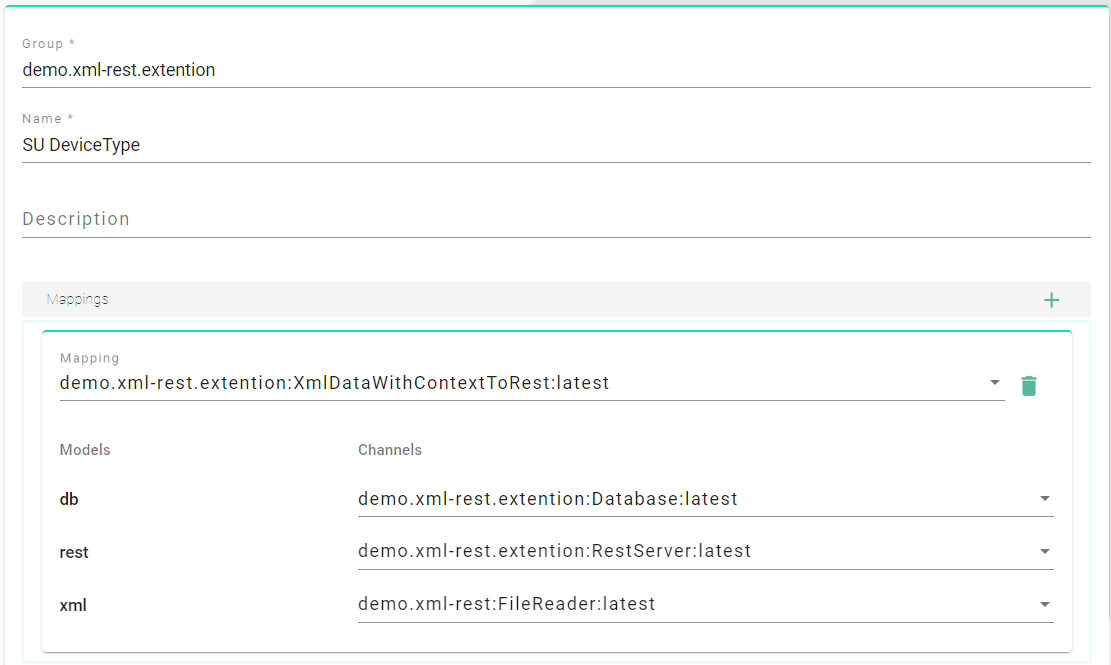
To create the Mapping we need to proceed with the steps outlined below:
1. Create the Mapping:
Enter the group name: demo.xml-rest
Enter a name: e.g. XmlDataToRest
Add the Information Models form earlier:
demo.xml-rest.FileReader
demo.xml-rest.extention.RestServer
demo.xml-rest.extention.Database
Hint
You can enter for each Information Model a short name which is used within the Rule to access all elements of the specific Information Model e.g. csv, db and rest.
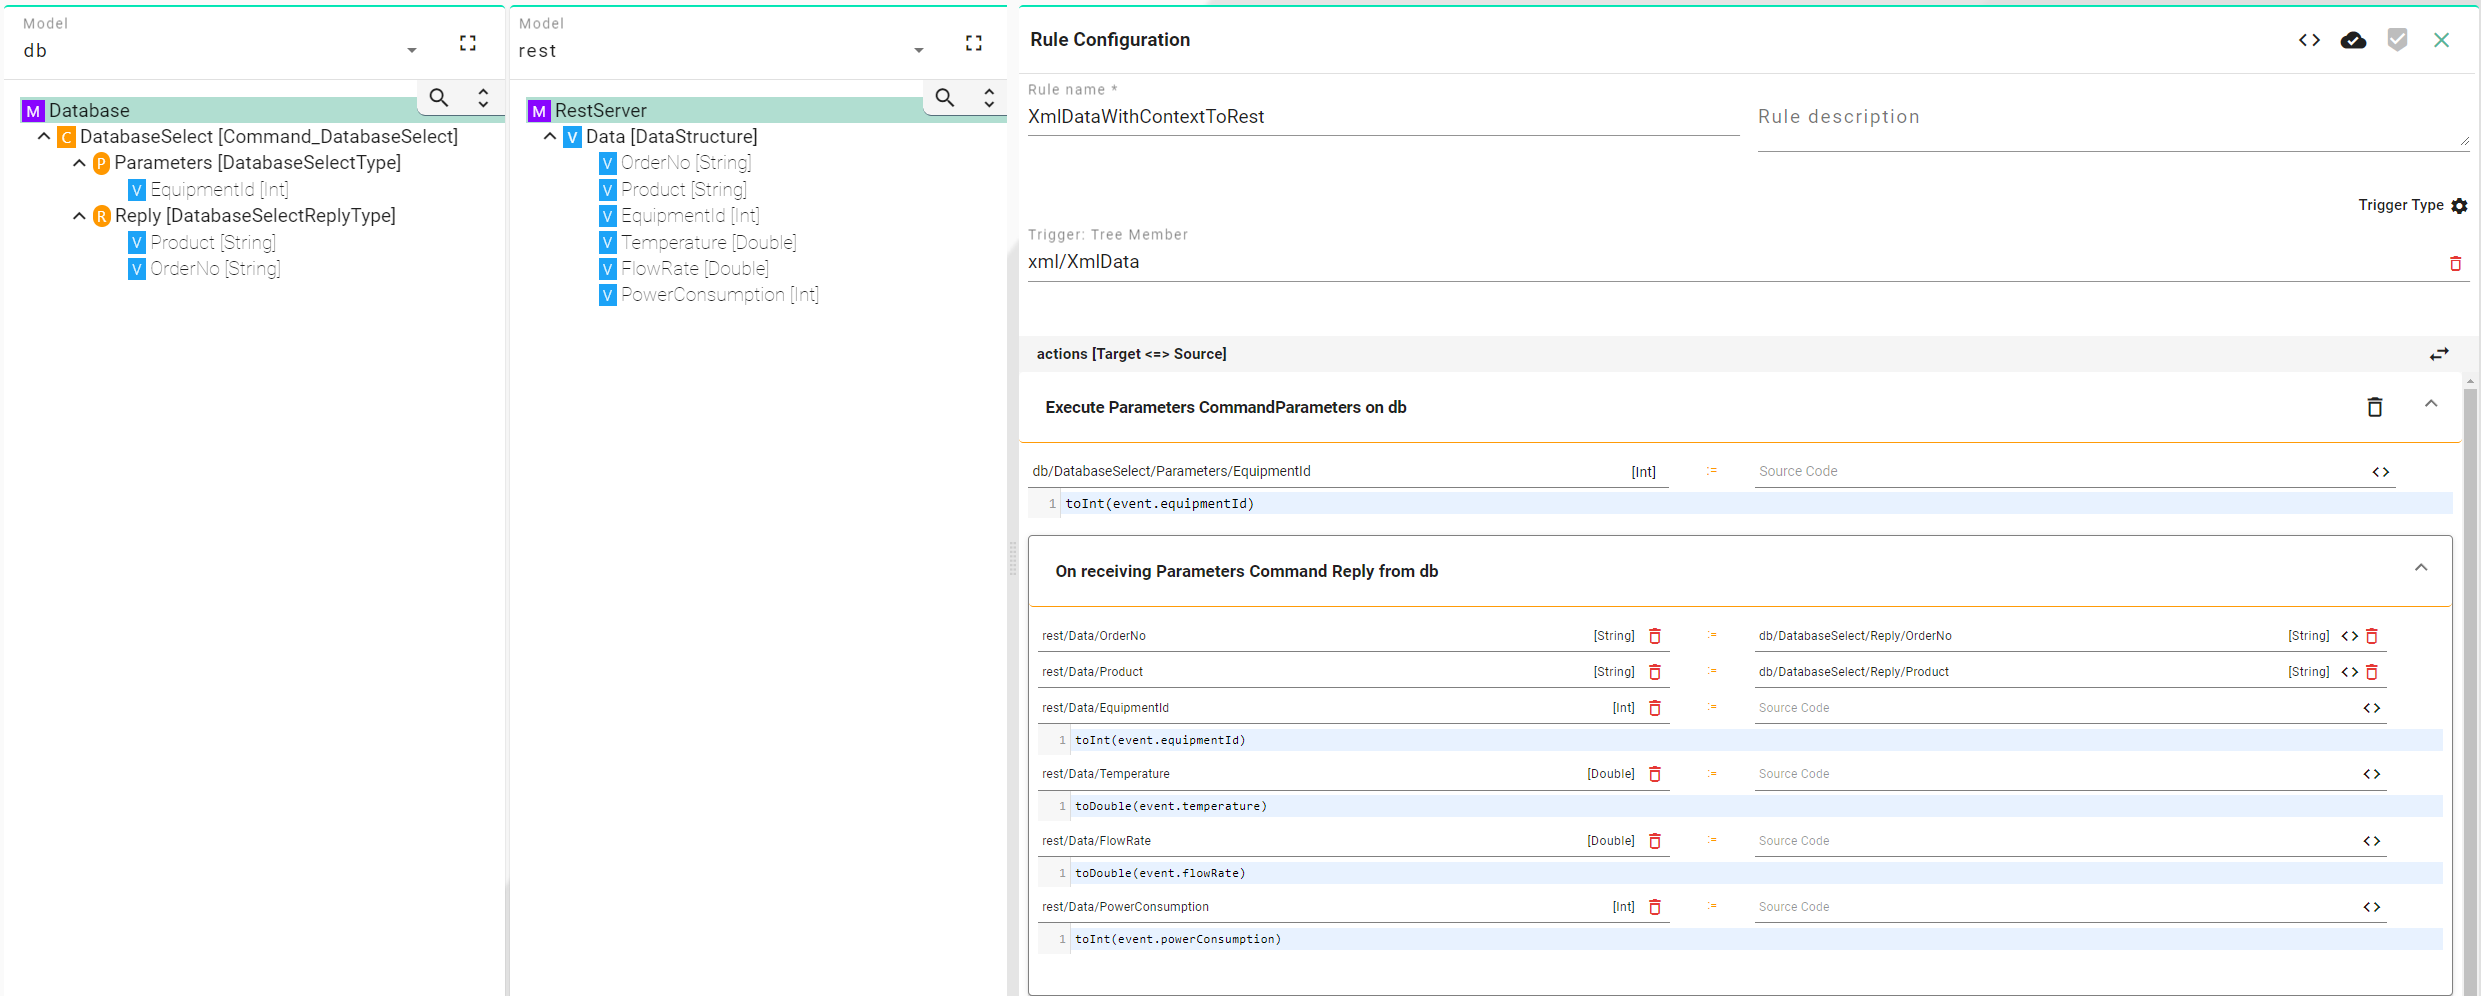
2. Create a Single Rule that defines the Mapping between the three Information Models.
a. Enter a Rule Name e.g. RuleWithContext
b. Drag and drop the XmlData Event from the File Reader Information Model into the trigger field.
c. Drag and drop the DatabaseSelect command from the Database Information Model into the actions panel. Make sure to choose the Complex assignment type.
d. Drag and drop the Data variable from the Rest Server Information Model into the Command Reply panel.
e. Assign the appropriate source element to each target element either via drag-and-drop or, in the case of type conversion, by entering code.
To deploy our Communication Instance we need to proceed with the steps outlined below:
1. Select the Local Deployment
2. Select the demo.xml-rest.extention.SUInstance, the Endpoint default:Default and Info for the level of detail of the log (We can leave the other configuration at their default value for this demo).