SMARTUNIFIER Configuration

Information Models

Information Models, and how to create them, are described in the chapter Information Models.

Information Model - XML file

Create an Information Model that represents the XMLs file’s structure:

File Reader XML Information Model

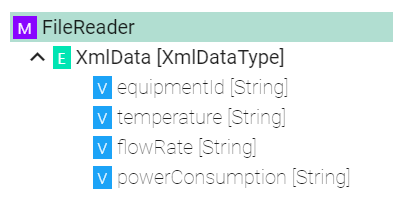
Screenshot of the FileReader Information Model in SMARTUNIFIER

Structure of the Information Model for the File Reader Channel
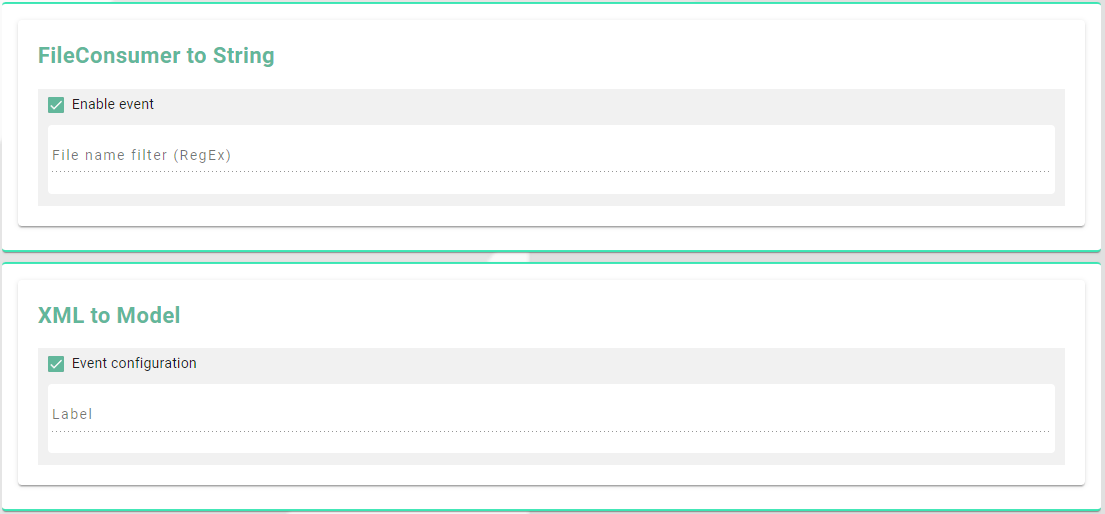
  • Event:

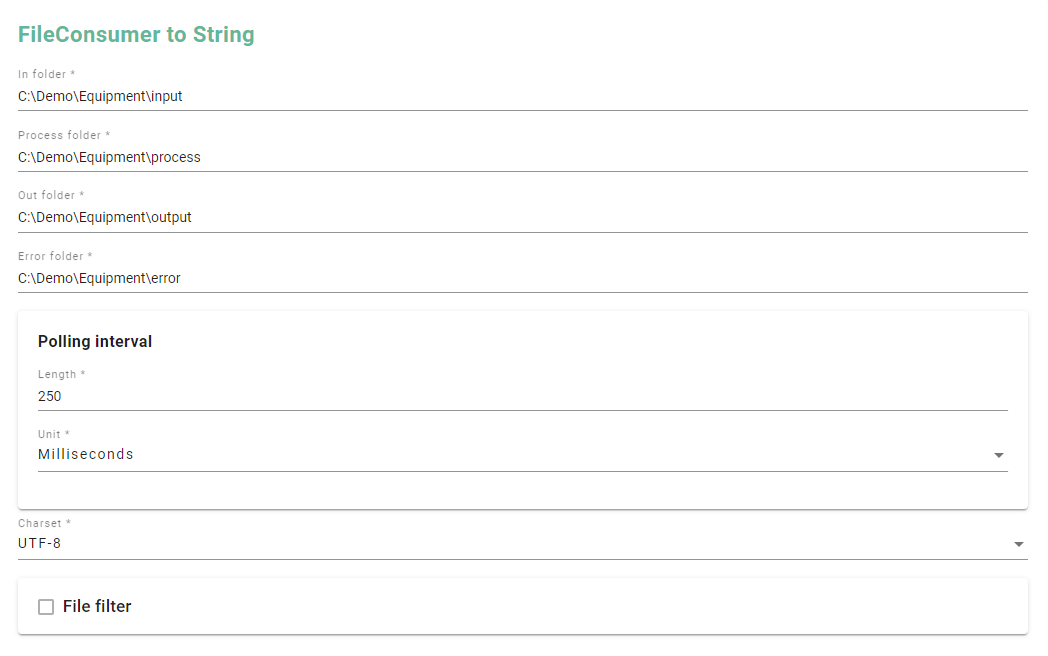
    The event defined in the Information Model for the File Reader acts as a trigger within the Mapping. Whenever SMARTUNIFIER detects a new XML file in the designated ‘input’ folder, the corresponding rule will be executed.

  • Variables:

    Variables specified in the Event correspond to the values defined in the XML file (order not relevant).

XmlDataModel - Variables

ID

Node Type

Data Type

XmlData

Event

XmlDataType

XmlData/equipmentId

Variable

String

XmlData/temperature

Variable

String

XmlData/flowRate

Variable

String

XmlData/powerConsumption

Variable

Int

Hint

We recommend using a consistent “Group” name throughout the demo. For instance, to identify the artifacts created for this scenario, the group name “demo.xml-rest” is used.

Information Model - REST Server

A second Information Model is needed for the REST-Server.

Create an Information Model that represents the structure of the data on the REST server.

REST Server Information Model

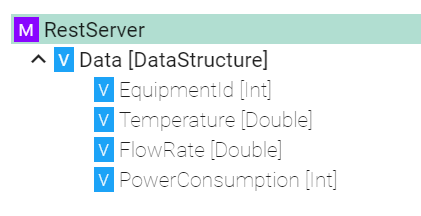
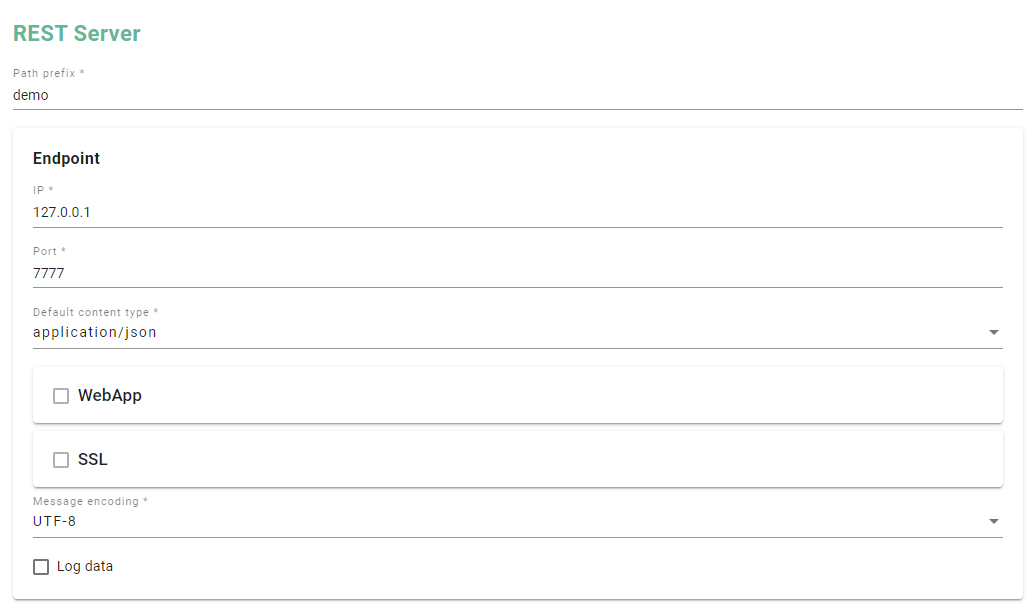
Screenshot of the REST server Information Model in SMARTUNIFIER

Structure of the Information Model for the REST server:

Variables

The variable Data which is defined as a custom data type represents a data object on the Rest server. By invoking Data, we can conveniently access all associated variables at once, rather than retrieving each individually.

The individual variables nested within Data specifically represent the actual values.

RestDataModel - Variables

ID

Definition Type

Data Type

Data

Variable

DataStructure

Data/EquipmentID

Variable

Int

Data/Temperature

Variable

Double

Data/FlowRate

Variable

Double

Data/PowerConsumption

Variable

Int

Communication Channels

Communication Channels are described in the chapter Communication Channels.

Communication Channel - File Reader (XML)

To create the File Tailer Communication Channel we need to proceed with the steps outlined below:

1. Create File Reader (XML) Channel:

  • Enter the group name: demo.xml-rest

  • Enter a name: e.g. FileReader

  • Select the FileReader Information Model created previously

  • Select File Reader (XML) as the Channel Type

2. Configuration of the File Reader (XML) Channel:

a. Select the root node to configure:

File Consumer to String:

  • Enter the path for the following folders (In - Input, Process, Out - Output, Error)

  • We can leave the other configurations on default

File Consumer to String configuration

b. Select the XmlData - Event and enable the event:

  • File Consumer to String - Click on Enable Event

  • XML to Model - Click on Enable Event

File Reader Event configuration

3. Apply your changes and save the Channel.

Communication Channel - REST Server

To create the REST Server Communication Channel we need to proceed with the steps outlined below:

1. Create the REST Server Channel:

  • Enter the group name: demo.xml-rest

  • Enter a name: e.g. RestServer

  • Select the RestServer Information Model created previously

  • Select Rest Server as Channel Type

2. Configuration of the Rest Server Channel:

  • Enter the Path prefix e.g. demo

  • Enter the IP e.g. 127.0.0.1

  • Enter the Port e.g. 7777

Rest Server configuration

3. Apply your changes and save the Channel.

Mapping

Mapping are described in the chapter Mappings.

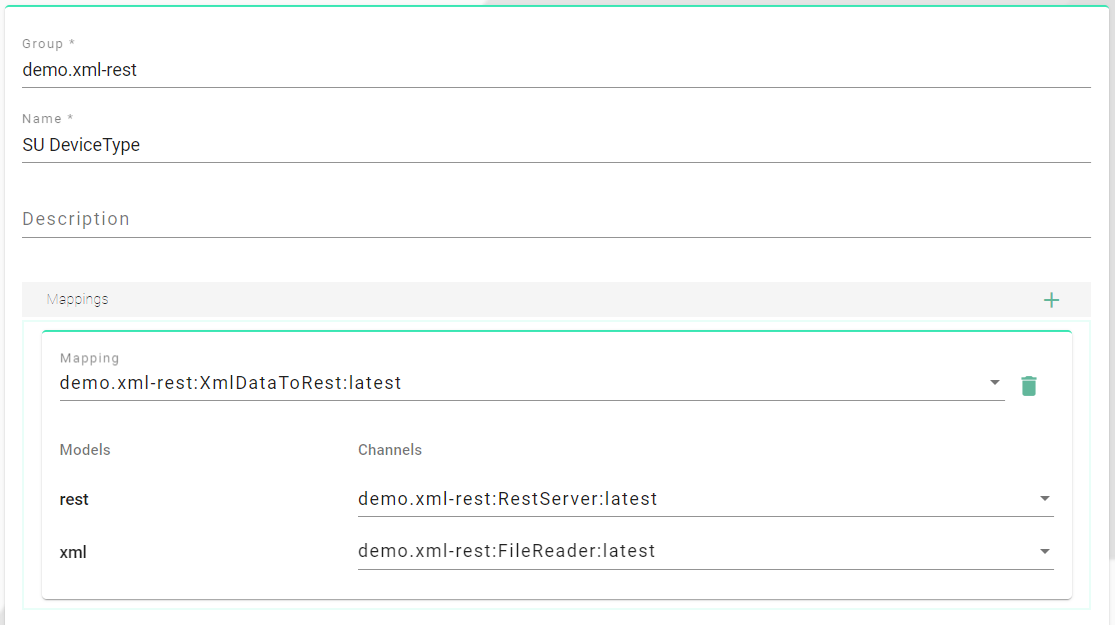
To create the Mapping we need to proceed with the steps outlined below:

1. Create the Mapping:

  • Enter the group name: demo.xml-rest

  • Enter a name: e.g. XmlDataToRest

  • Add the Information Models form earlier:

  • demo.xml-rest.FileReader

  • demo.xml-rest.RestServer

Hint

You can enter for each Information Model a short name which is used within the Rule to access all elements of the specific Information Model e.g. xml and rest.

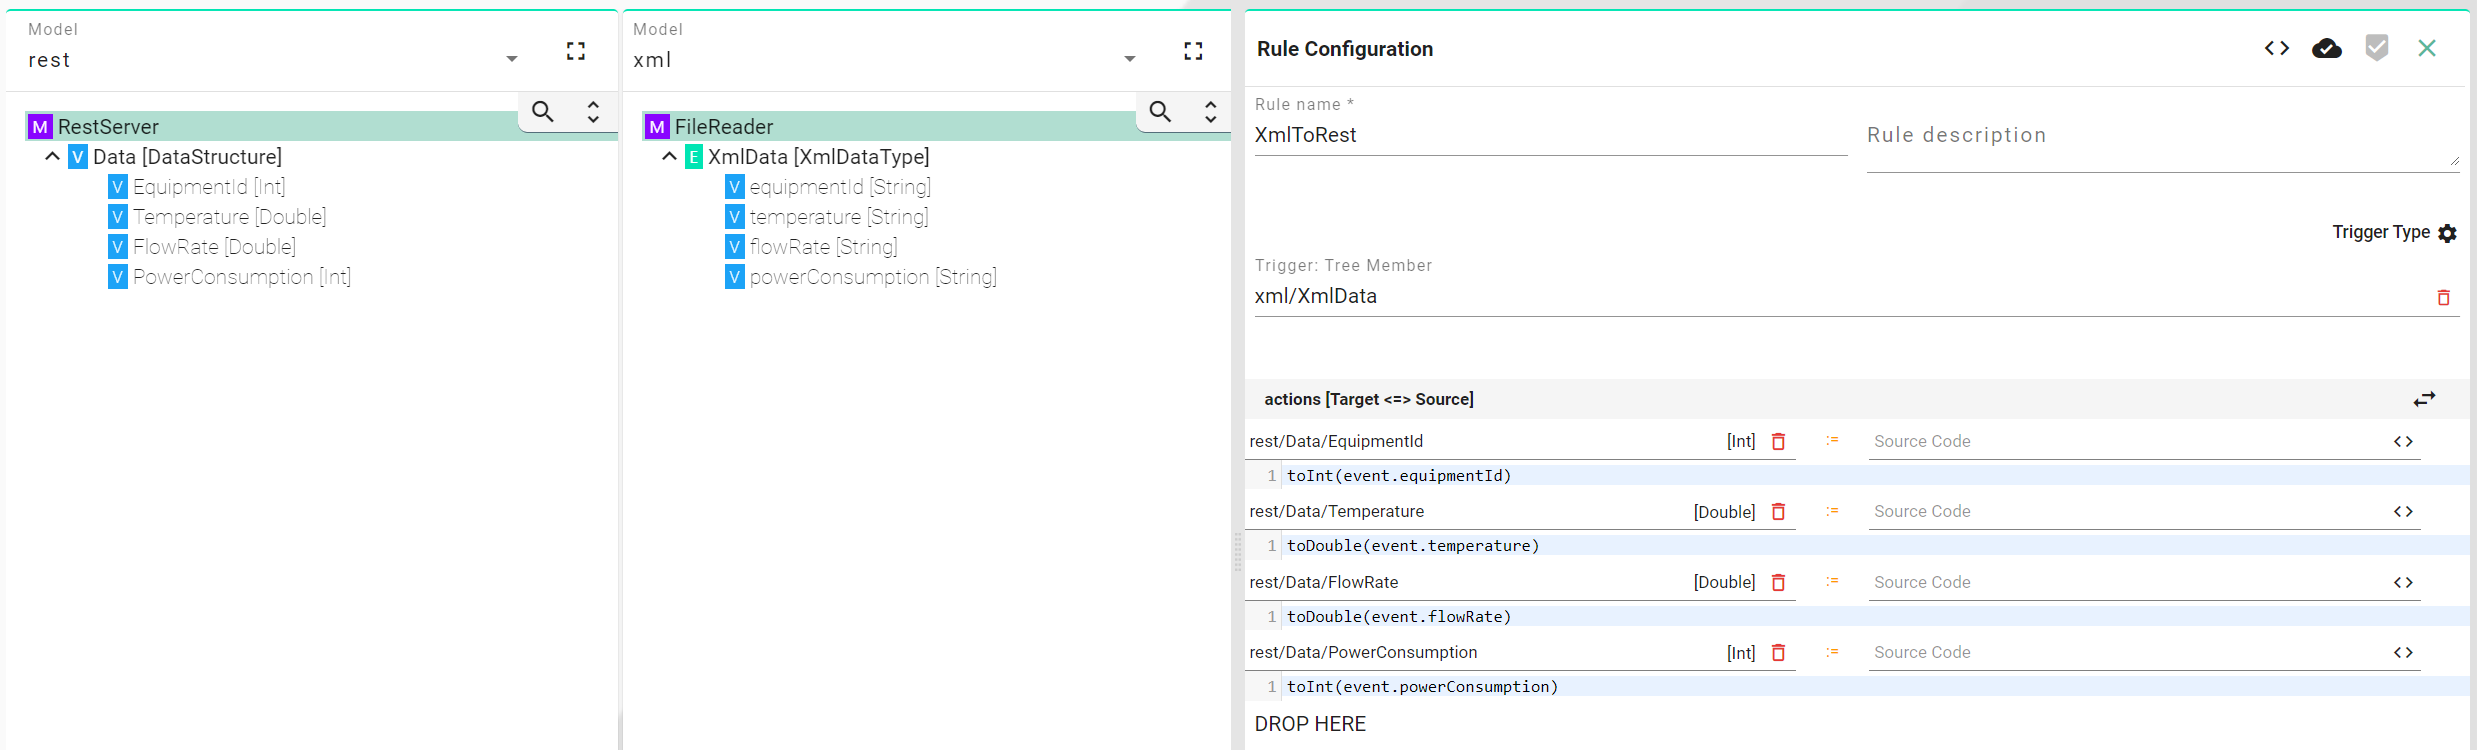
2. Create a Single Rule that defines the Mapping between the File Reader and the Rest Server Information Model.

a. Enter a Rule Name.

b. Drag and drop the XmlData Event from the File Reader Information Model into the trigger field.

c. Drag and drop the Data variable from the Rest Server Information Model into the actions panel. Make sure to choose the Complex assignment type.

d. Assign the appropriate source element to each target element either via drag-and-drop or, in the case of type conversion, by entering code.

  • rest/Data/EquipmentID := toInt(event.equipmentId)

  • rest/Data/Temperature := toDouble(event.temperature)

  • rest/Data/FlowRate := toDouble(event.flowRate)

  • rest/Data/PowerConsumption := toInt(event.powerConsumption)

Definition of the Rule

Screenshot of the Rule editor in SMARTUNIFIER

3. Compile the Rule and save the Mapping

Device Type

Device Types are described in the chapter Device Types.

To create the Device Type we need to proceed with the steps outlined below:

1. Enter the group name used for this demo: demo.xml-rest and a name: e.g. SU DeviceType.

2. Select the Mapping created previously.

3. Assign the Channels (File Reader and Rest Server) to their respective Information Models.

Device Type

Screenshot of the Device Type view in SMARTUNIFIER

4. Save the Device Type.

Instance

Instances are described in the chapter Communication Instances.

1. Here we just need to select the Device Type created previously.

Hint

We could modify the configuration of the different Channels at this level, but we have already done so at the Channel level previously.

2. Save the Instance.

Deployment

Deployments are described in the chapter Deployment.

To deploy our Communication Instance we need to proceed with the steps outlined below:

1. Select the Local Deployment

2. Select the Instance, the Endpoint default:Default and Info for the level of detail of the log (We can leave the other configuration at their default value for this demo).

3. Save the Deployment.

4. Now Deploy and Start the Instance.

Deployment

Screenshot of a deployed Instance in SMARTUNIFIER