SMARTUNIFIER Configuration
Information Model
What Information Models are and how to create them is described in the chapter Information Models.
Information Model - OPCUA
Create an Information Model that represents the data structure of the OPCUA server.
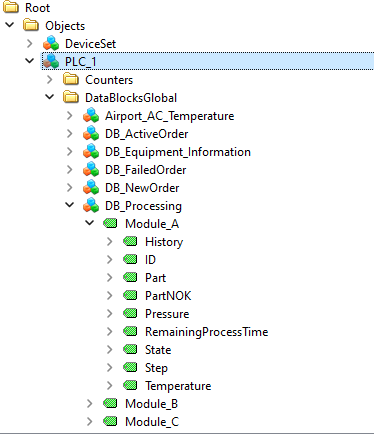
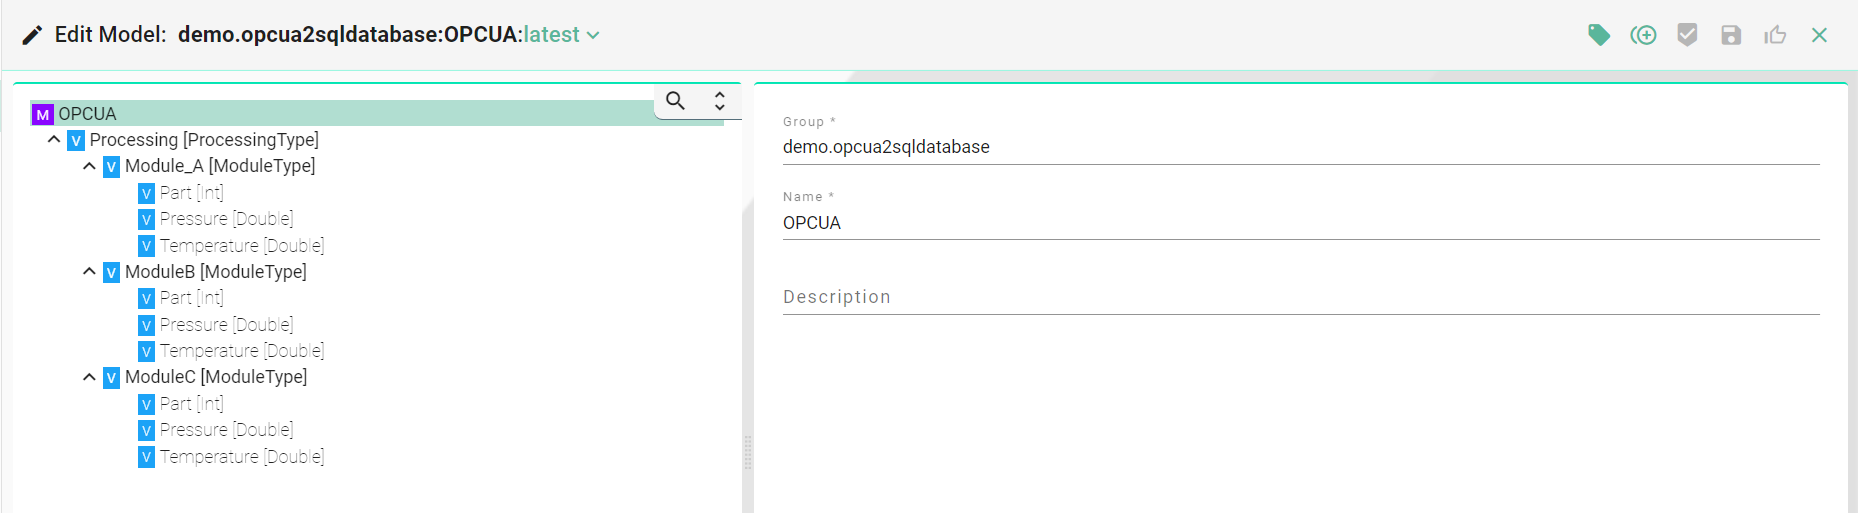
Structure of the OPCUA Information Model:
Complex Variables (ModuleType) represent a PLC module
Variables represent the data of a PLC module
Note
The group function allows you to combine logical entities into paths. You can use existing naming conventions and styles for naming equipment to organize the configuration components. This simplifies the structuring and management of configurations.
Information Model - SQL Database
Create an Information Model that represents the SQL database.
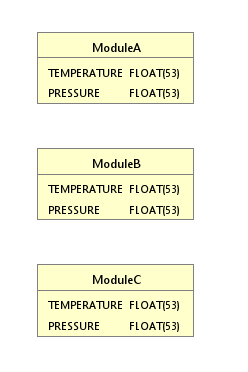
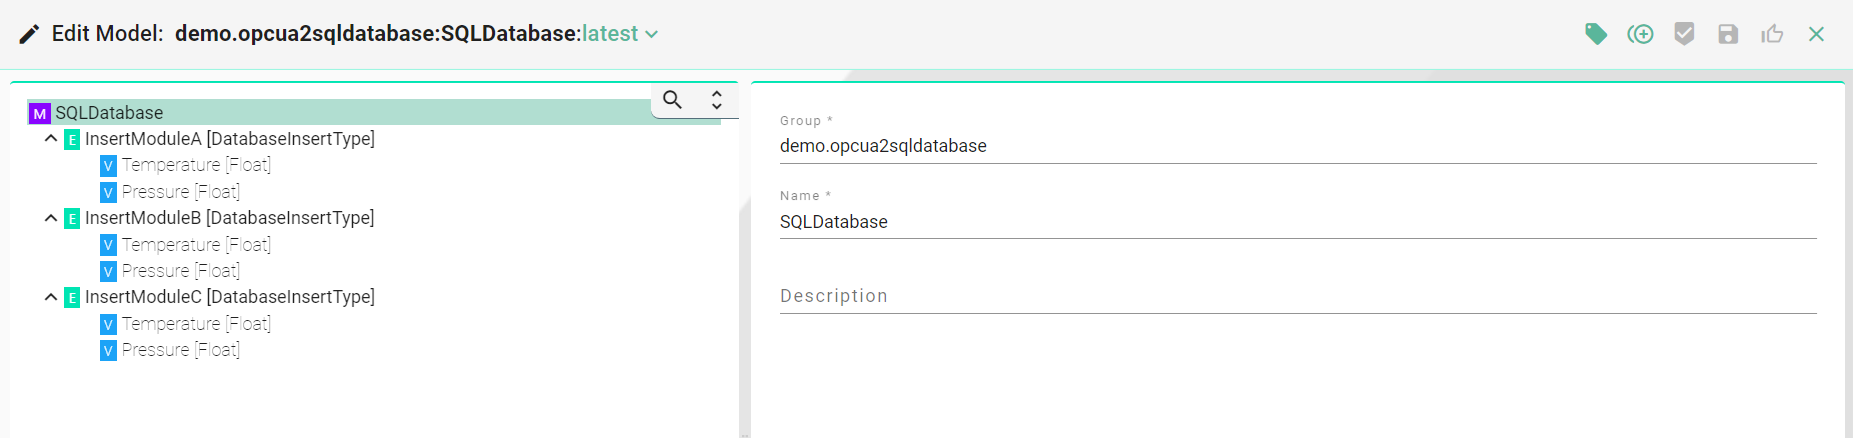
Structure of the SQLDatabase Information Model:
Communication Channel
What Communication Channels are and how to create them is described in the chapter Communication Channels.
Communication Channel - OPCUA Client
Create a new OPCUA Client Communication Channel and choose the OPCUA Information Model just created.
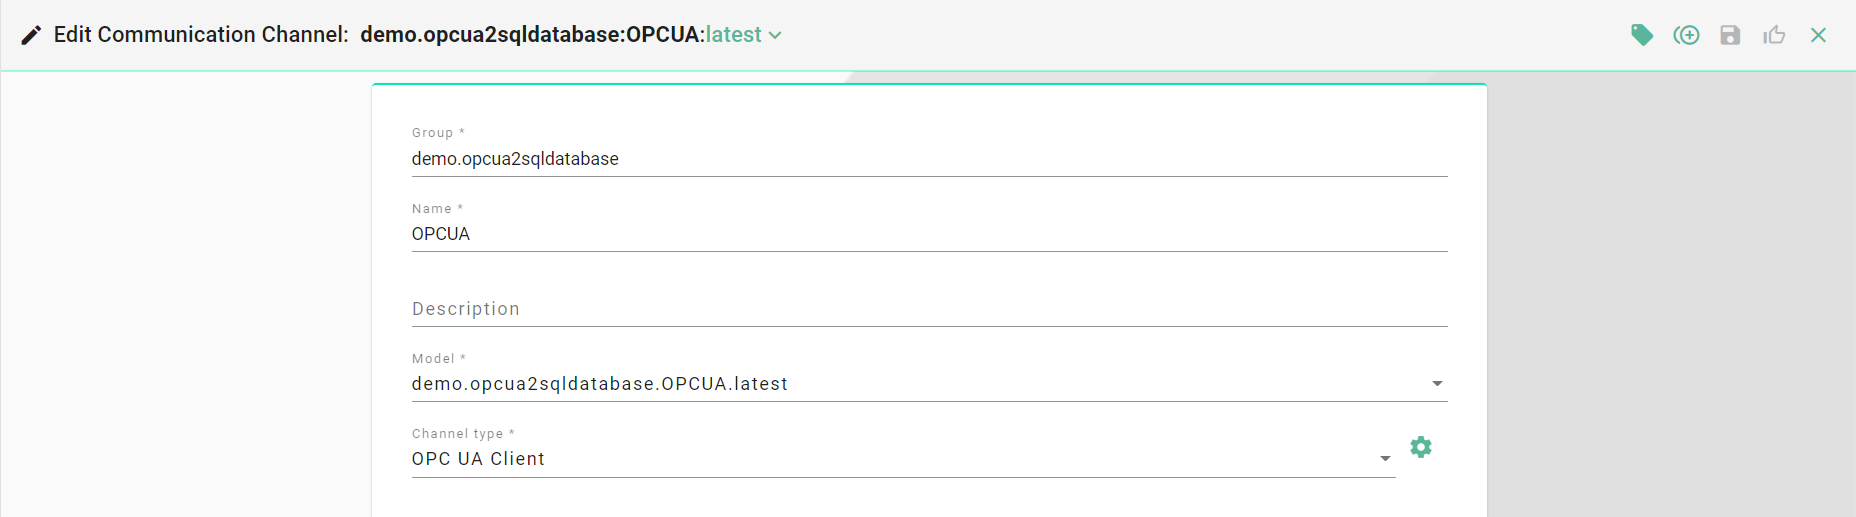
Configure the OPCUA Client Channel by following the steps described in the User Manual.
1.) Select the root node of the Information Model and configure the server access.

2.) Select a Variable and configure the Node ID (Repeat this step with the rest of the Variables, for each Module).

3.) Save the new Communication Channel.
Communication Channel - SQL Database
Create a new SQL Database Communication Channel and choose the Database Information Model just created.

Configure the Database Channel by following the steps described in the User Manual:.
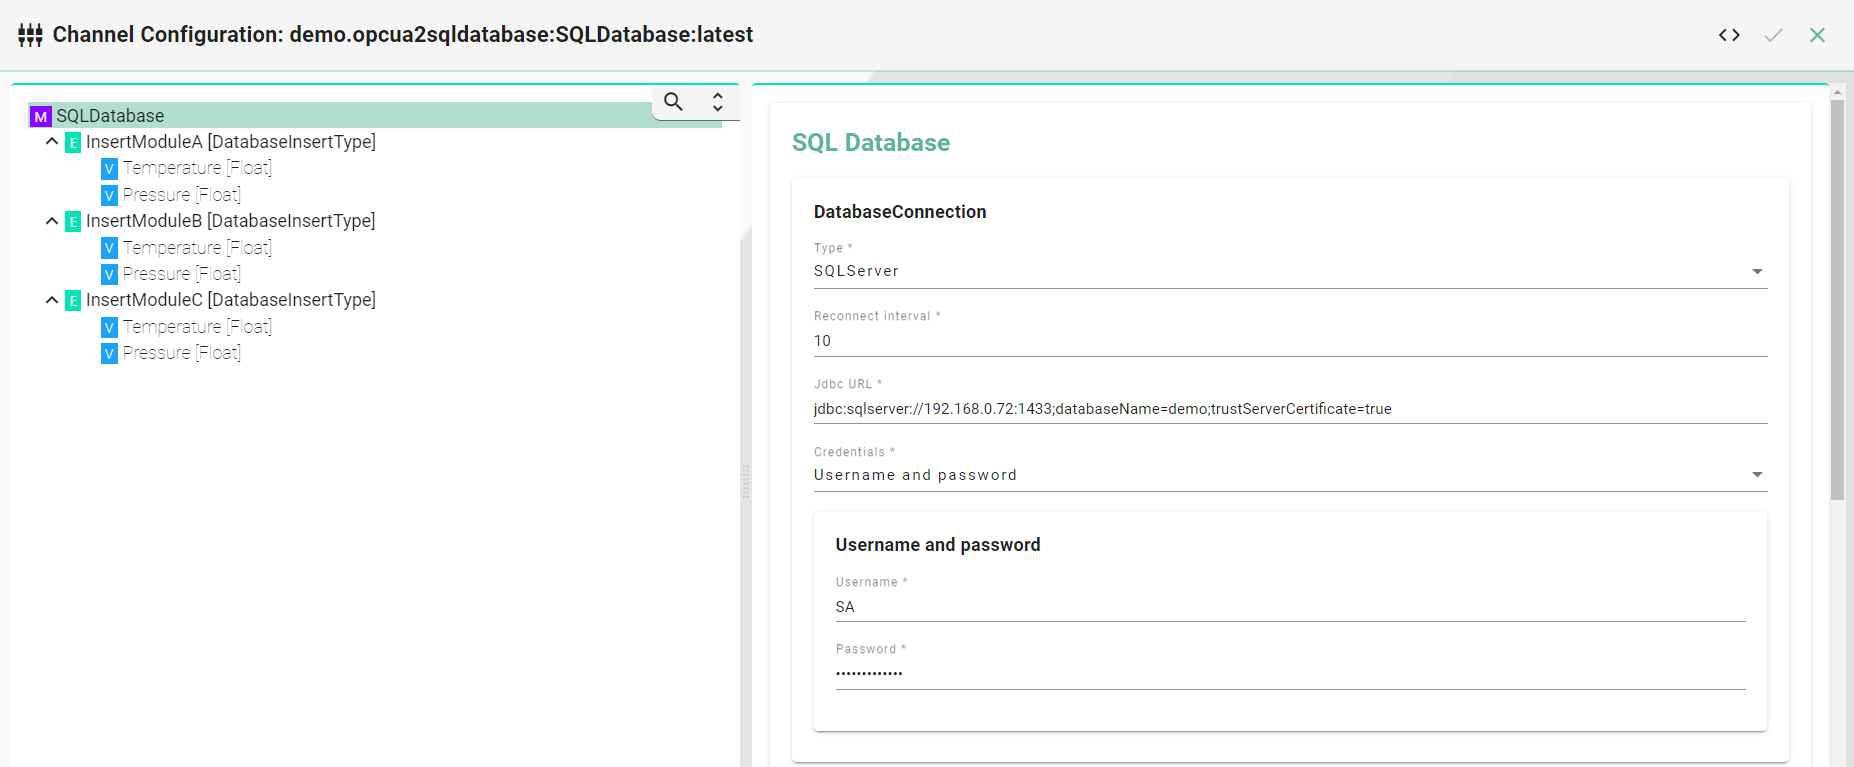
1.) Select the root node of the Information Model and configure the database access.
Select SQLServer as Type
Enter the JDBC Url according to the selected database -
jdbc:sqlserver://192.168.0.72:1433;databaseName=demo;trustServerCertificate=trueEnter the username and the password of the database
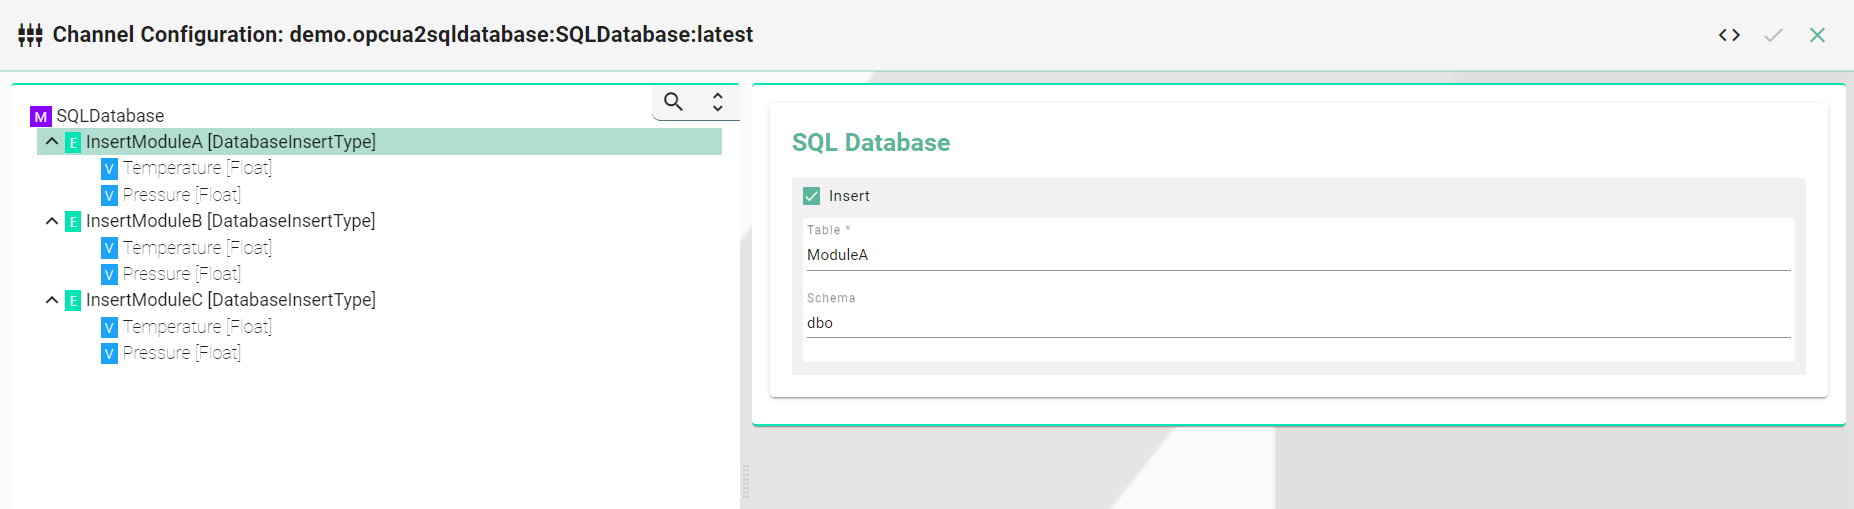
2.) Select the Event node in the Information Model and configure the table settings.
Enable the checkbox Insert
Enter the name for the Table and for the Schema
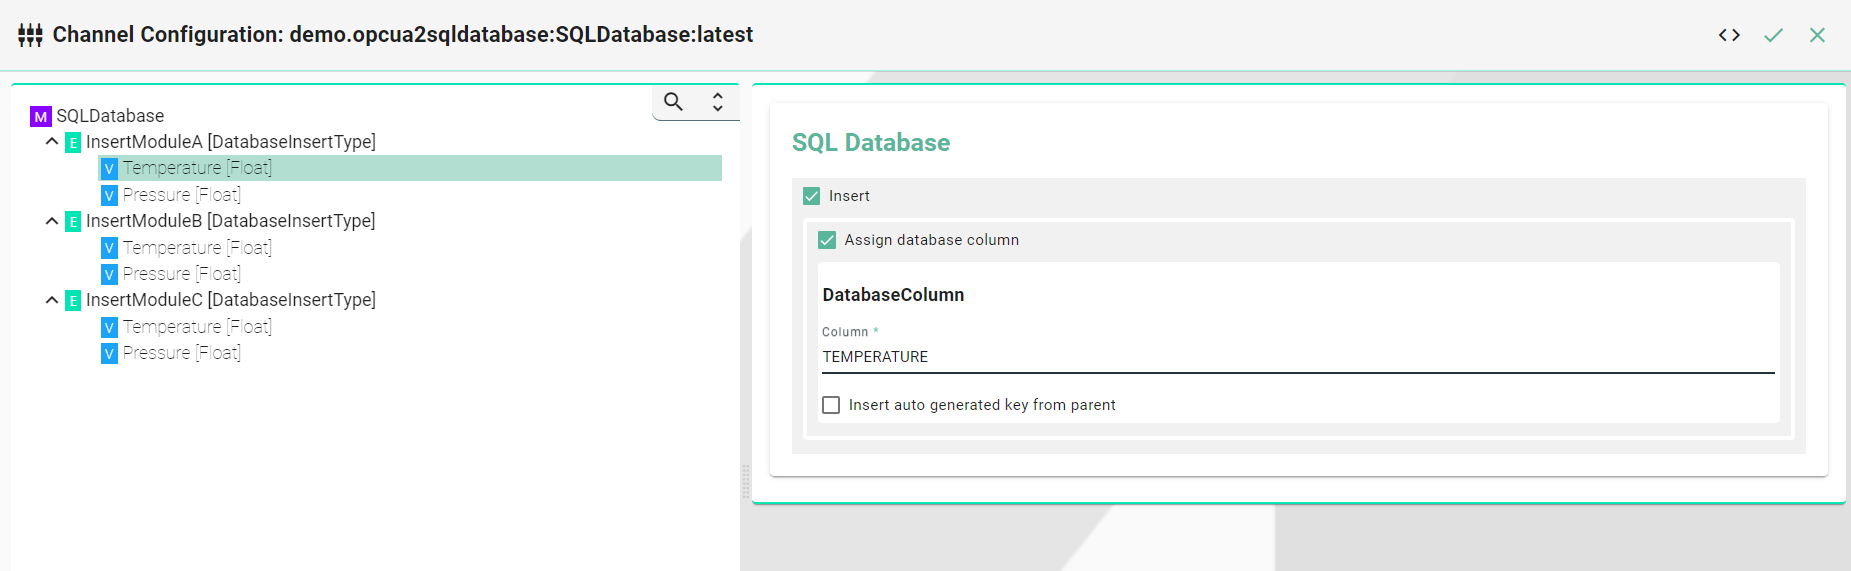
3.) Select a Variable and configure the columns (Repeat this step with the rest of the Variables).
Enable the checkbox Assign Database Column
Enter the name for the Column
4.) Save the new Communication Channel.
Mapping
What Mappings are and how to create them is described in the chapter Mappings.
Create a new Mapping by selecting the Information Models just created (OPCUA and SQLDatabase).
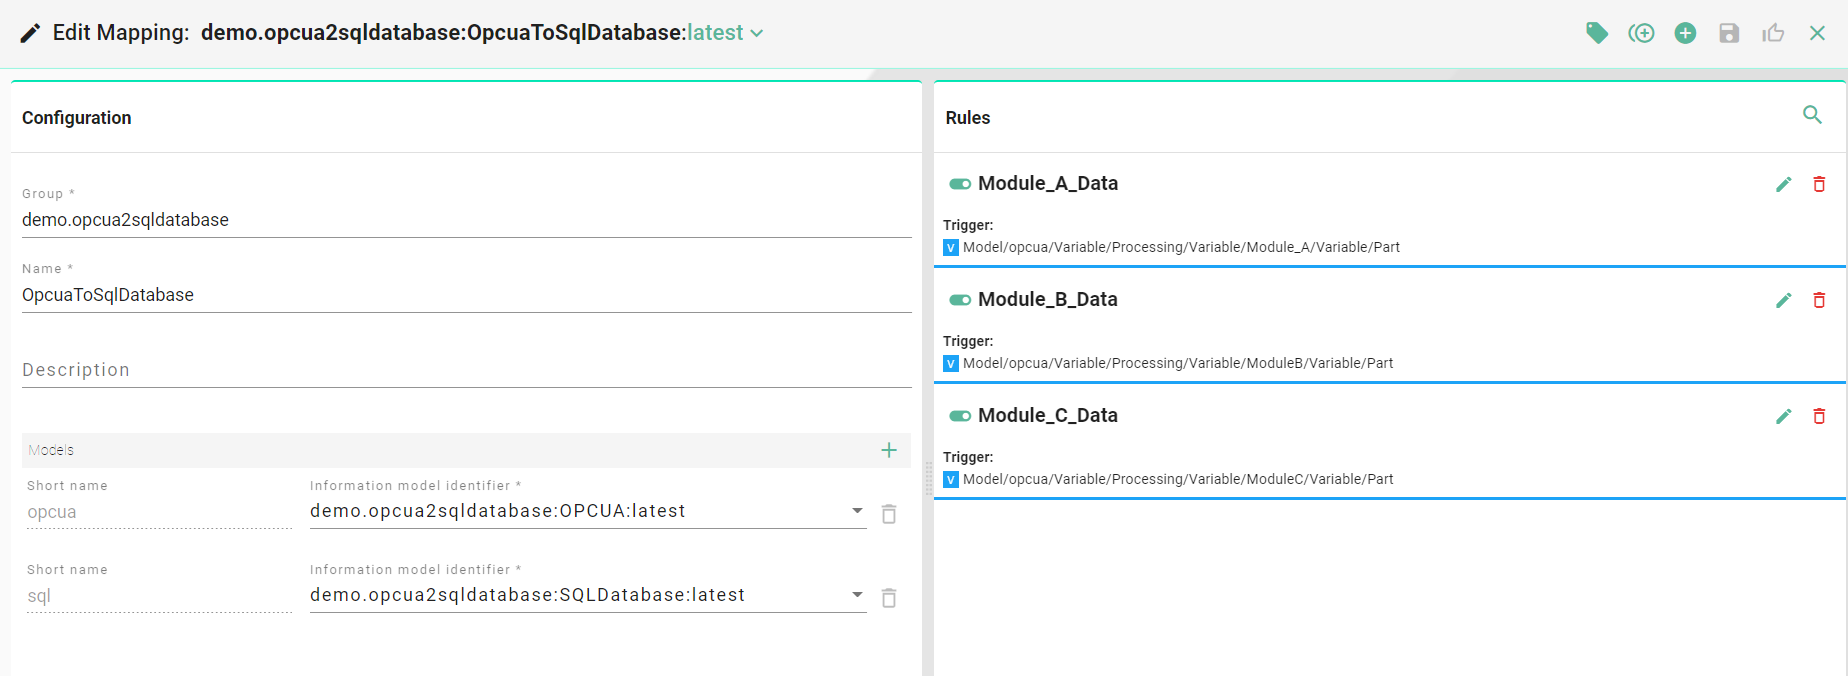
Create a Rule that handles the assignment of values from the OPCUA Server to the SQL Database.
1.) Enter a meaningful Rule Name.
2.) Drag and Drop the Variable of the OPCUA Model into the Trigger field.
Note
Several Trigger Types are available. In this example we use a single OPCUA variable. That means the rule is triggered when the value on the OPCUA server is changing.
3.) Drag and Drop the Event of the SQL Database Model into the Actions panel.
4.) Assign source to target (Repeat for all variables).

5.) Compile and save the new Mapping.
Device Type
What Device Types are and how to create them is described in the chapter Device Types.
1.) Select the Mapping just created.
2.) Assign the Communication Channels (OPCUA and SQL Database) to the associated Information Model.

3.) Save the new Device Type.
Communication Instances
What Communication Instances are and how to create them is described in the chapter Communication Instances.
1.) Select the Device Type just created.
2.) Enter a meaningful name for the Instance.
Note
Changes of the Communication Channel configurations can be made on this level if necessary.
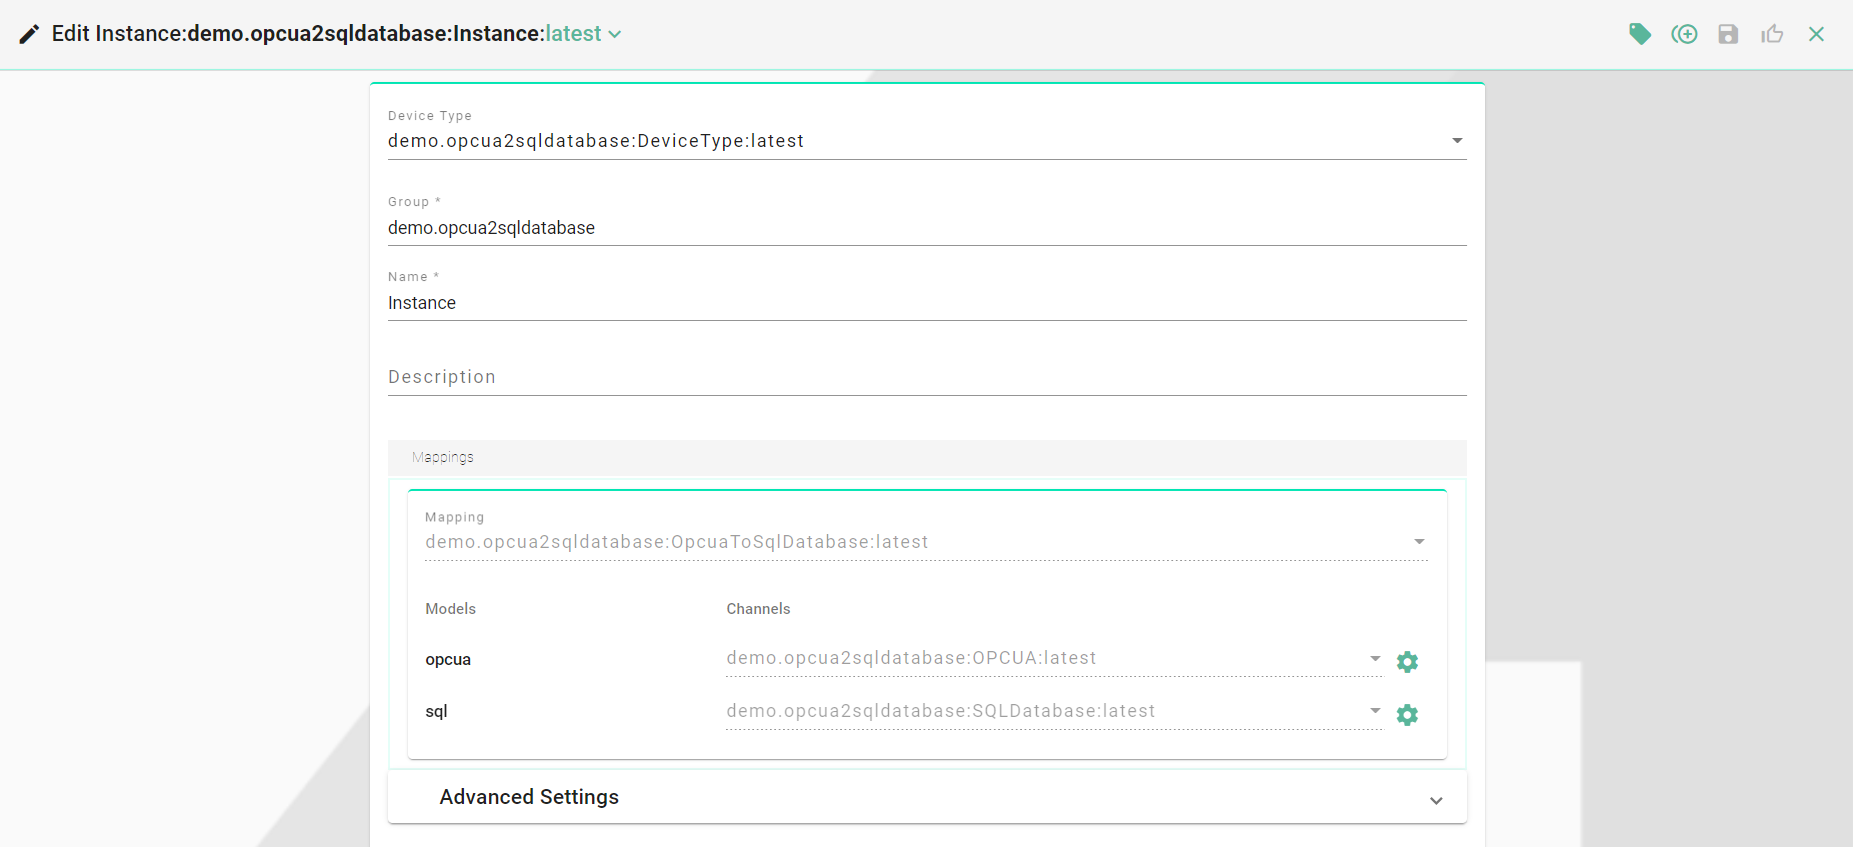
3.) Save the new Instance.
Deployment
Create a new Local Deployment
1.) Select the Instance just created.
2.) For EndpointId choose Default location.
3.) Select the Log File Configuration Info (Defines the log level).

4.) Save the new Deployment.
5.) Go to Deployment Endpoints section and start the Default Endpoint.
6.) Return to Deployment section to Deploy and then Start the Instance.

The Instance is now running on the local machine.