Graphical
When creating rules using the Graphical Editor, a rule type needs to be selected first: Single or Multi Rule.
Single Rule
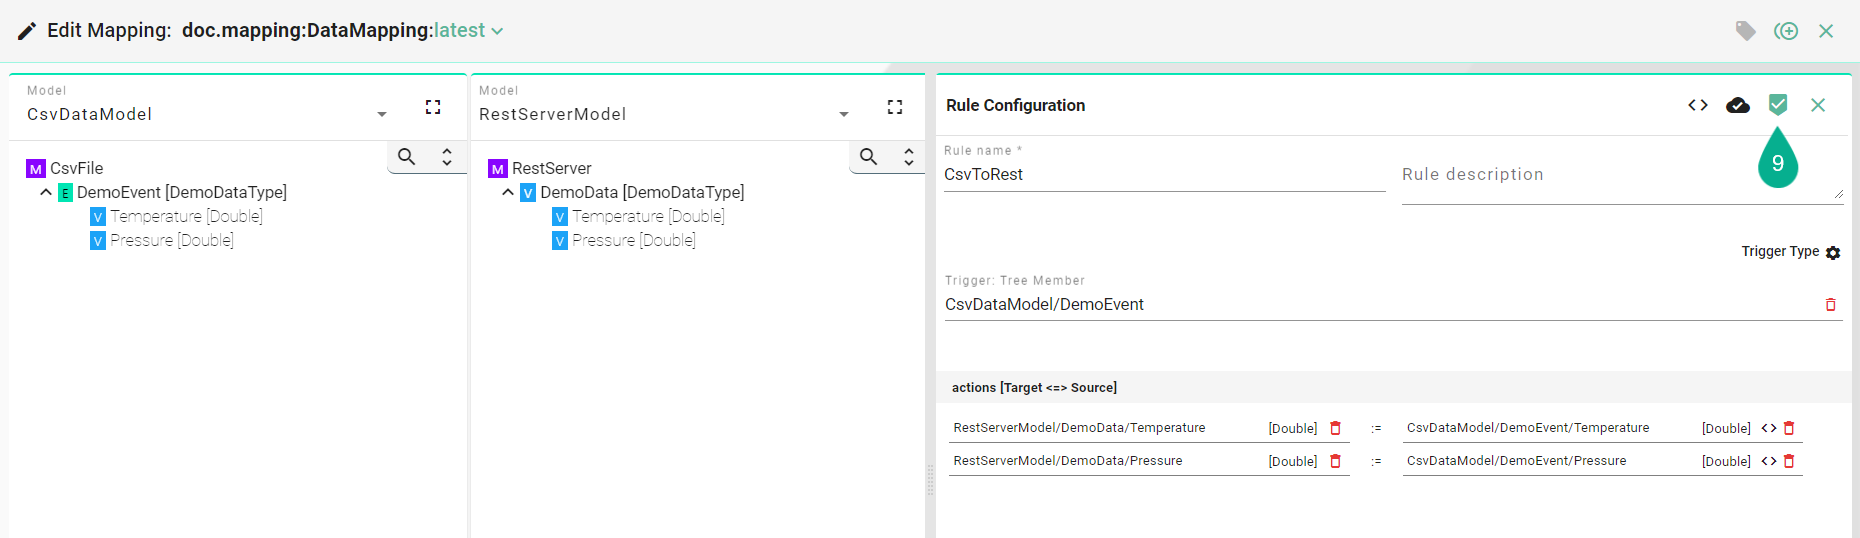
The following screenshot shows the Single Rule Editor. The rule contains the following components:
Name and an optional Description field.
Trigger which can be either a Tree Member of the Information Model, Fixed Rate Scheduler or Fixed Delay Scheduler.
Actions where source-to-target assignments are defined betweent the elements of the Information Models.
Enter “Rule name” (3).
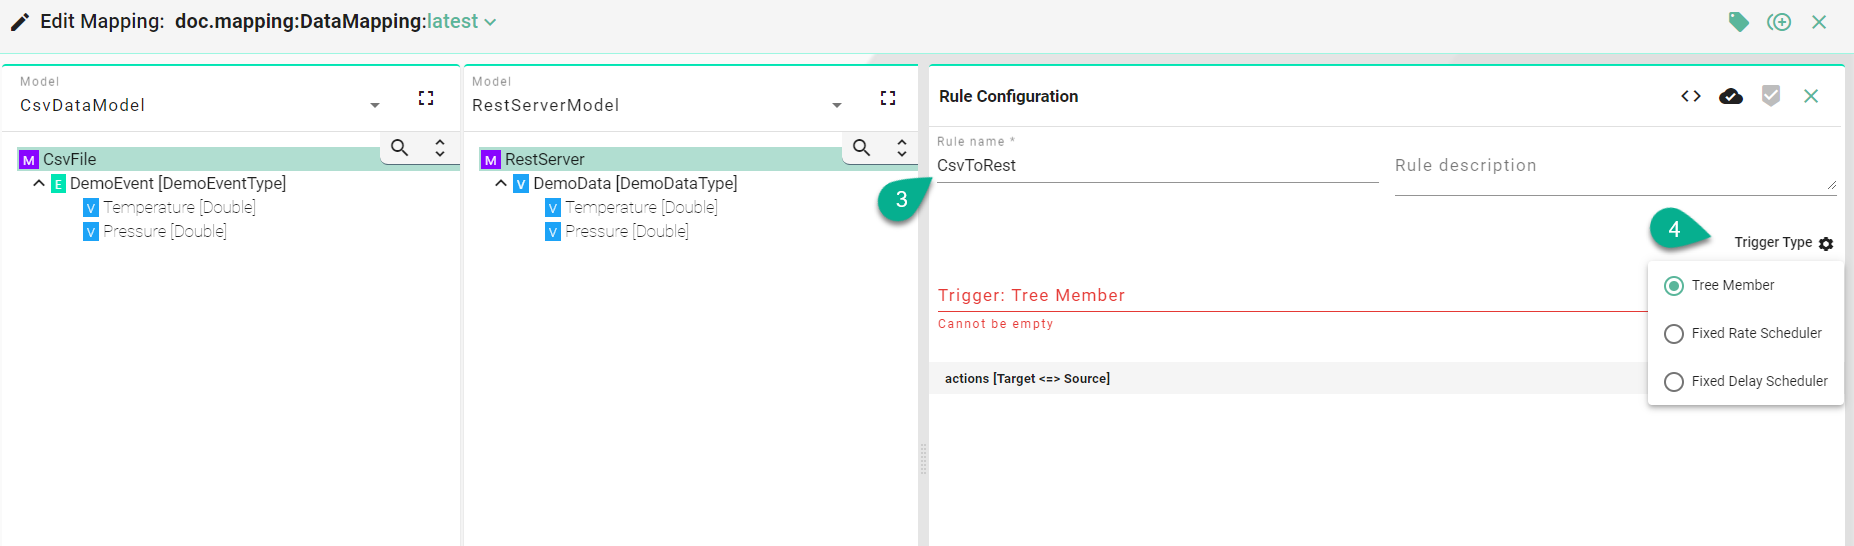
Select the “Trigger Type” (4):
Tree Member - rule with an Information Model tree member as trigger.
Fixed Rate Scheduler - rule with a time based trigger, using a Cron Expression.
Fixed Delay Scheduler - rule based on a scheduled delay.
Timeout Scheduler - rule based on a timeout.
Trigger Types
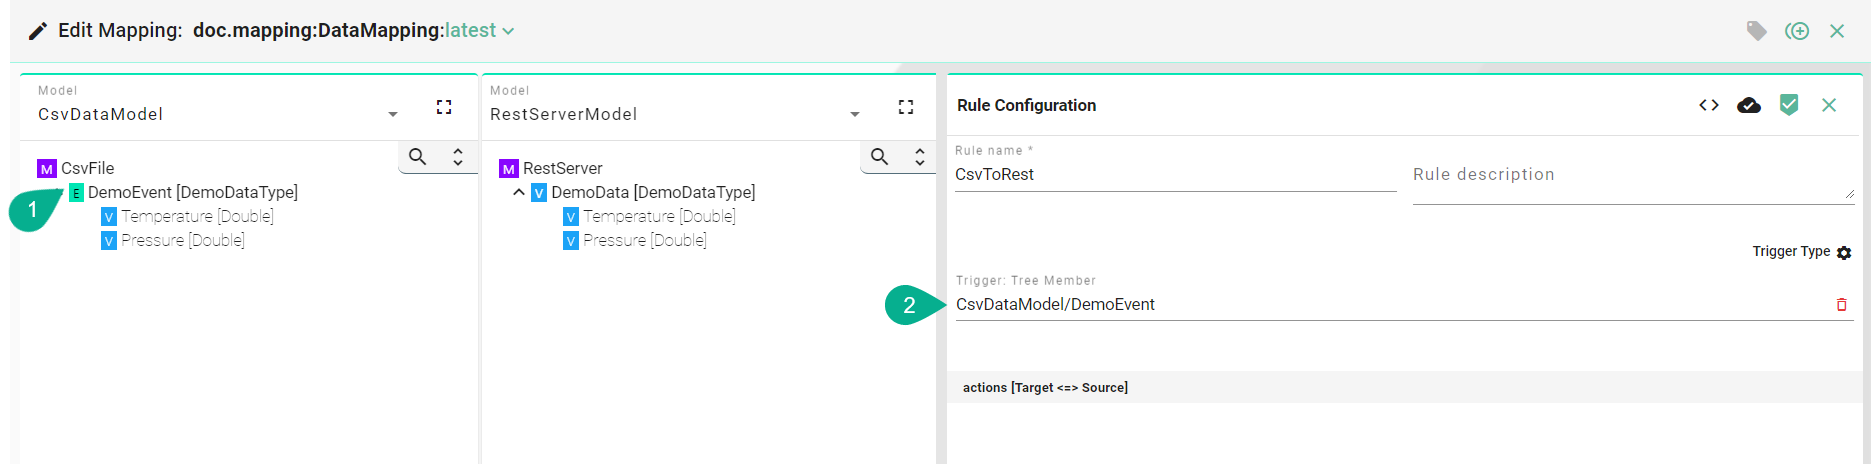
Tree Member
Drag and drop the Trigger from the model panes (1) into the trigger field (2).
Fixed Rate Scheduler
Input a “Cron Expression” (1) to set the time based trigger. (E.g., 0 */5 * ? * * meaning the trigger is set at every 5 minutes).
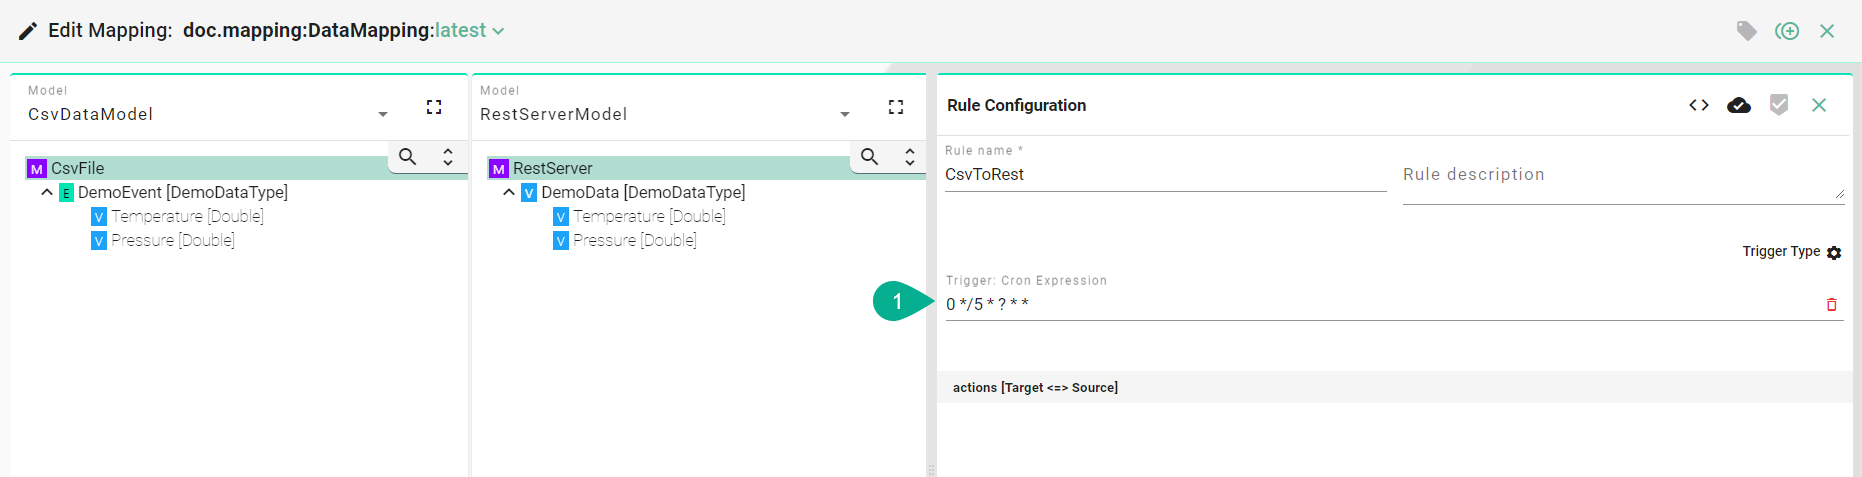
Hint
Cron expressions are primarily designed for specifying schedules in terms of seconds, minutes, hours, days, months, and weekdays. They do not support specifying intervals at the millisecond level. To use millisecond intervals, use the Fixed Delay Scheduler.
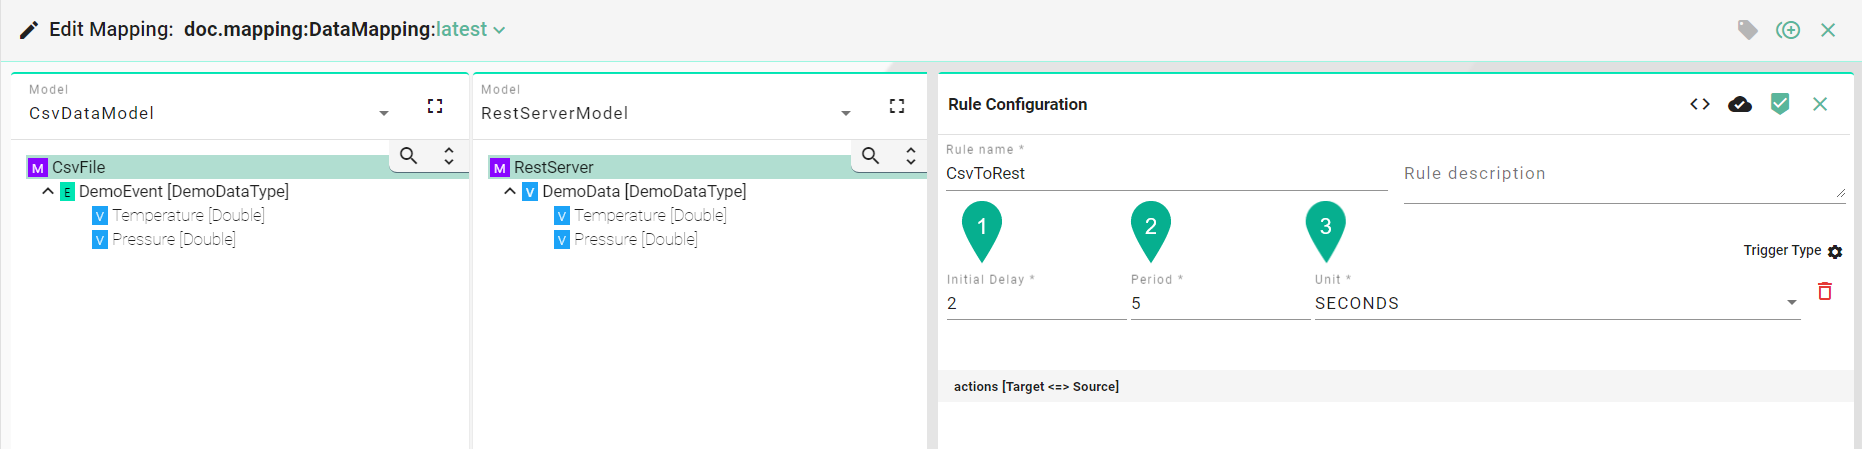
Fixed Delay Scheduler
Input the trigger “Initial start Delay” (1), the “Period” delay (2) and the “Unit” (3).
Timeout Scheduler
Input the trigger “Timeout” (1) and the “Unit” (2).
Actions
Drag and drop the Target Information Model node (5) into the Target field (6).
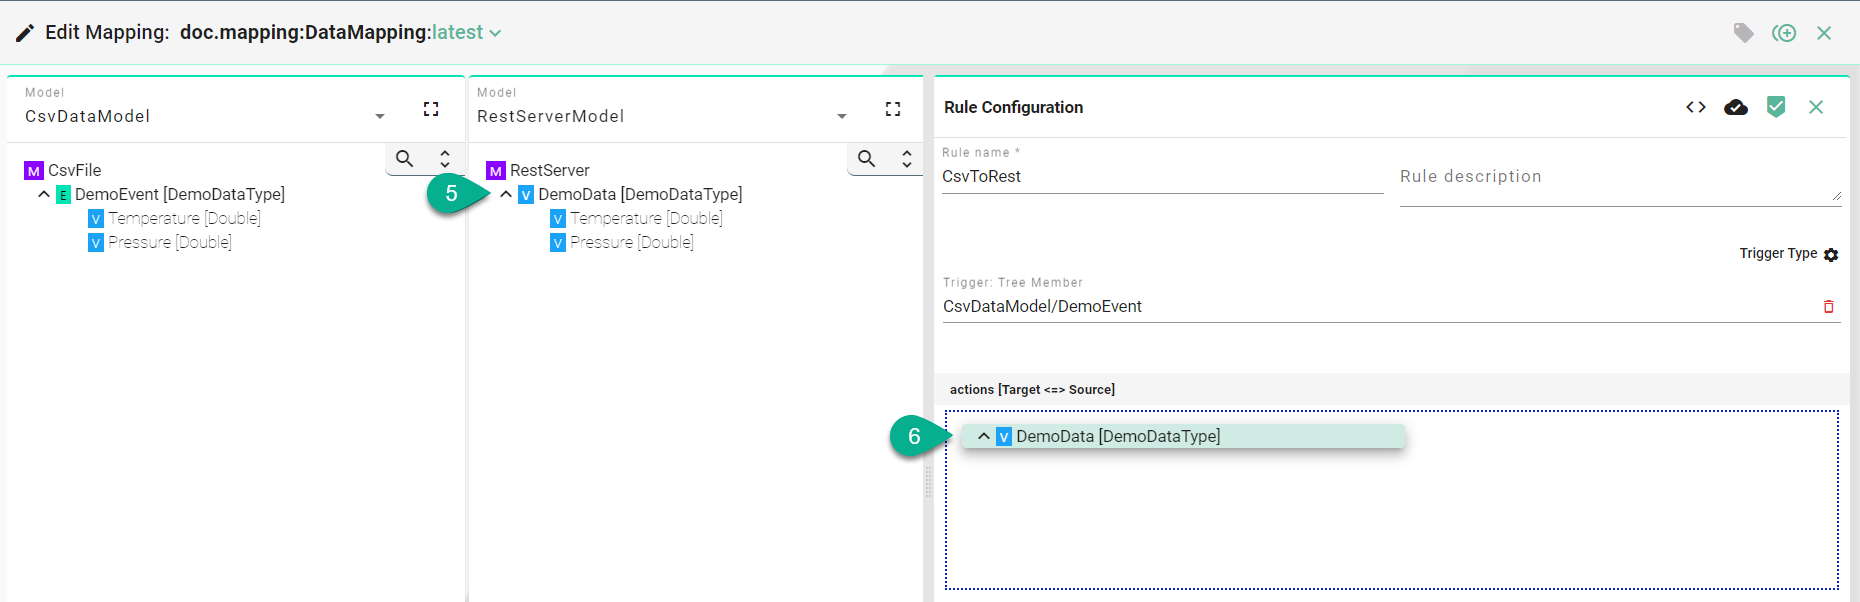
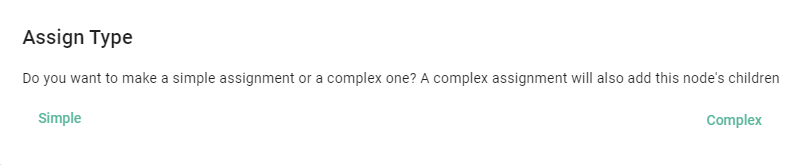
A popup appears to select the assignment type:
Simple - assignment of a source element to a target element both having the same custom data type - no need to assign each children elements separately
Complex - assignment of a source element to a target element both having different custom data types
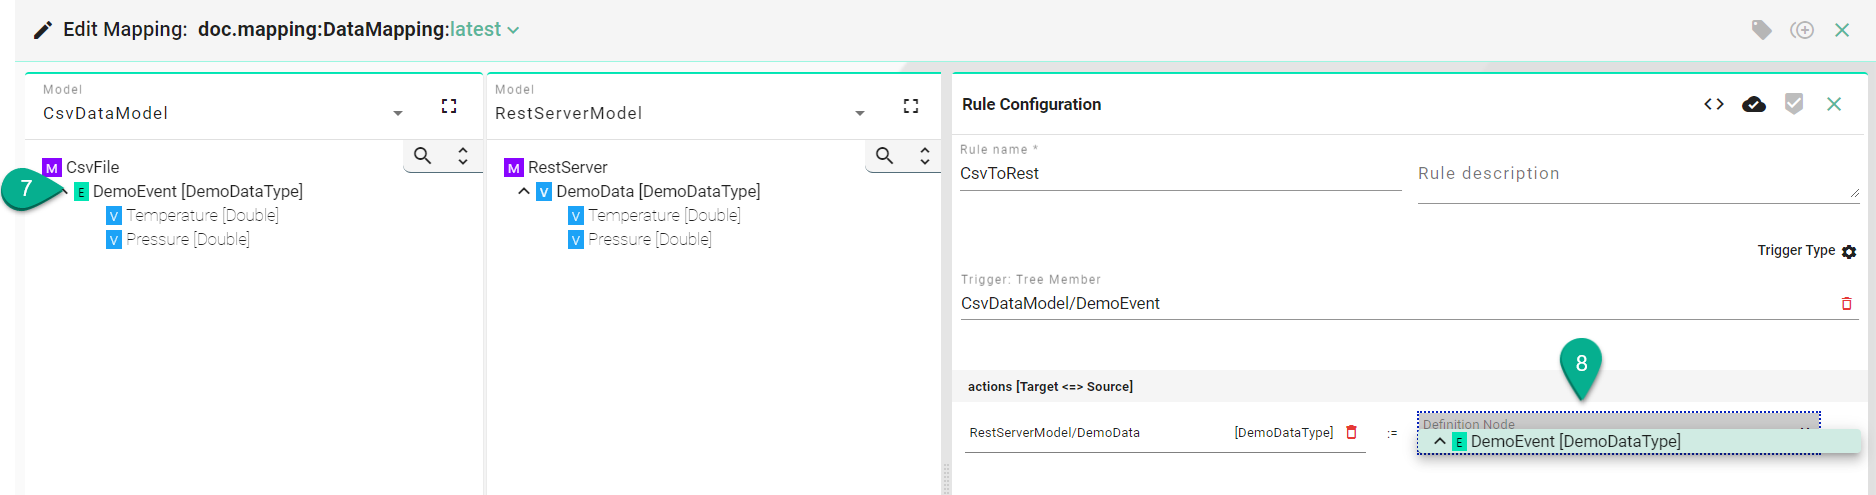
Simple Assignment
When Source and Target are of the same data type they can be directly assigned to one another.

Follow the steps below to create a simple assignment:
Drag and drop the Source Information Model node (7) into the Source field (8). The Source and the Target node data type must be matched one on one (e.g., DemoEventType to DemoEventType).
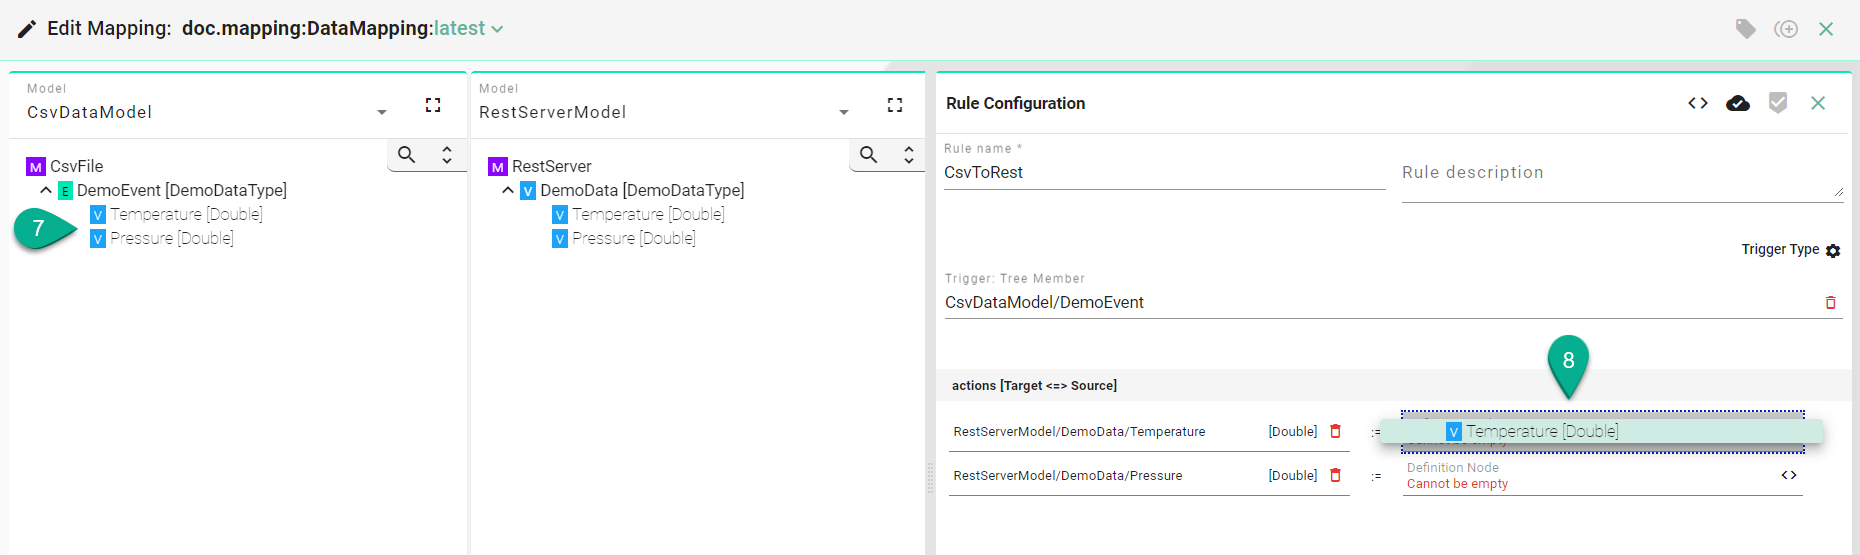
Complex Assignment
When the Source and Target differ in data type, their child nodes must be assigned individually.

Follow the steps below to create a complex assignment:
Drag and drop the Source Information Model node children’s (7) one by one into the Source field (8).
Hint
If the Source and Target have different data types (e.g., Int and String), a type conversion can be performed by using conversion functions .
After all mandatory fields have been filled out, select the “Apply” button (9) to save the newly created Rule.
The Single Rule Editor is closed and the newly created Rule is displayed in the Rules List.
Select the “Save” button placed in the upper right corner to save the Mapping.
Actions with Conditions
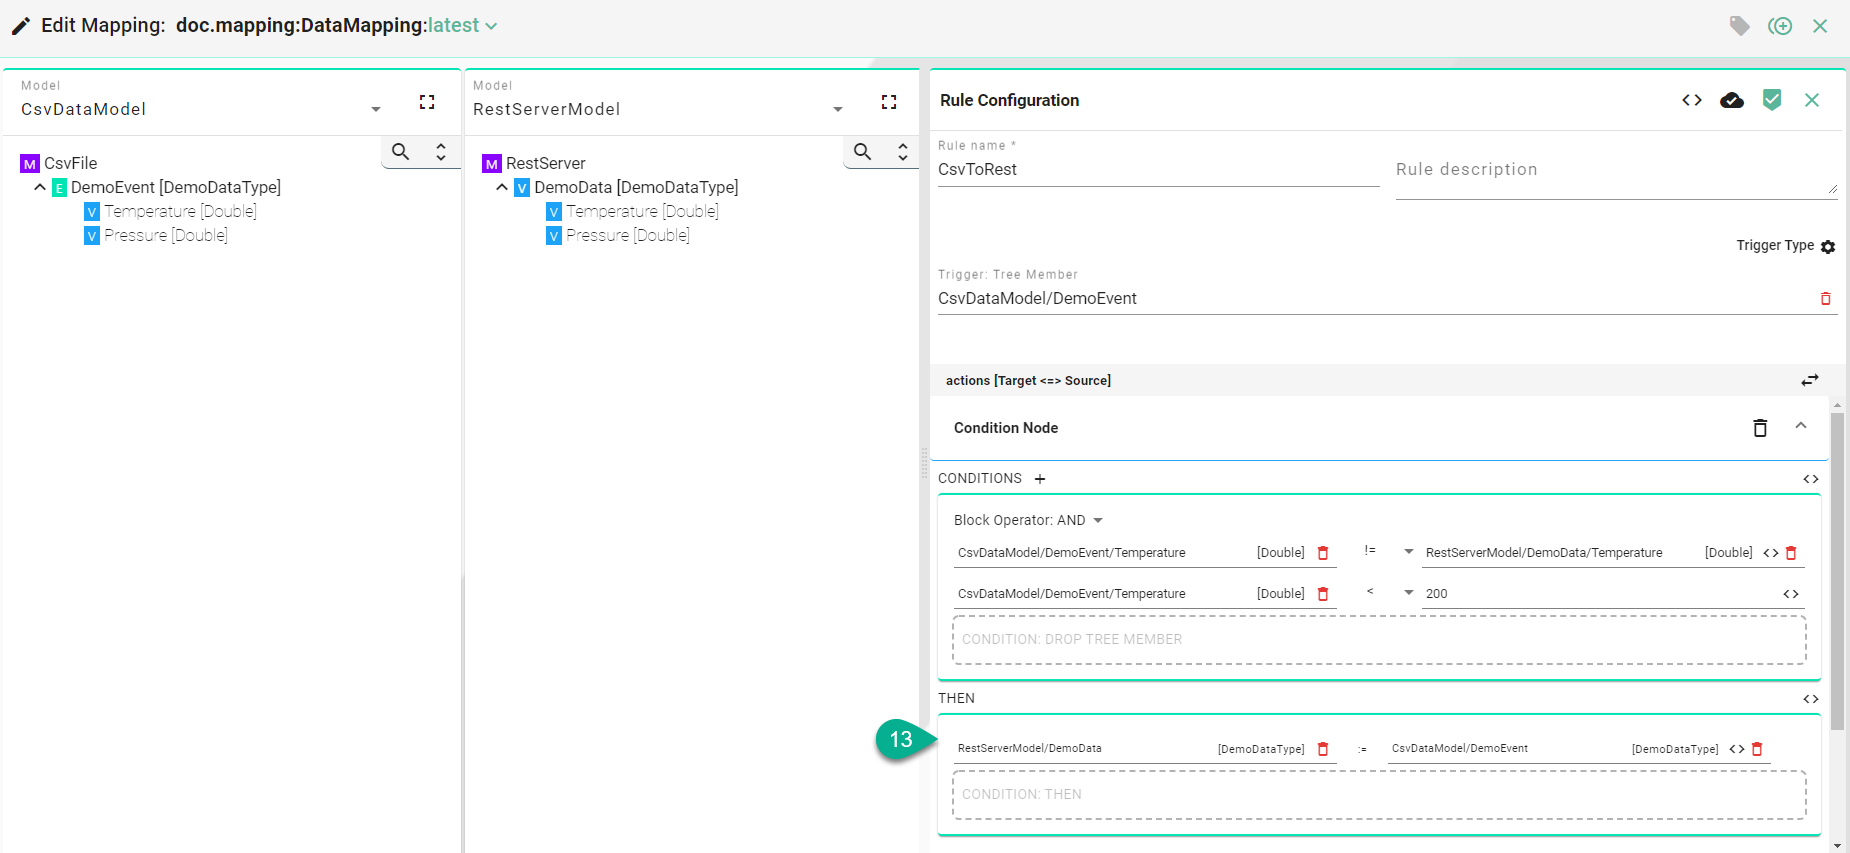
Click on the “Add condition block” button (1).
Drag and drop a tree member to build up the condition (2) and (3) or use the Literal Node button to enter a custom value.
Select a condition operator (4). The following operators are available:
==,!=,<,<=,>,>=.
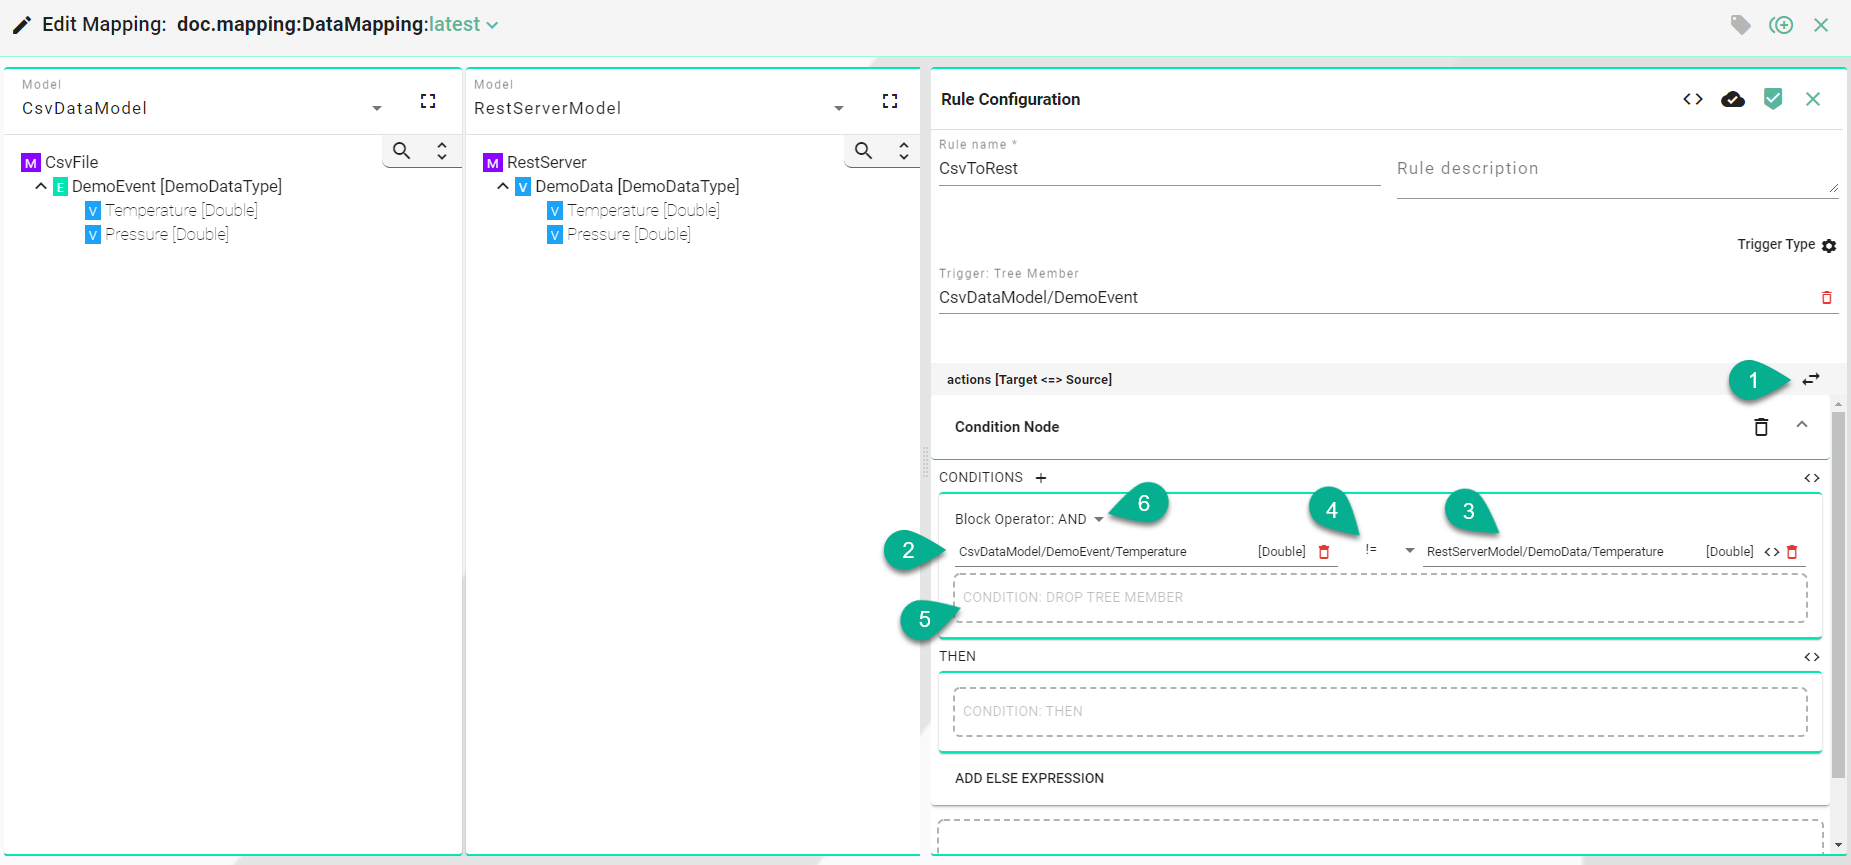
To add multiple conditions (5) select the block operator (6).
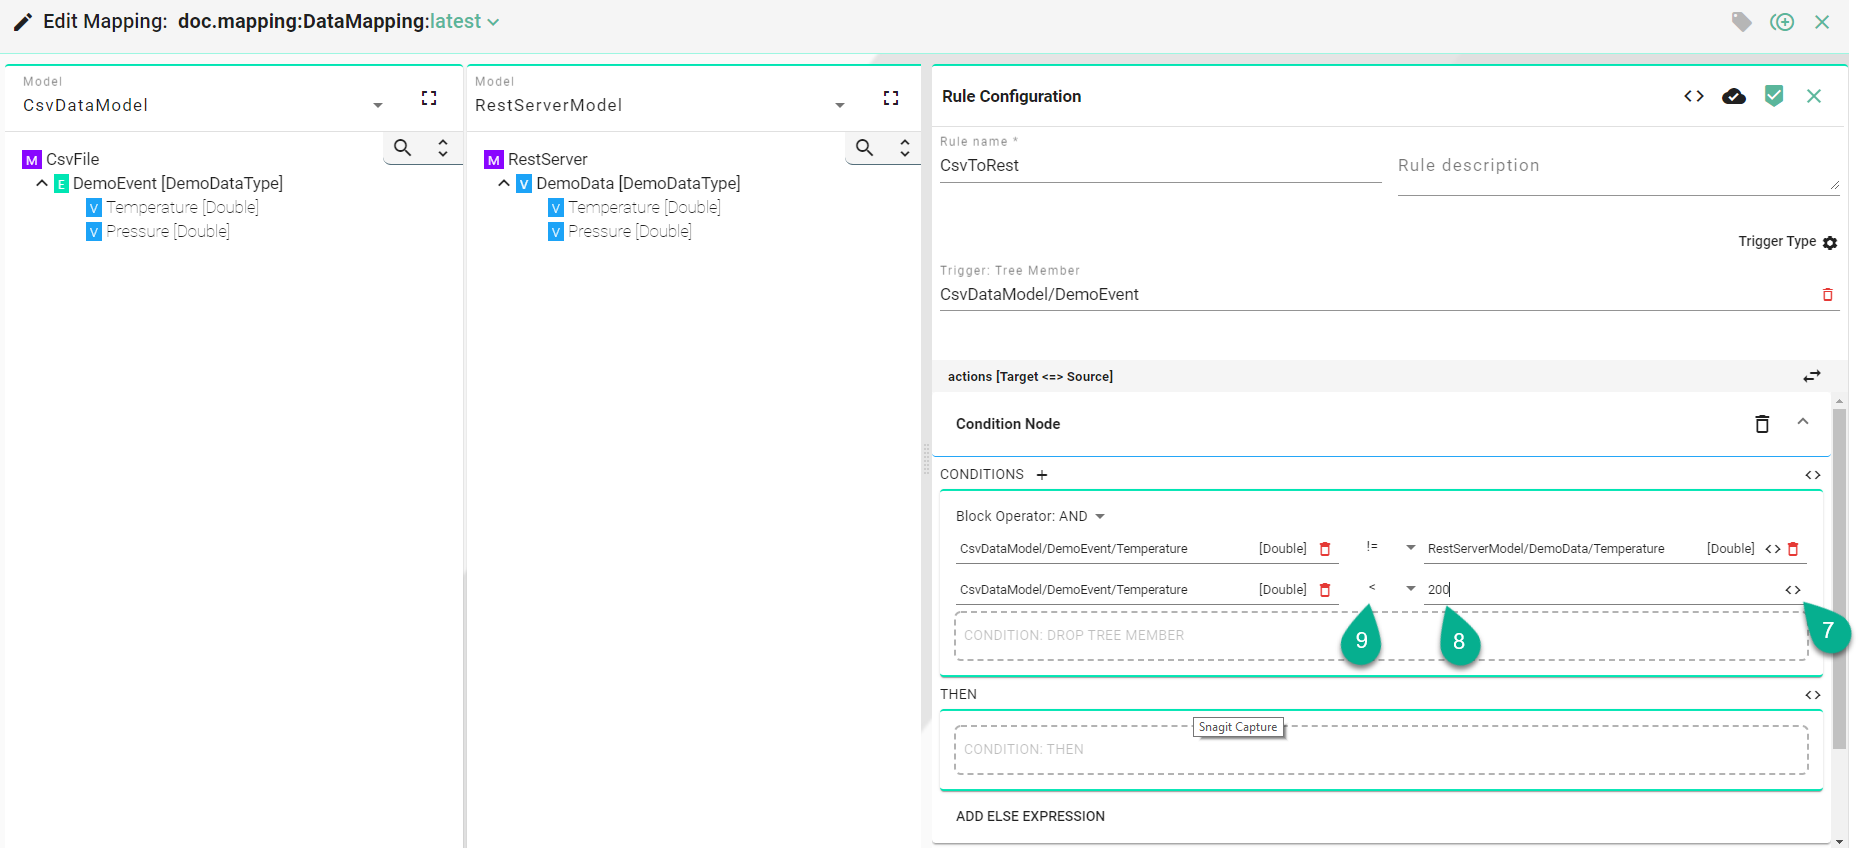
Click on the “Literal Node” button (7) to enter a custom value (8).
Select a condition operator (9).
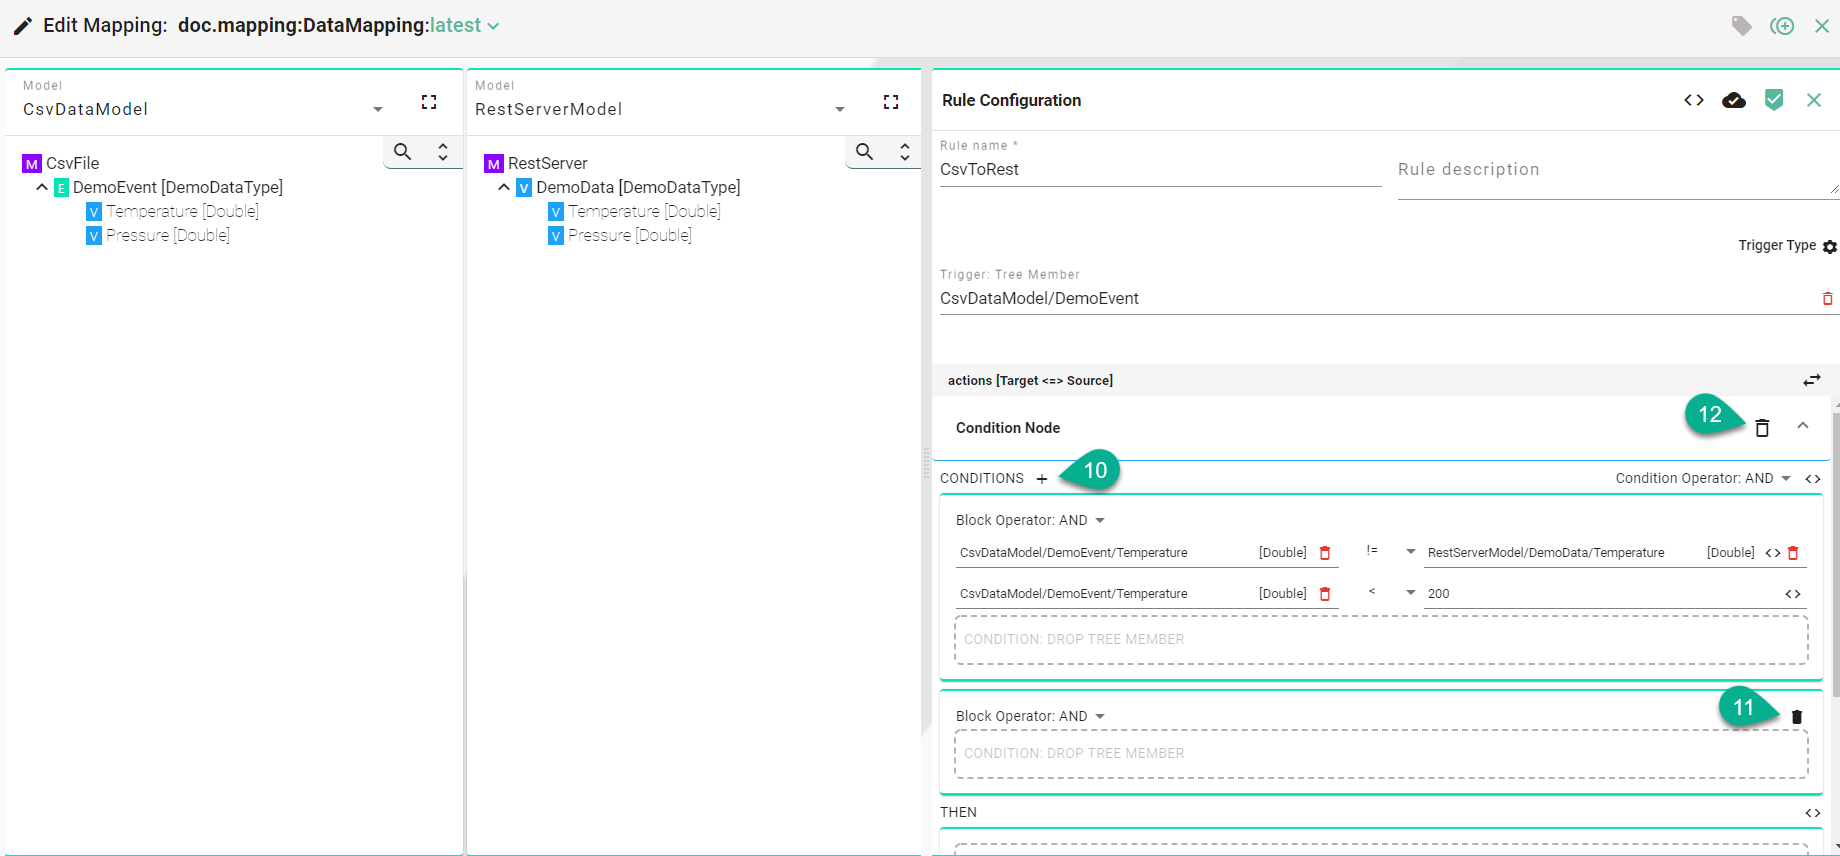
Click on the “Add Condition Block” button (10) to add a new one.
Click on the “Delete Condition Block” button (11) to remove a condition block and select the “Delete” button (12) to remove the condition.
In the “THEN” (13) section, drag and drop the Target and Source Information Model nodes, using either the simple or the complex assignment methods.
Actions with Custom Conditions
Click on the “Source Code” button (1).
Input code for a complex condition (2).
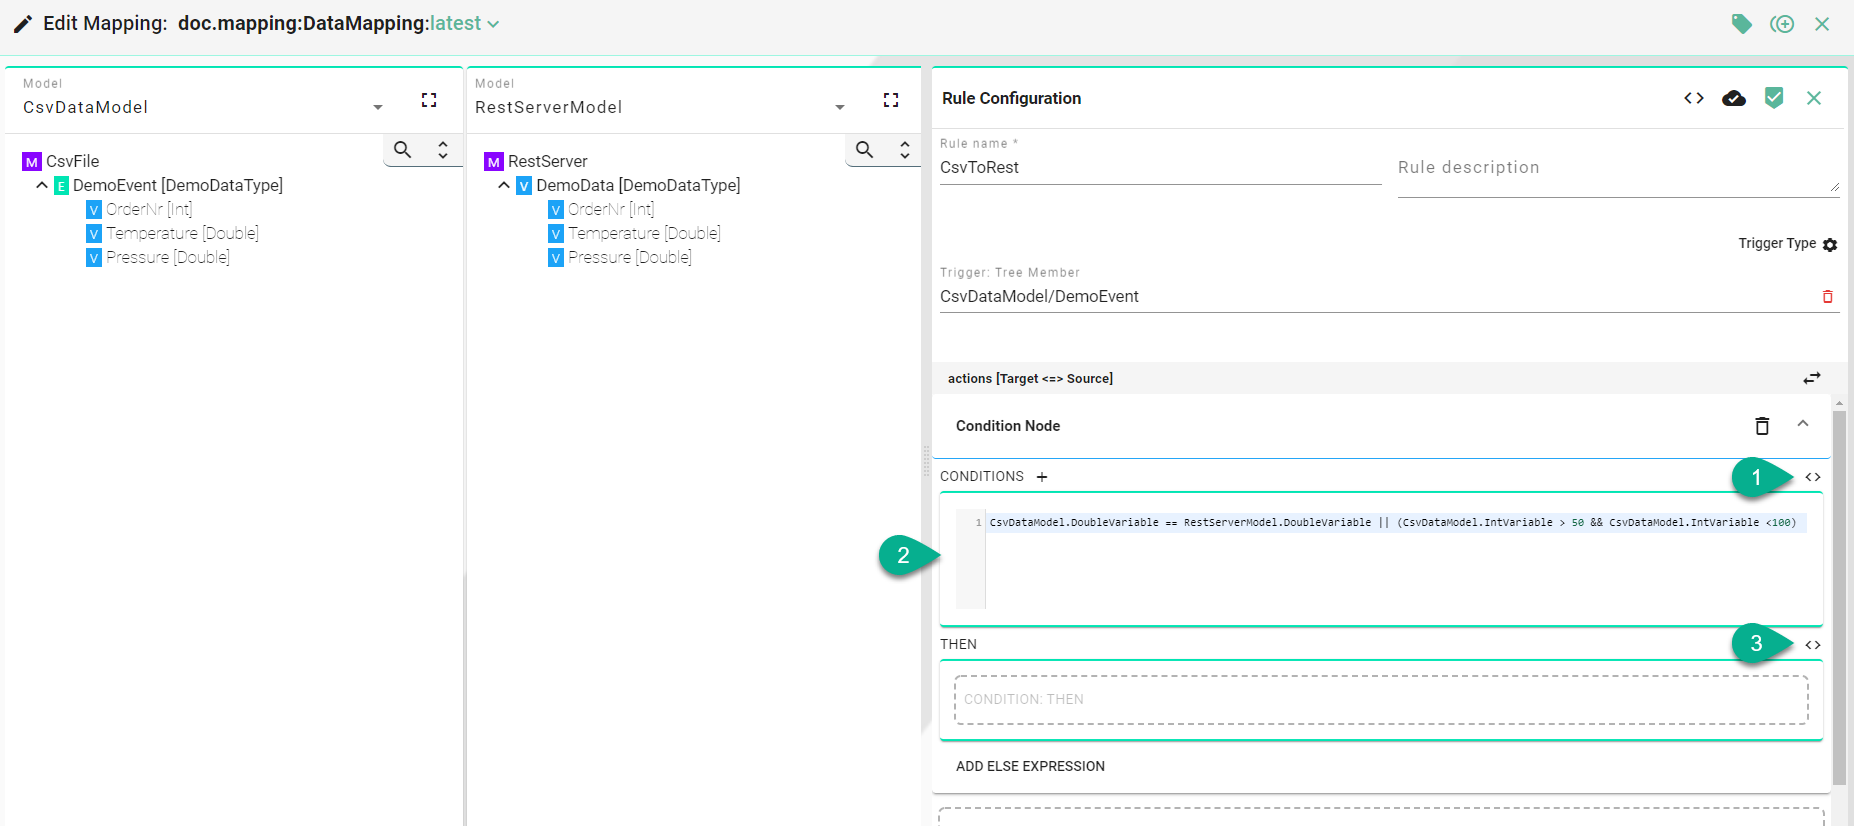
For the “THEN” section, either use drag and drop to add the target and source Information Model nodes, or click the “Source Code” button (3) to input code.
Multi Rule
The following screenshot displays the Multi Rule Editor. Here, no specific trigger can be set; instead, each source element from an Information Model behaves as a trigger. When a source element is updated, the assignment to the target element is performed.
Note
The Multi Rule configuration treats each source as a trigger.
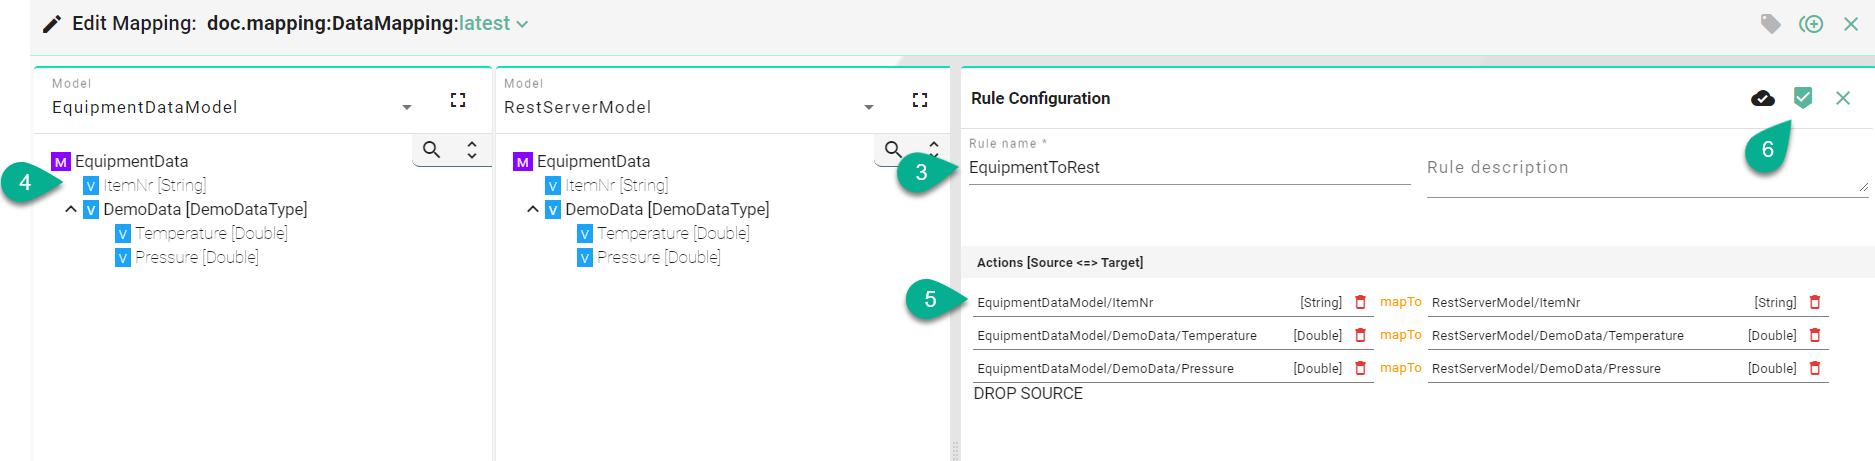
Enter “Rule name” (3).
Drag and drop the Source Information Model nodes (4) one by one into the Source field (5).
The Source and Target information must match on a one-to-one basis (e.g., String to String). Allowed nodes for Source and Target include Simple Variables and Variables from a Complex Variable.
After all mandatory fields are filled out, click the “Apply” button (6) to save the newly created rule.
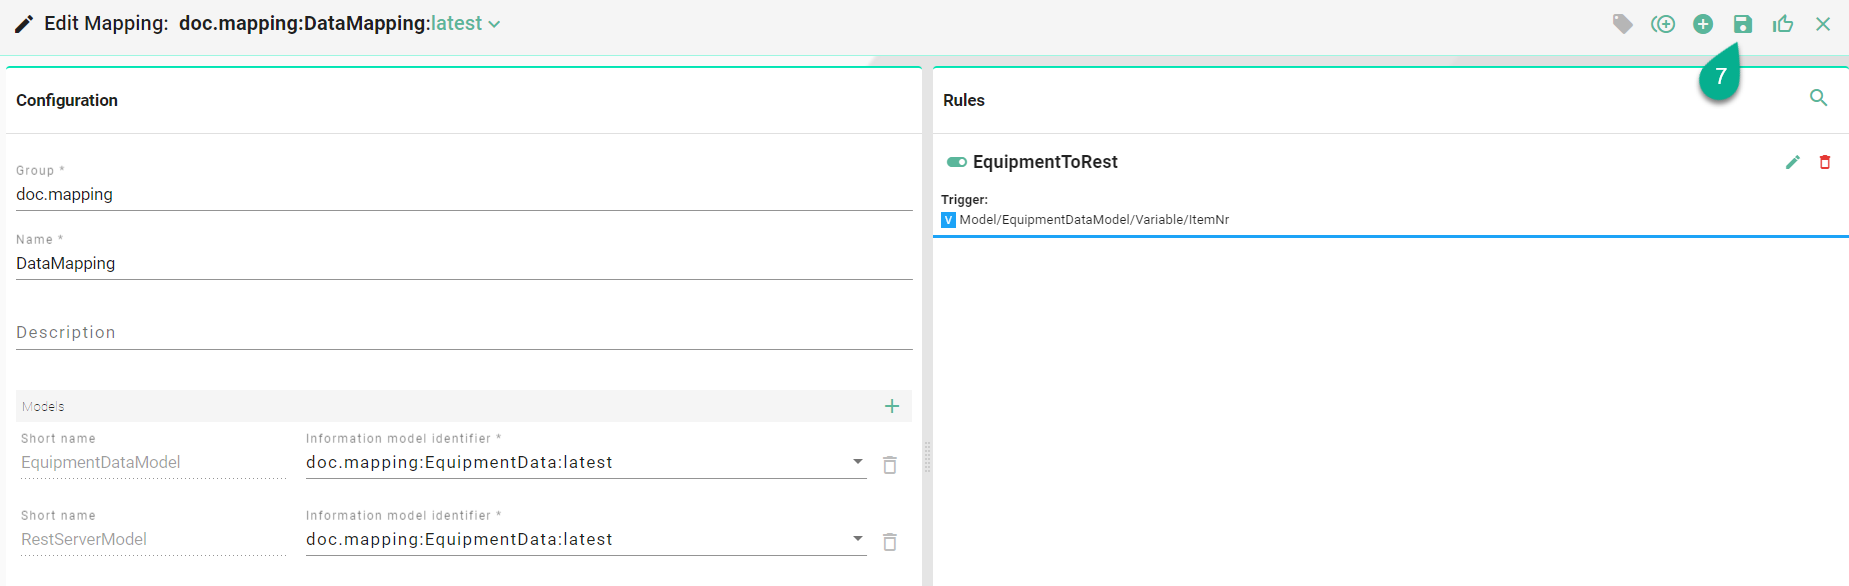
The Multi Rule Editor closes, and the newly created rule appears in the Rules List.
Click the “Save” button (7) located in the upper right corner to save the mapping.
Implicit Type Conversion
Within the graphical mapping, Variables and Properties of different data types are implicitly converted. For example, a variable of type String (1) can be assigned to a variable of type Double (2) without the need for manual data type conversion through code entry.

The table below outlines the implicit conversions supported:
Data Type |
Convertible To/From |
|---|---|
String |
Char, Byte, Short, Int, Long, Float, Double, LocalDateTime, OffsetDateTime, Boolean |
Long |
LocalDateTime, OffsetDateTime |
LocalDateTime |
OffsetDateTime |