Backup and Restore
SMARTUNIFIER provides the possibility to manually backup and restore the repository. The repository represents a central location in which all the configuration components are stored:
Information Models
Communication Channels
Mappings
Node Types
Instances
How to access
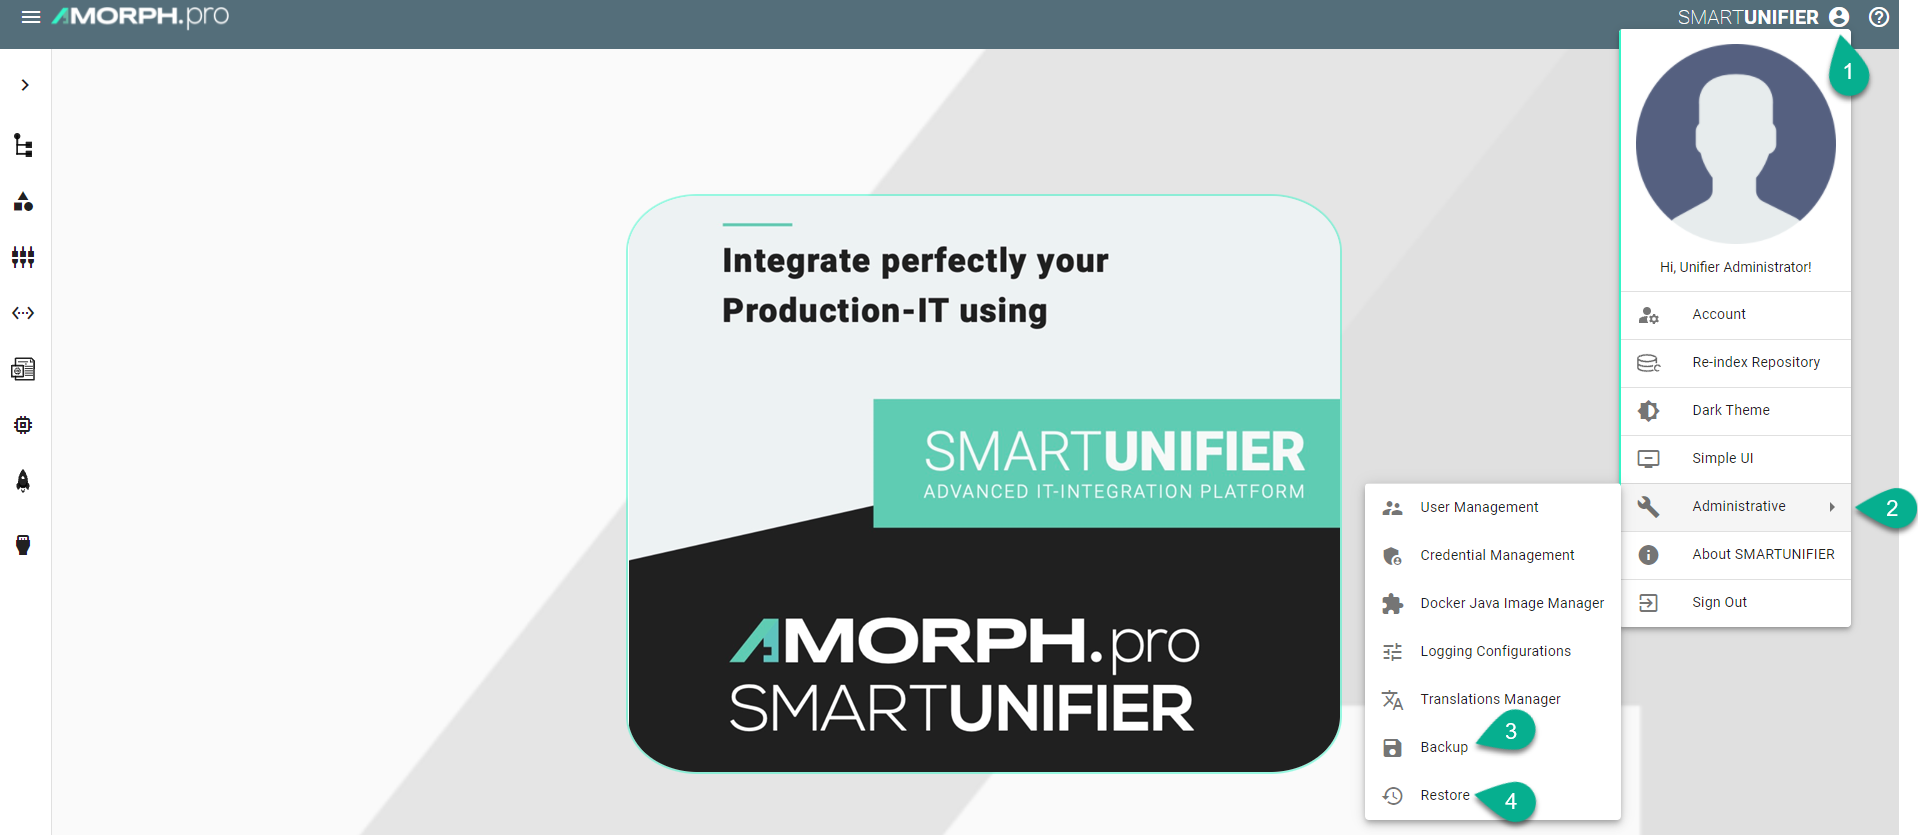
To access the Backup or the Restore option, click on the Account icon (1), go to the Administrative option (2) and select the Backup perspective (3) or the Restore perspective (4).
Note
The Backup and the Restore features can only be accessed by user accounts with an administrator role assigned. Also keep in mind that the same SMARTUNIFIER Manager version must be used.
Backup
The Backup feature provides the possibility to create a copy of the configuration components to store elsewhere, so that it can be used to restore the last used after a data loss event occurs.
Follow the steps described below to create a backup of the repository:
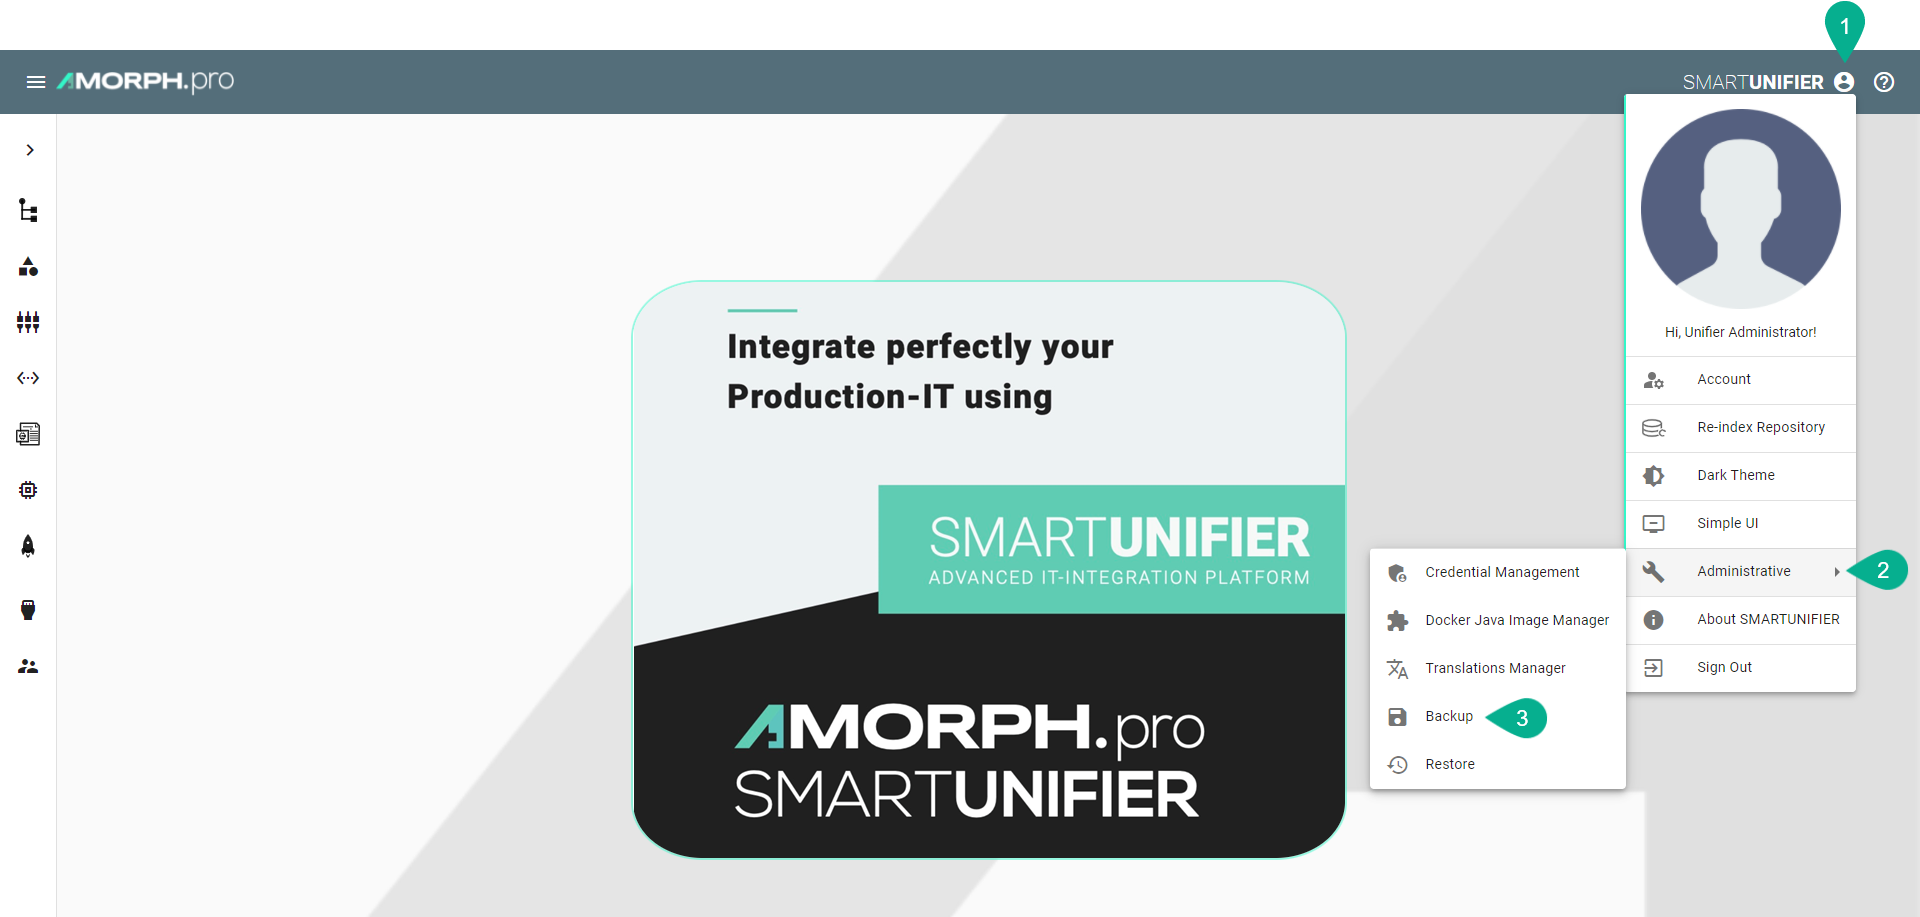
Select the Account icon (1), go to the Administrative section (2) and select the Backup option (3).
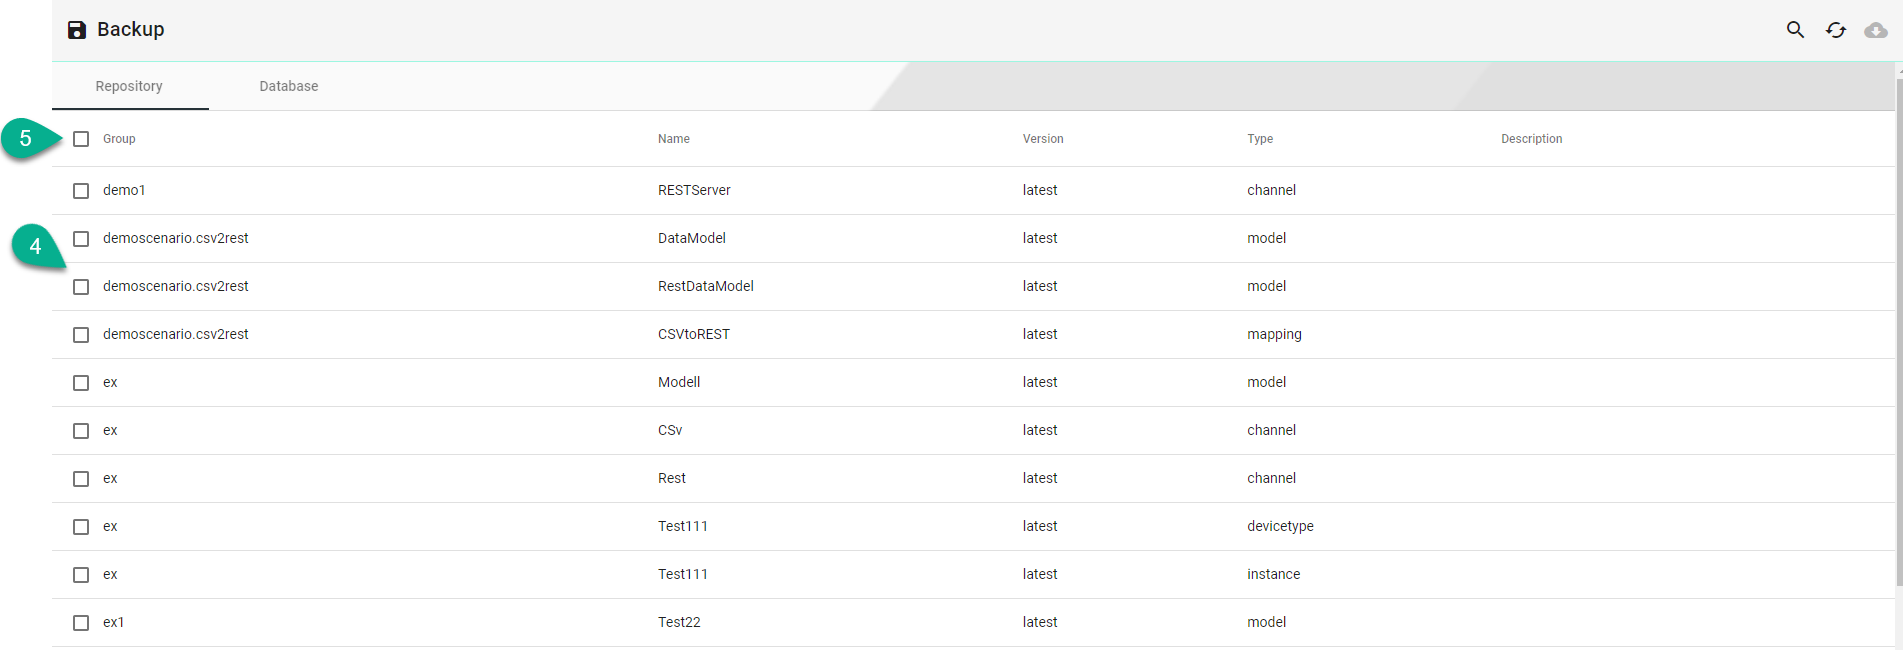
The configuration components (Repository) are visible. Check the boxes (4) to select what to backup or check the top box (5) to select all.
When the selected component has dependencies, a pop-up will appear and click on the Yes button (6) to select all the dependencies.

Click on the Database tab (7) and select the desired tables (8) for backup.
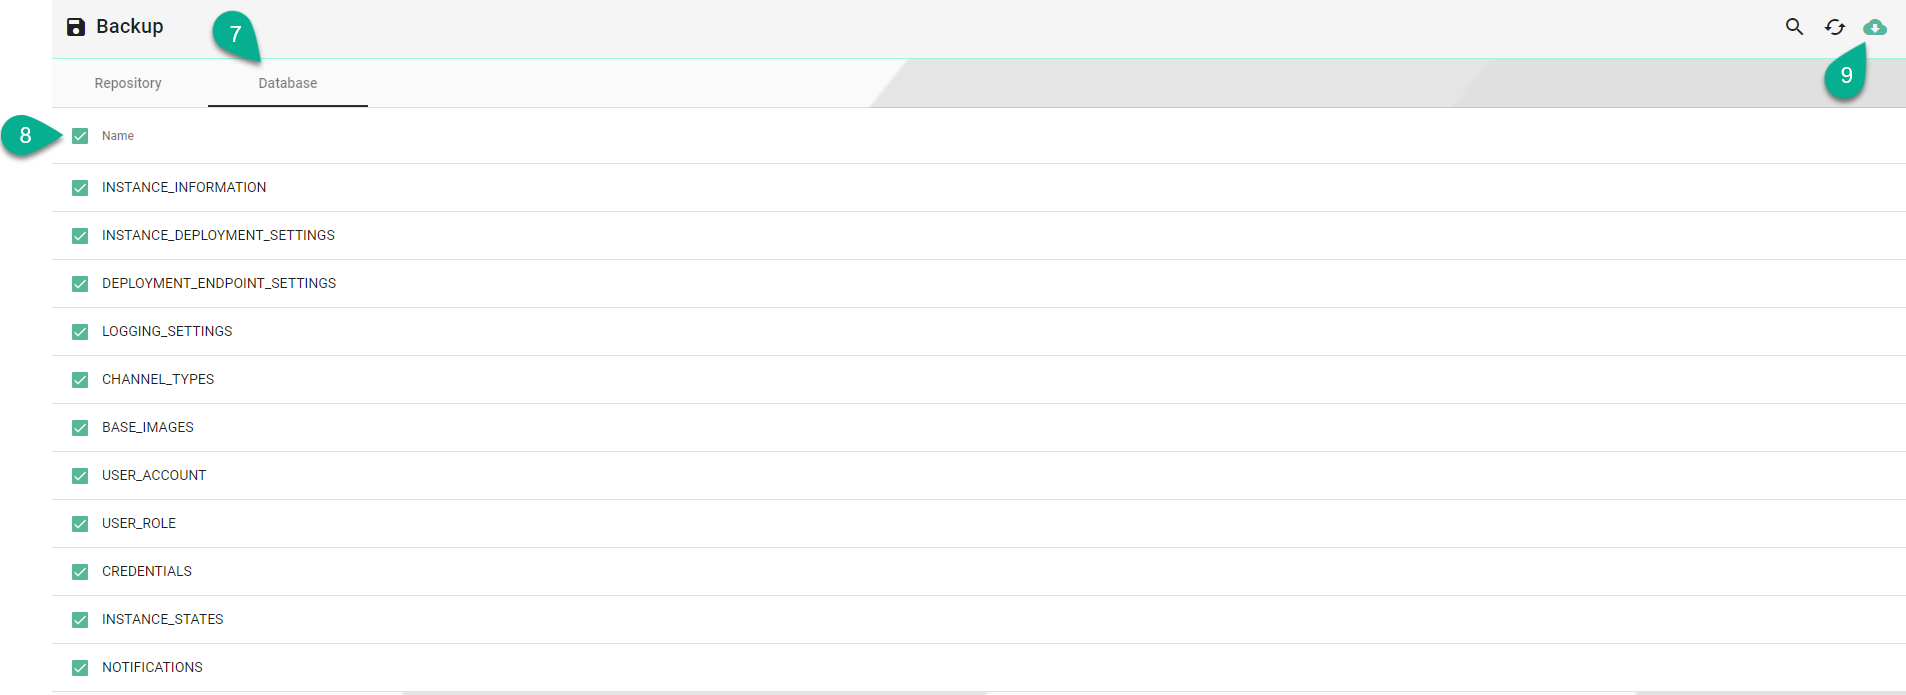
After the desired components are selected, click on the Backup button (9). Click on the Yes button (10) to confirm.

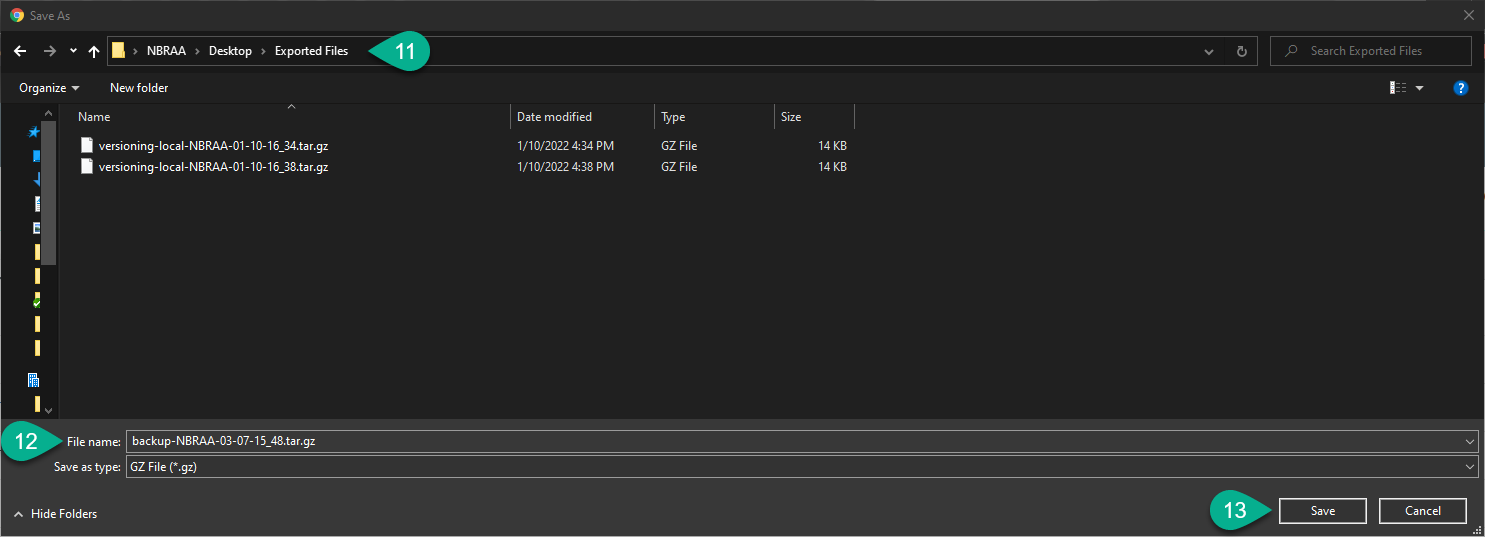
Choose the path (11) and the name (12) to save the repository TAR file then click on the Save button (13) to finish.
Restore
The Restore feature allows to copy the SMARTUNIFIER configuration components from a backup to the original location.
Note
When restoring, the existing configuration components will be overwritten by with the selected configuration components from the backup if the name match!
Follow the steps described below to restore the SMARTUNIFIER repository:
Select the Account icon (1), go to the Administrative section (2) and select the Restore option (3).

A pop-up appears, choose the TAR file to restore (4) and select the Yes button (5) to confirm.

The backup configuration components (Repository) are visible.
If needed, check the box (6) to delete all existing components, before restoring.
Check the boxes (7) to select what to restore or check the top box (8) to select all. Do the same for Database tab (9) if needed.

If a component from the current configuration (if any) has the same name as one from the backup, it will be overwritten.
When the selected component has dependencies, a pop-up will appear and click on the Yes button (10) to select all the dependencies.

After the desired components are selected, click on the Restore button (11).
The configuration components are uploading and all existing data will be overwritten!
The uploading progress is displayed, including errors, if any.
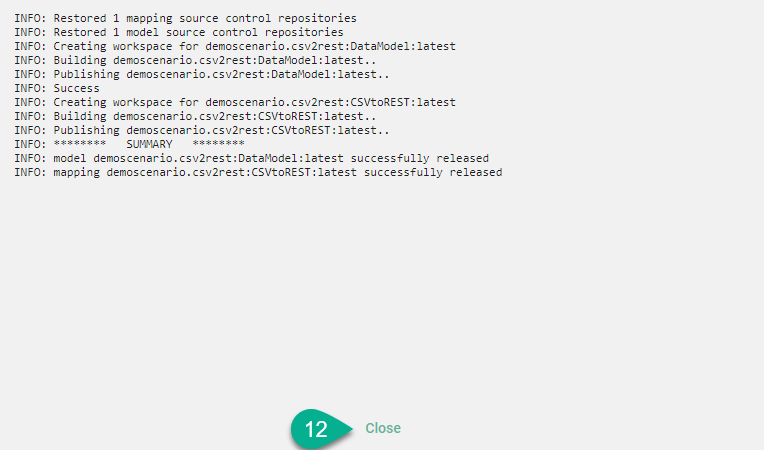
Click on the Close button to finish (12).
Manager Backup
In order to backup SMARTUNIFIER Manager make a copy of the SMARTUNIFIER installation package.
Before the backup make sure to remove the following directories:
temp
workspace
log
deploy
