Run the Instance
The communication between the Rest Server and the Influx DB is facilitated by two SMARTUNIFIER Instances.
First add each Instance to a local deployment:
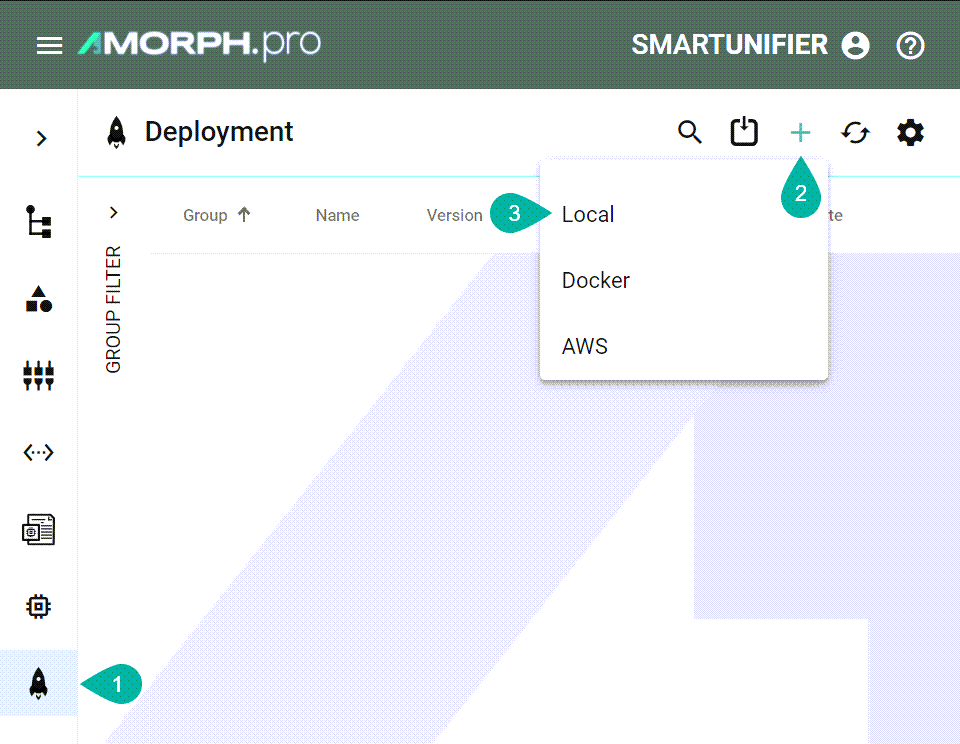
Open “Deployments” section (1).
Click on the “Add” button (2).
Select the “Local” option (3).
Select the “Instance” from the dropdown (4).
Select “Info” from the “Log File Configuration” dropdown (5).
Check the box for “Enable Encryption” (6) to have all the credentials encrypted in the configuration files.
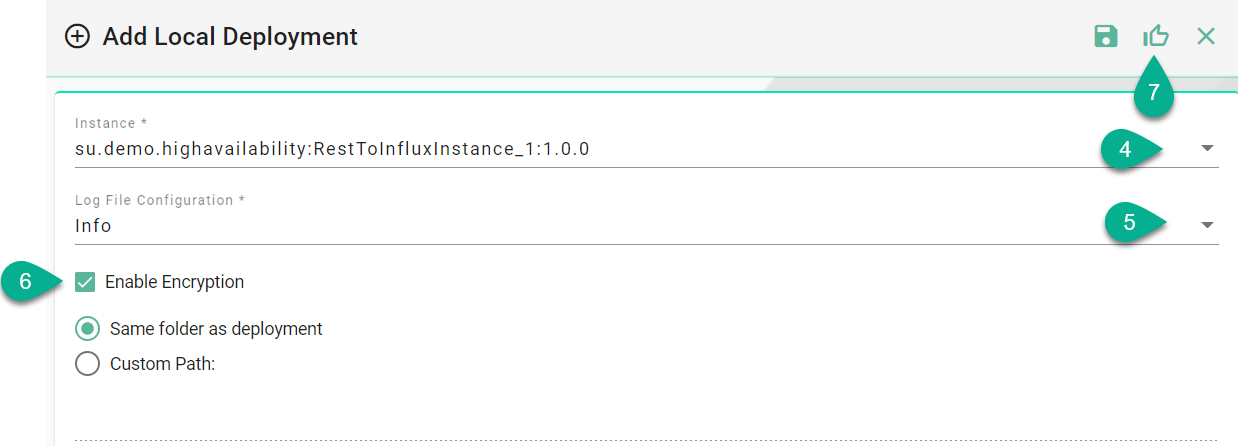
Click the “Save and Close” button (7).
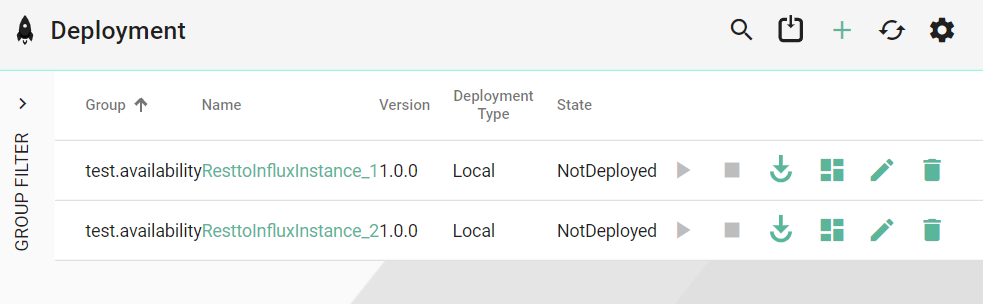
The first Instance is added, follow the steps above to add the second Instance.
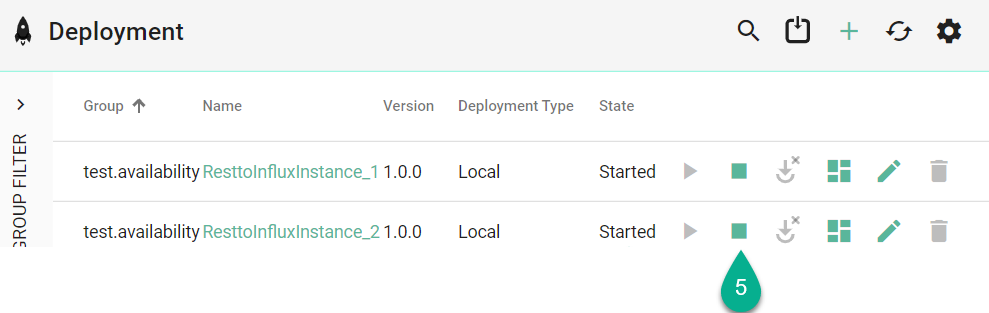
Then run each Instance:
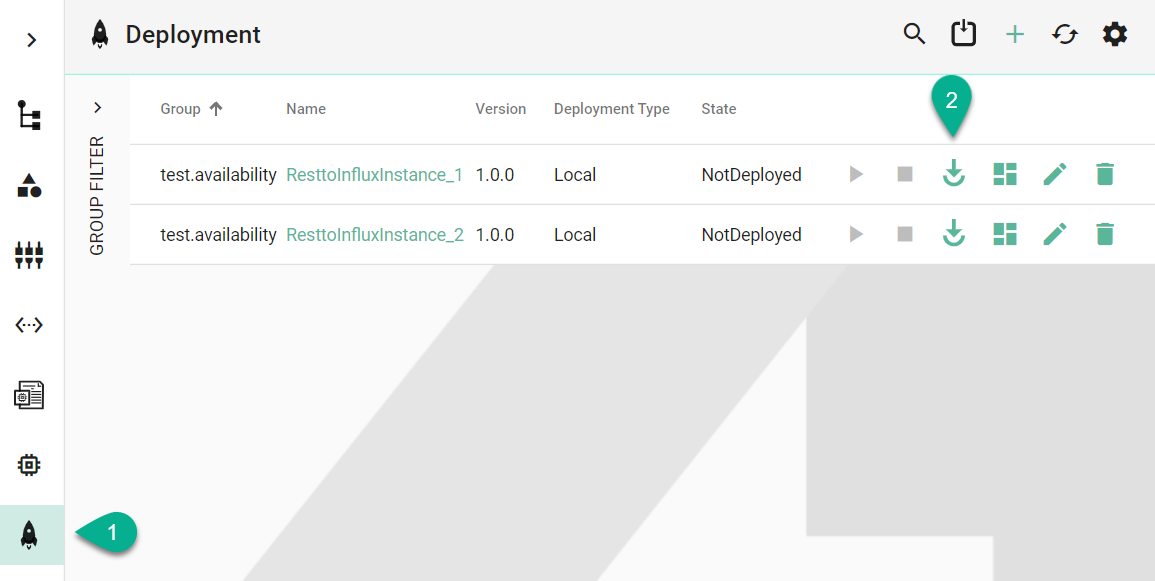
Open the “Deployments” section (1).
Click the “Deploy” button (2) for each Instance.
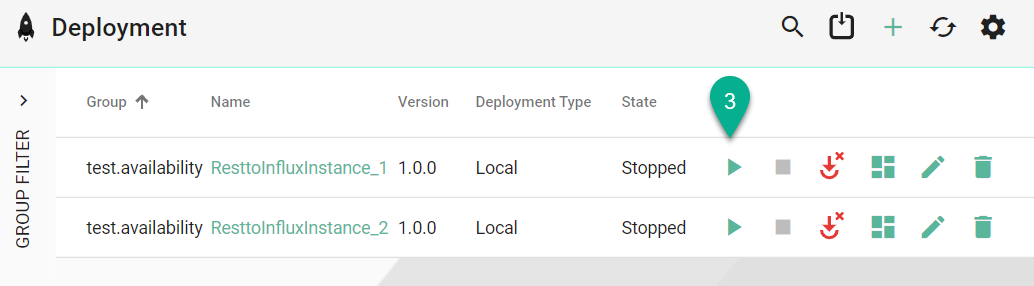
Click the “Start” button (3) to run each Instance.
The Instances are running (4).
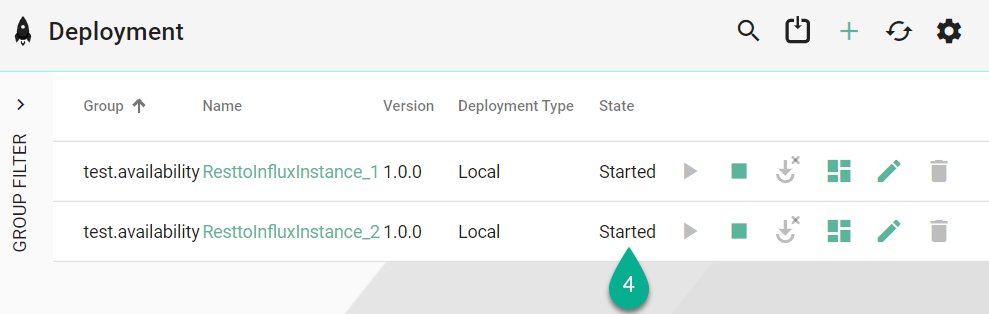
To stop an Instance click on the “Stop” button (5) as seen below.