Graphical
How to create a Rule
Follow the steps described below to create Rules:
Select the “Edit” button (1).

Select the “Add Rule” button at the top right corner (2).
Two options are available:
Single Rule
Multi Rule

Single Rule
The following screenshot shows the Single Rule Editor. The Rule contains the following components: Name, Trigger and the Action with it’s Source to Target assignments.
Note
The Single Rule includes only one Trigger.
Enter “Rule name” (3).

Select the “Trigger Type” (4):
Tree Member - rule with an Information Model tree member as trigger
Fixed Rate Scheduler - rule with a time based trigger, using a Cron Expression
Fixed Delay Scheduler - rule based on a scheduled delay
Trigger Types
Tree Member
Drag and drop the Trigger from the model panes (1) into the trigger field (2).

Fixed Rate Scheduler
Input a “Cron Expression” (1) to set the time based trigger. (E.g.,
0 */5 * ? * *meaning the trigger is set at every 5 minutes).

Fixed Delay Scheduler
Input the trigger “Initial start Delay” (1), the “Period” delay (2) and the “Unit” (3).

Actions
Drag and drop the Target Information Model node (5) into the Target field (6).

A popup appears to select the assignment type:
Simple - the assignment is made at the Information Model node level
Complex - the assignment is made at the Information Model node children’s level

Simple Assignment
Drag and drop the Source Information Model node (7) into the Source field (8). The Source and the Target node data type must be matched one on one (e.g., DemoEventType to DemoEventType).

Complex Assignment
Drag and drop the Source Information Model node children’s (7) one by one into the Source field (8). The Source and the Target information must be matched one on one (e.g., String to String).

After all mandatory fields have been filled out, select the “Apply” button (9) to save the newly created Rule.
The Single Rule Editor is closed and the newly created Rule is displayed in the Rules List.
Select the “Save” button placed in the upper right corner to save the Mapping.

Actions with Conditions
Click on the “Add condition block” button (1).
Drag and drop a tree member (2) and (3).
Select the condition operator (4).
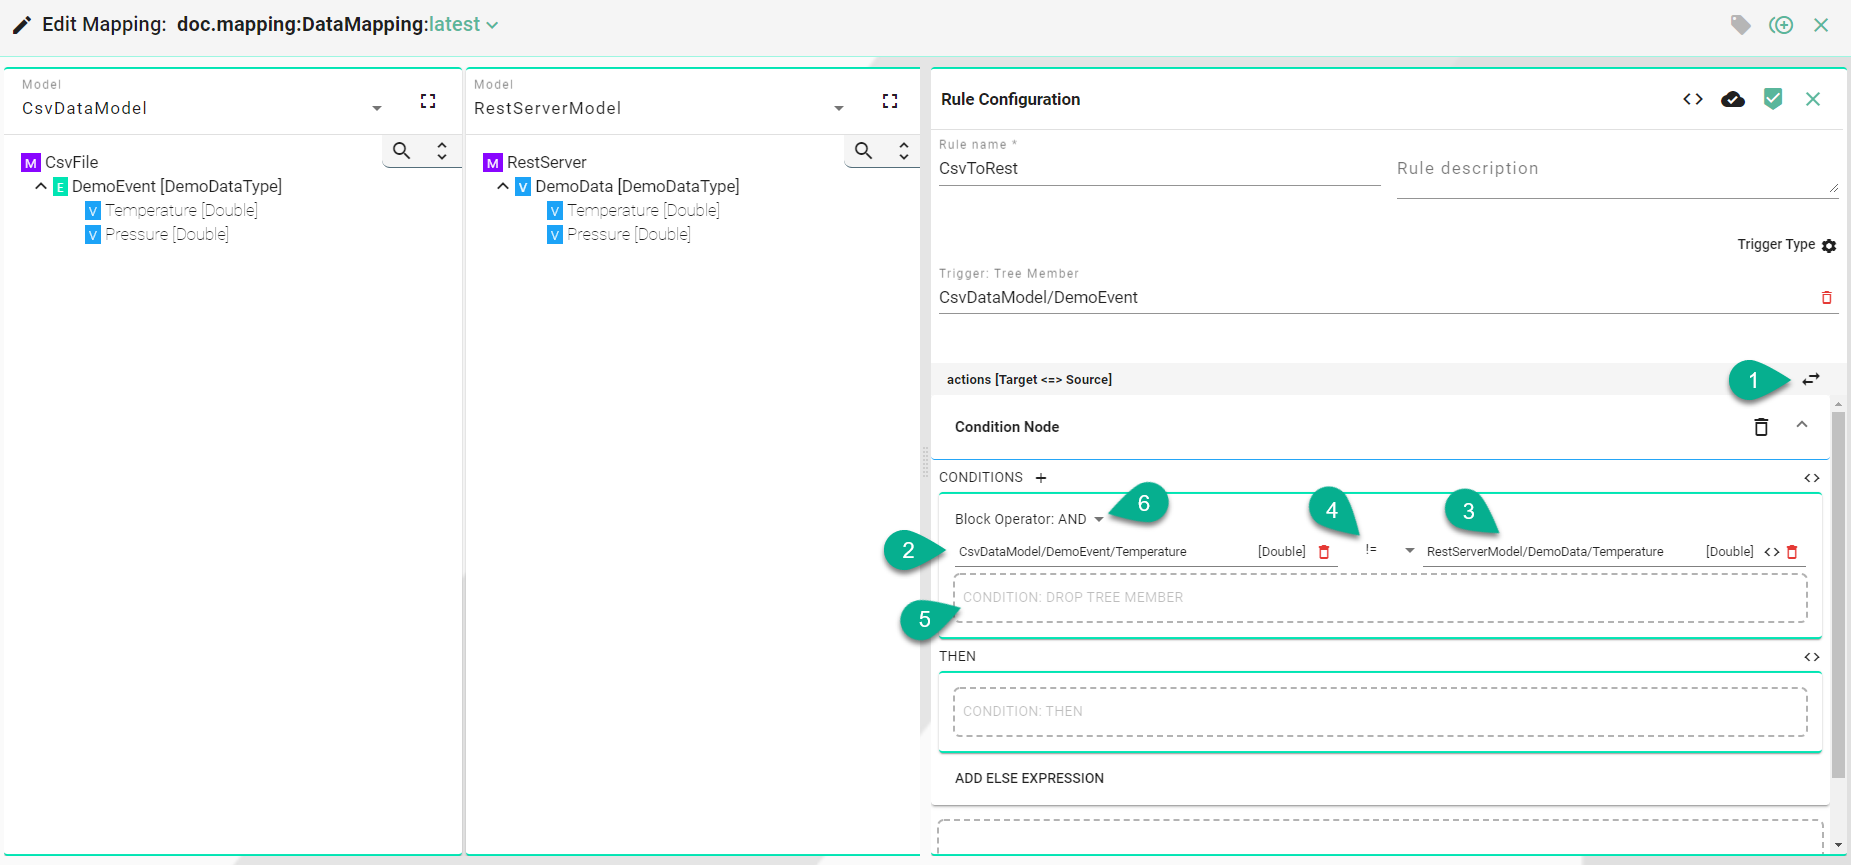
To add multiple conditions (5) select the block operator (6).
Click on the “Literal Node” button (7) to use as a definition node a value (e.g., Integer) instead of a tree member.
Input a value (8).
Select the condition operator (9).
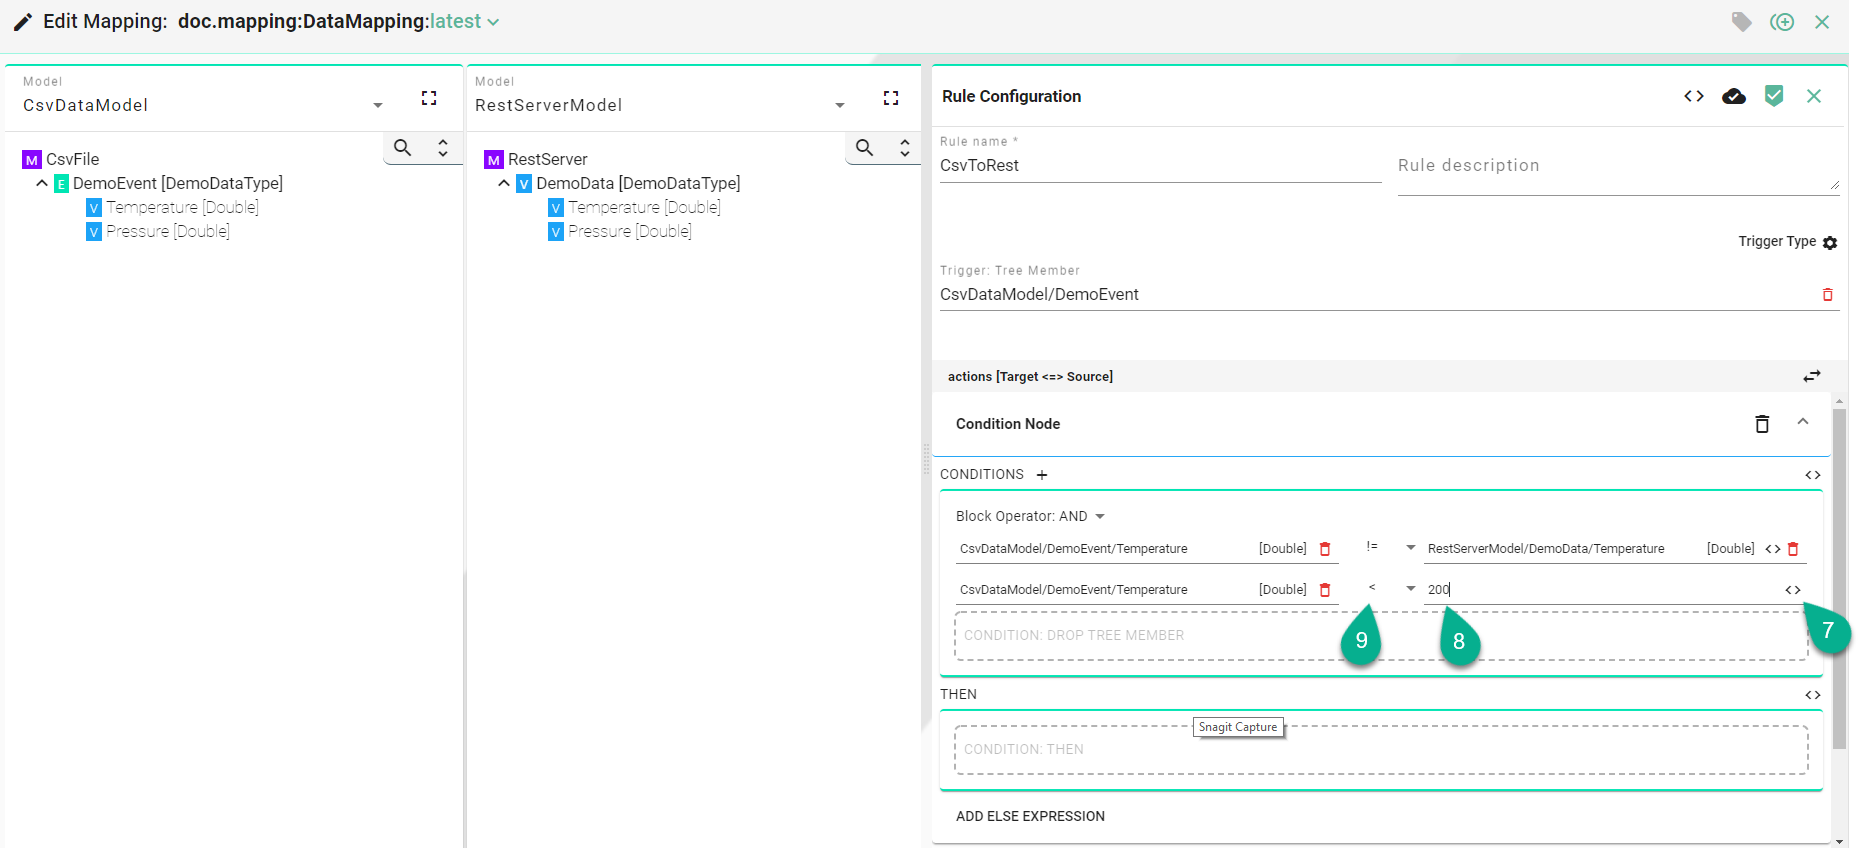
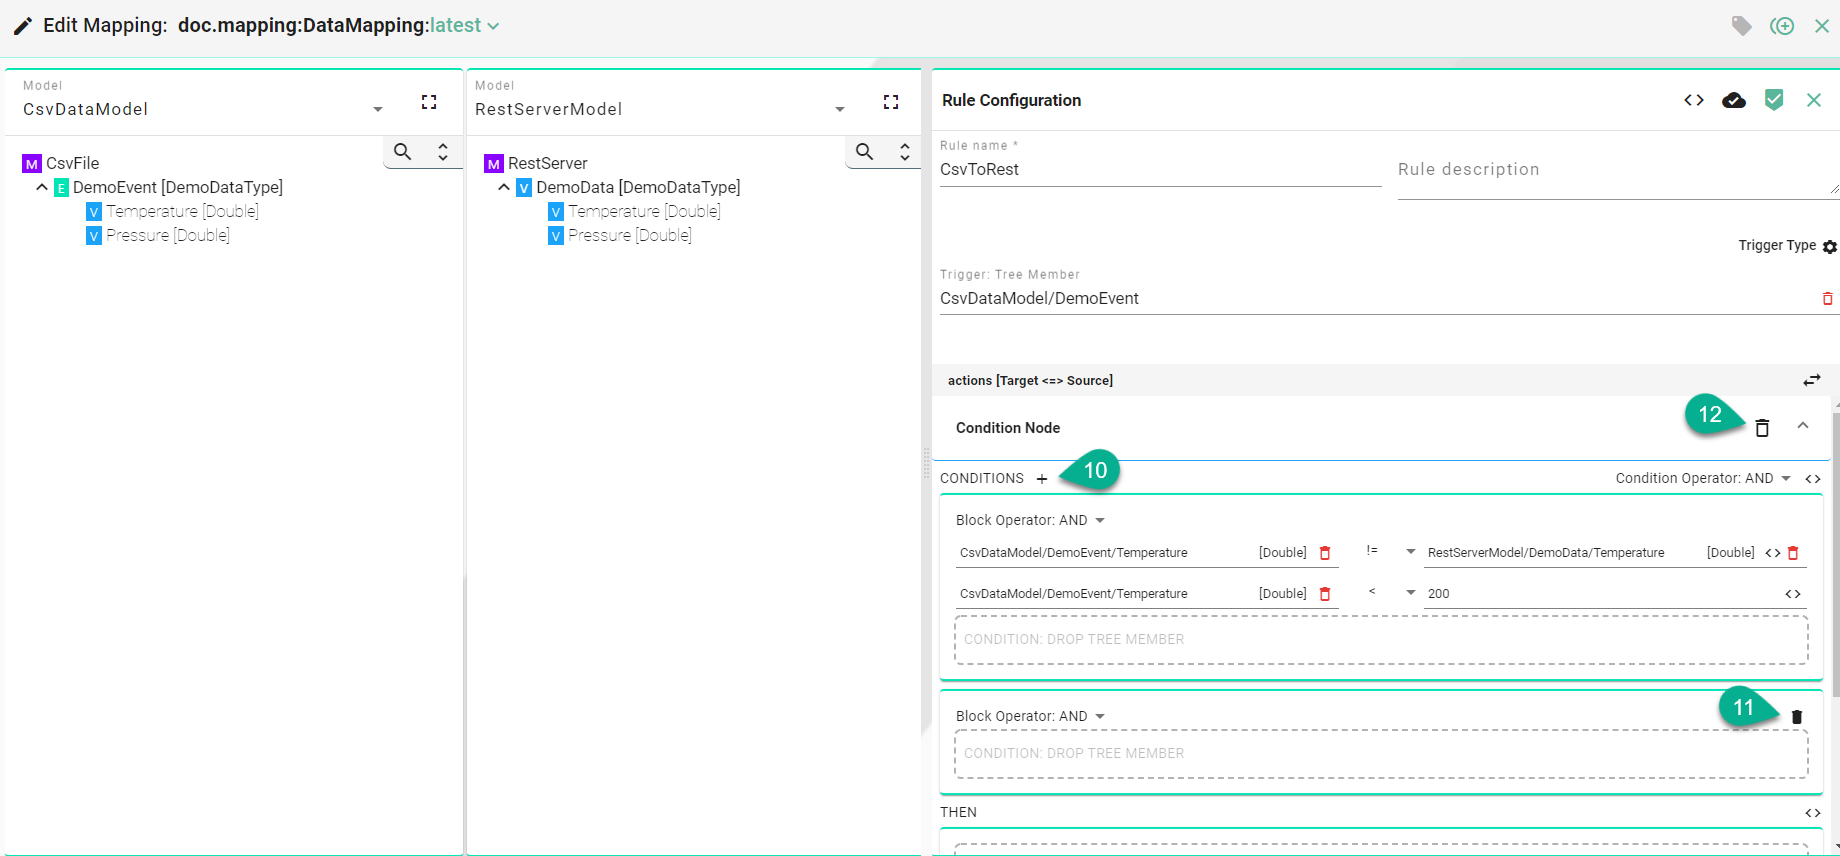
Click on the “Add Condition Block” button (10) to add a new one.
Click on the “Delete Condition Block” button (11) to remove a condition block and select the “Delete” button (12) to remove the condition.
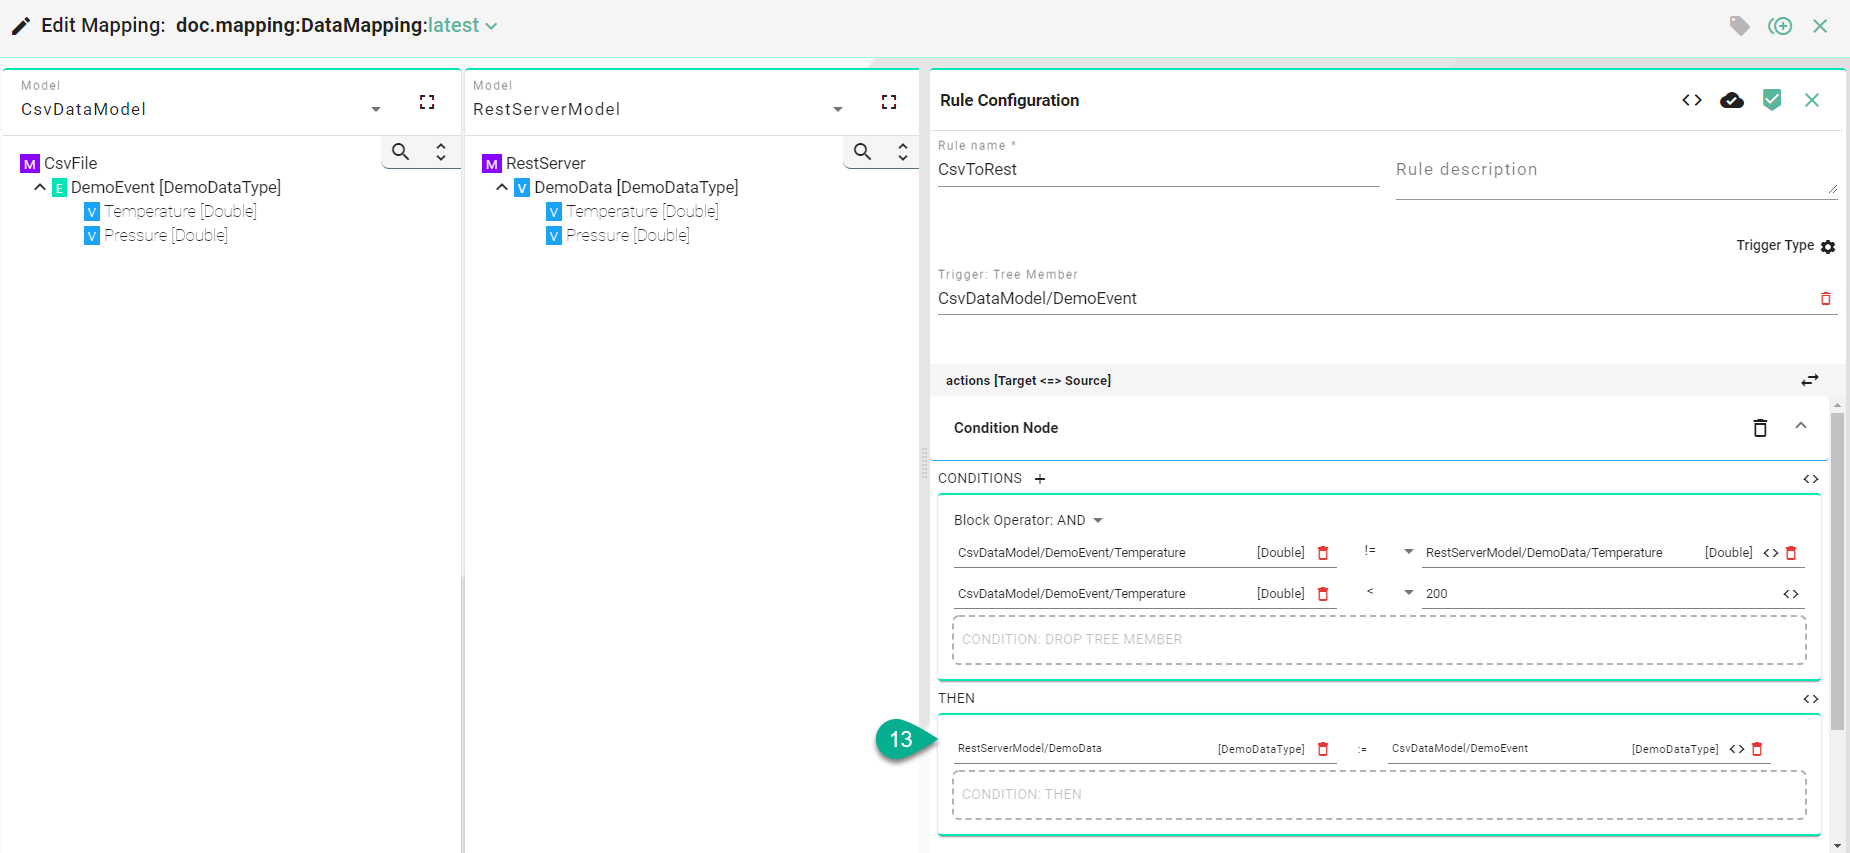
In the “THEN” (13) section, drag and drop the Target and Source Information Model nodes, using either the simple or the complex assignment.
Actions with Custom Conditions
Click on the “Source Code” button (1).
Input code for a complex condition (2).
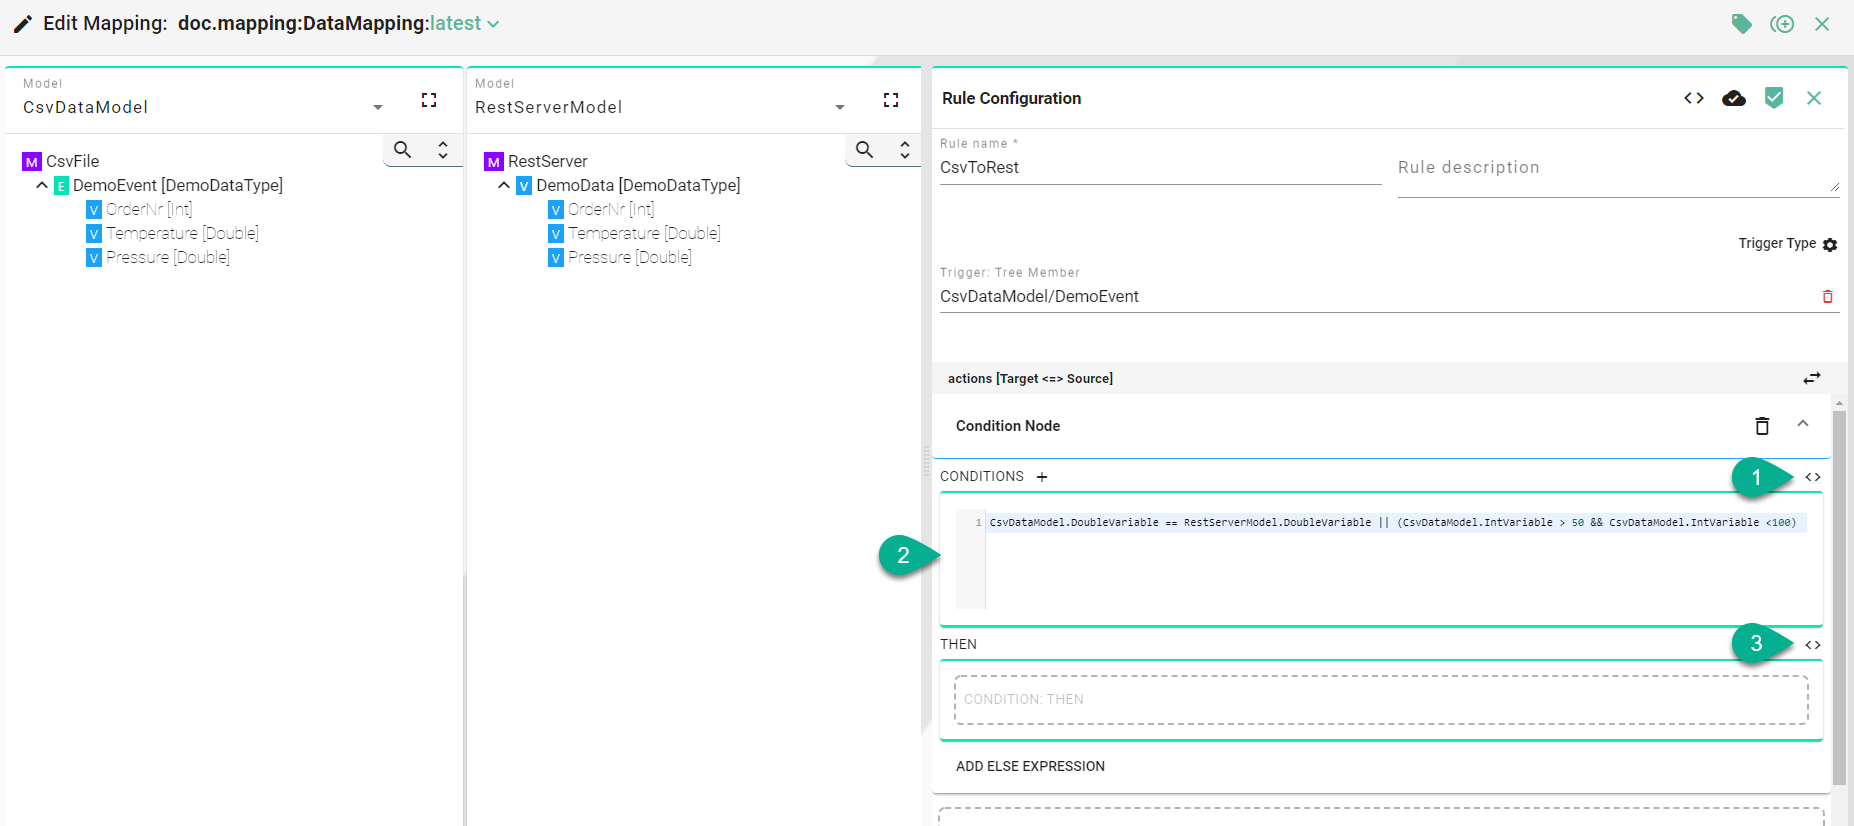
For the “THEN” section use drag and drop or click the “Source Code” button (3) to input code.
Multi Rule
The following screenshot shows the Multi Rule Editor. The Rule contains the following components: Name and the Actions with it’s Source to Target assignments.
Note
The Multi Rule configuration considers each Source as a Trigger.
Enter “Rule name” (3).
Drag and drop the Source Information Model nodes (4) one by one into the Source field (5).
The Source and the Target information must be matched one on one (e.g., String to String). Allowed nodes for Source and Target: Simple Variables and Variables from a Complex Variable.
After all mandatory fields have been filled out, select the “Apply” button (6) to save the newly created Rule.

The Multi Rule Editor is closed and the newly created Rule is displayed in the Rules List.
Select the “Save” button (7) placed in the upper right corner to save the Mapping.
