Operations
SMARTUNIFIER provides a comprehensive management of the configuration components.
In the View Mode, the following options are available:
Group Filter
Search
Import
Add
Reload
Sort
Group Filter
With the Group Filter it is possible to restrict the number of components according to the substrings in the Group.
The Group Name contains substrings separated by a dot “.”. The Group Filter is then able to visualizes the Group Names in a hierarchical structure.
The Show All filter enables the view of all components (1).
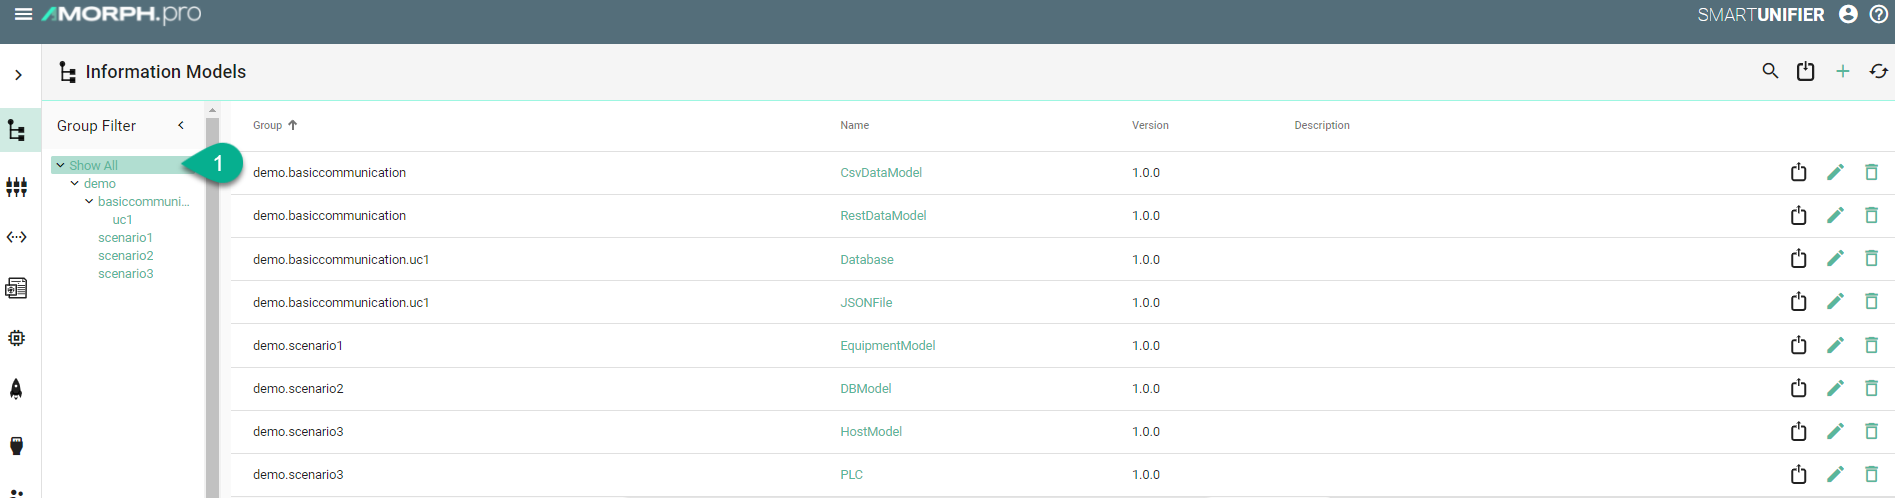
In order to apply a filter, click one of the item in the Group Filter list (2). At the top of the table, the selected filter is visible (3).

Removing the filter is possible by either clicking the selected item again, selecting the Show All option or by clicking the cross in the filter at the top of the table.
Search
- The Search option allows the user to filter results by different criteria:
Name
Version
Description
The search is not key sensitive and it works as a partial search, displaying all the results matching with the searched characters.
To search for a component, select the Search button (1) from the upper right corner.

Enter a search term (2).

To cancel the search click on the Close Search button (3).

Import
This option allows the user to add to the scenario a new created or an exported component.
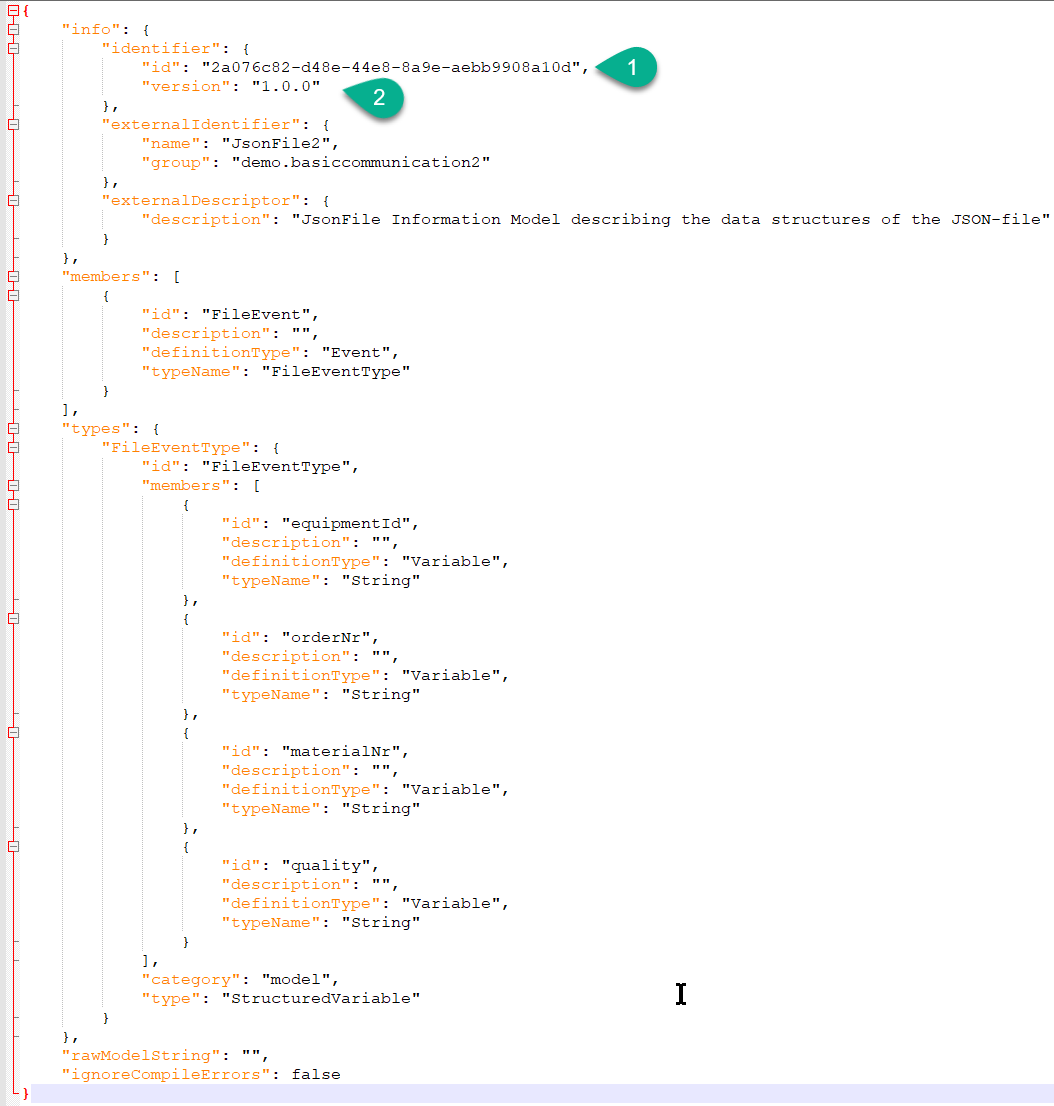
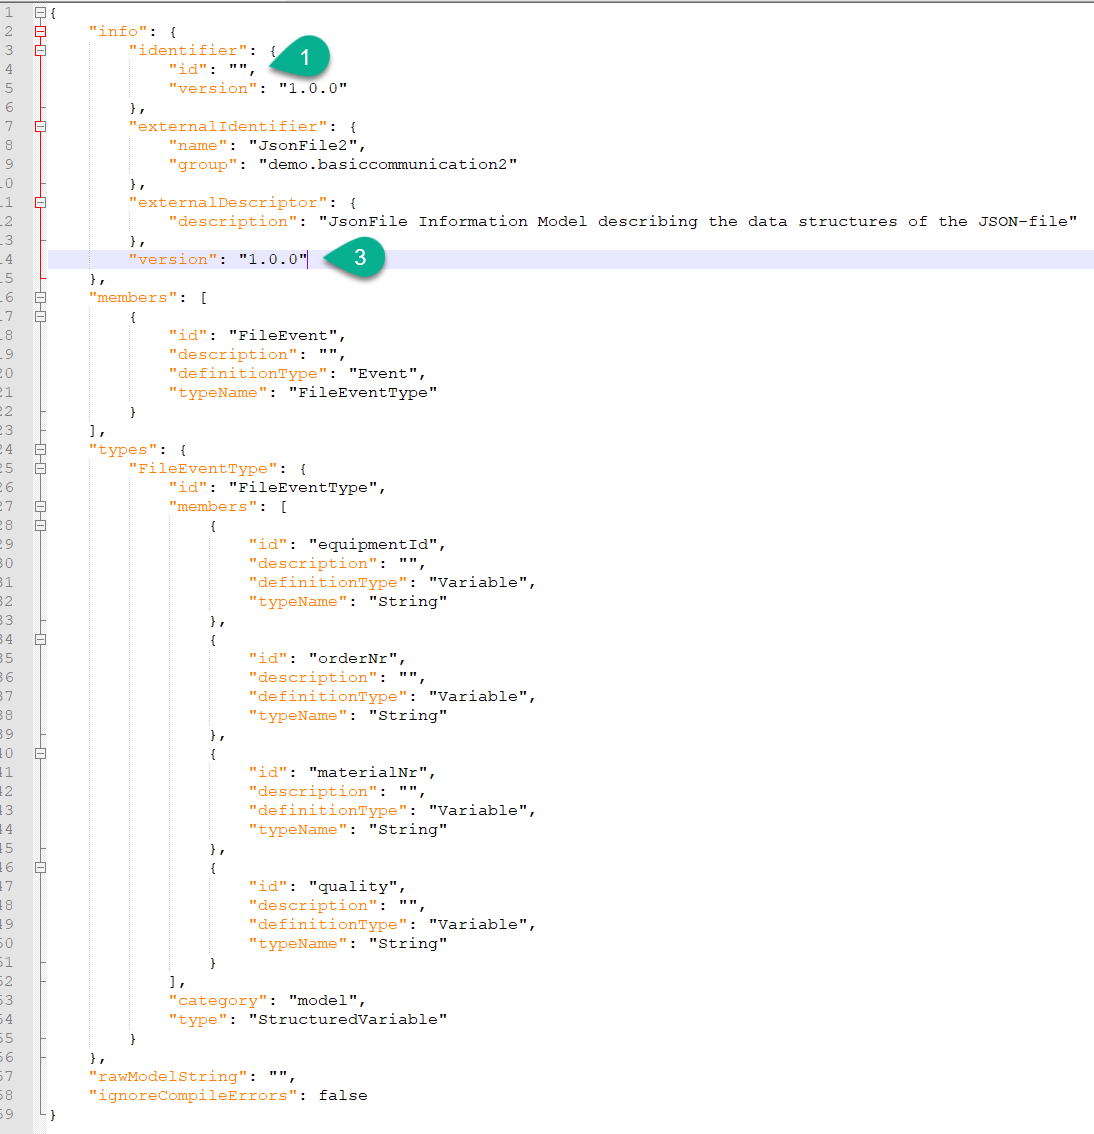
Before importing an exported component, open the JSON file and delete the component id (1) - when importing the database will generate a universally unique identifier (uuid). Also, copy (2) and paste (3) the version in the info section, as shown bellow.
To import, select the Import button (4) from the upper right.

A pop-up window appears. Chose the file (5) and select the Open button (6).
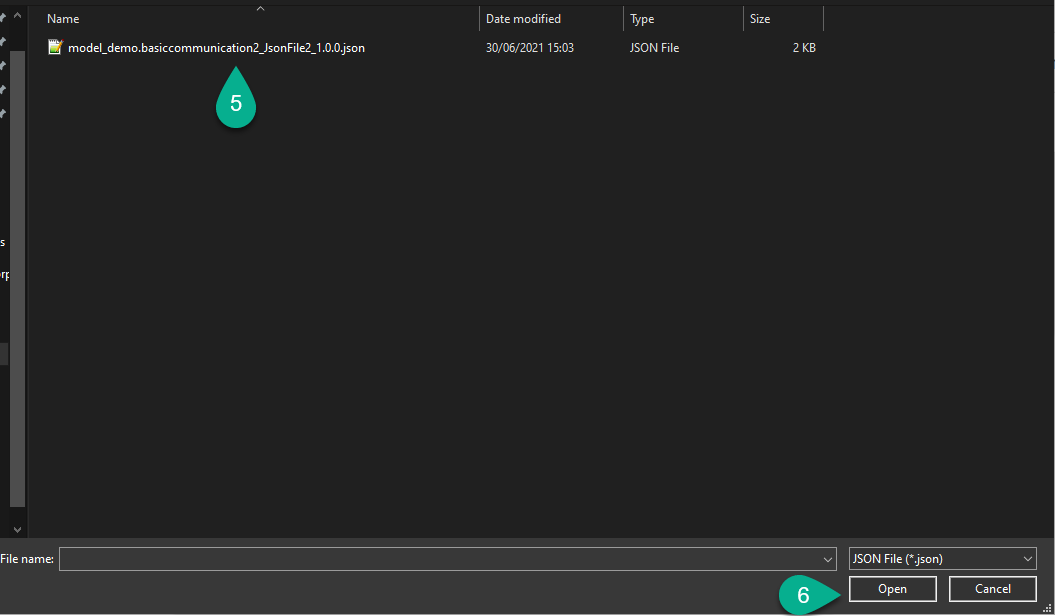
The imported component is now listed (7).

Add
- The option to add/create a new component is described in the Instance Setup chapter, for each type:
Reload
This option reloads the components from the repository by selecting the Reload button (1) from the upper right.

Sort
- The information in the view mode can be sorted ascending or descending for each column:
Group
Name
Version
Description
To sort the information from a column click on the column header (1). An arrow icon will indicate if the components are sorted ascending or descending.

- In the view mode on the right of each component, the following operations are available:
Export
Edit
Delete
Export
The user has the option to export a component to the local machine.
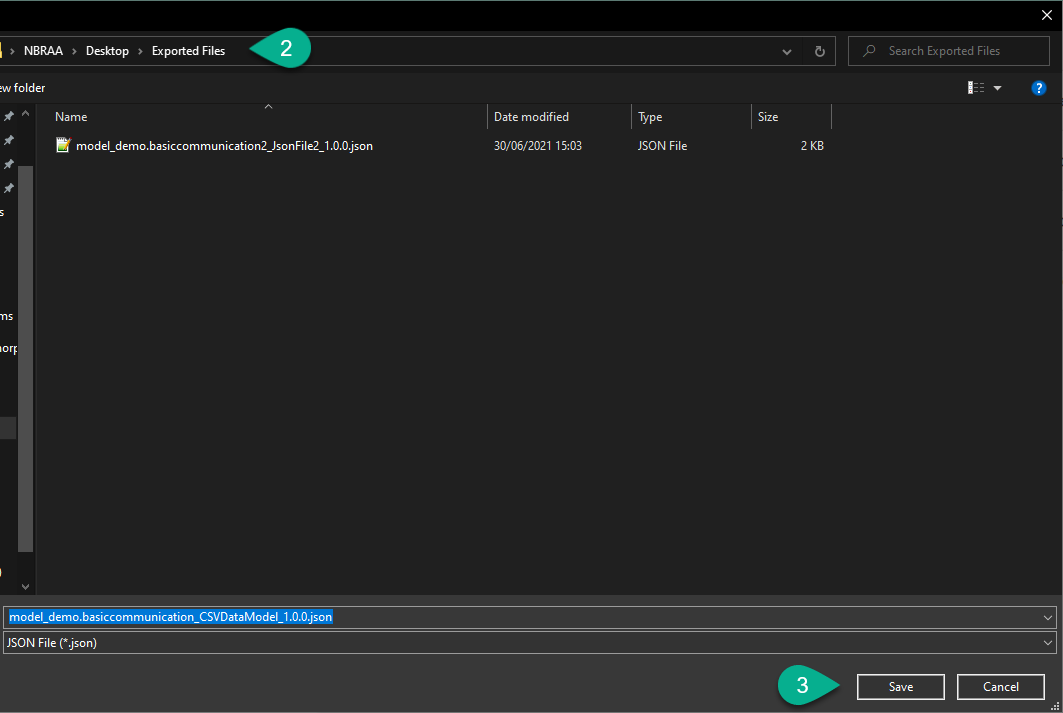
First, click on the Export button (1).

Choose a location for the file (2) and select the Save button (3).
Delete
A component can be deleted by clicking the Delete button (1).

Select Delete on the confirmation dialog (2).
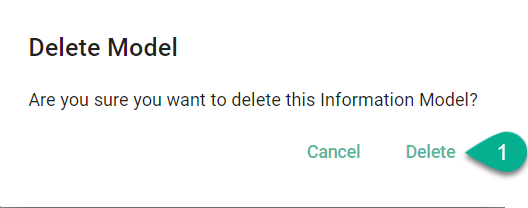
The component is deleted.

Edit
A component can be edited by clicking the Edit button (1).

The component is opened in the edit mode.

- In the edit mode, the following operations are available:
Clone
Apply
Save
Save and Close
Close
Clone
A component can be cloned from the edit mode, by selecting the Clone button. (1).

A pop-up appears, if needed change the version (2) and click on the Ok button (3).
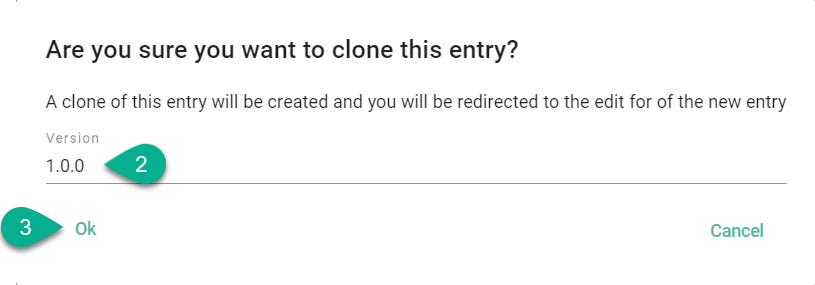
The cloned component is visible, in edit mode, requiring to input a valid name (4)
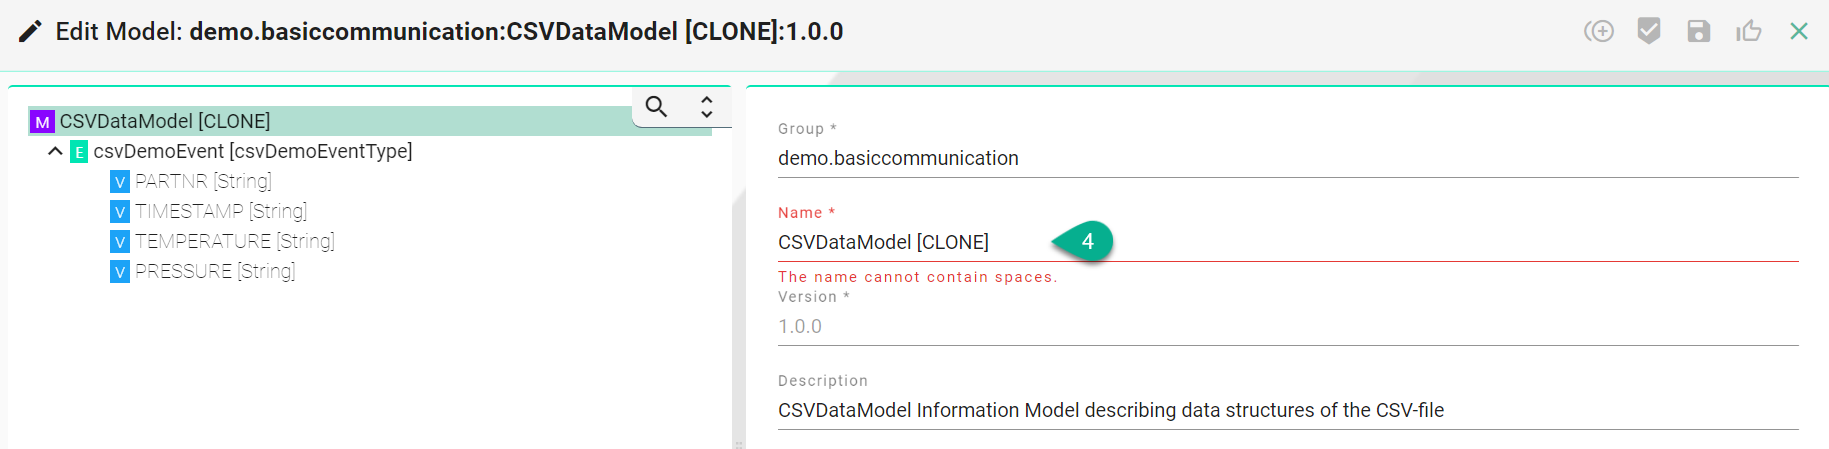
Note
The Clone operation is not available for the Deployment component.
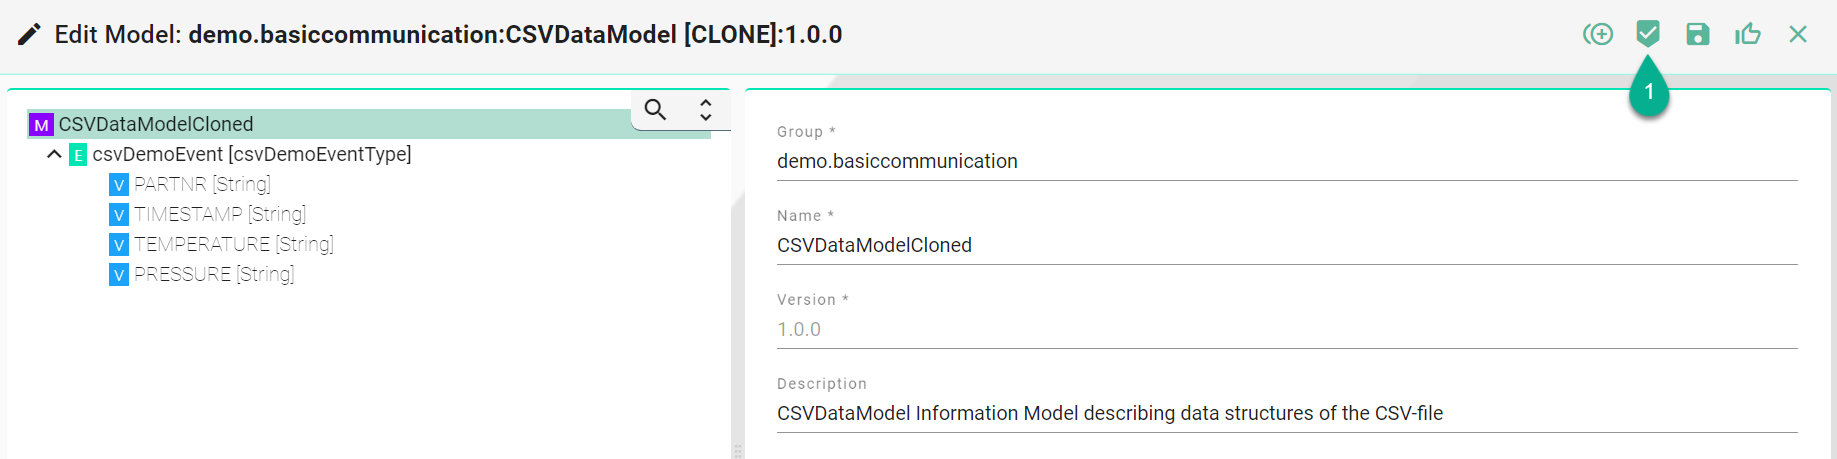
Apply
In the edit mode, after a new data input the Apply button (1) must be selected to validate/compile data.
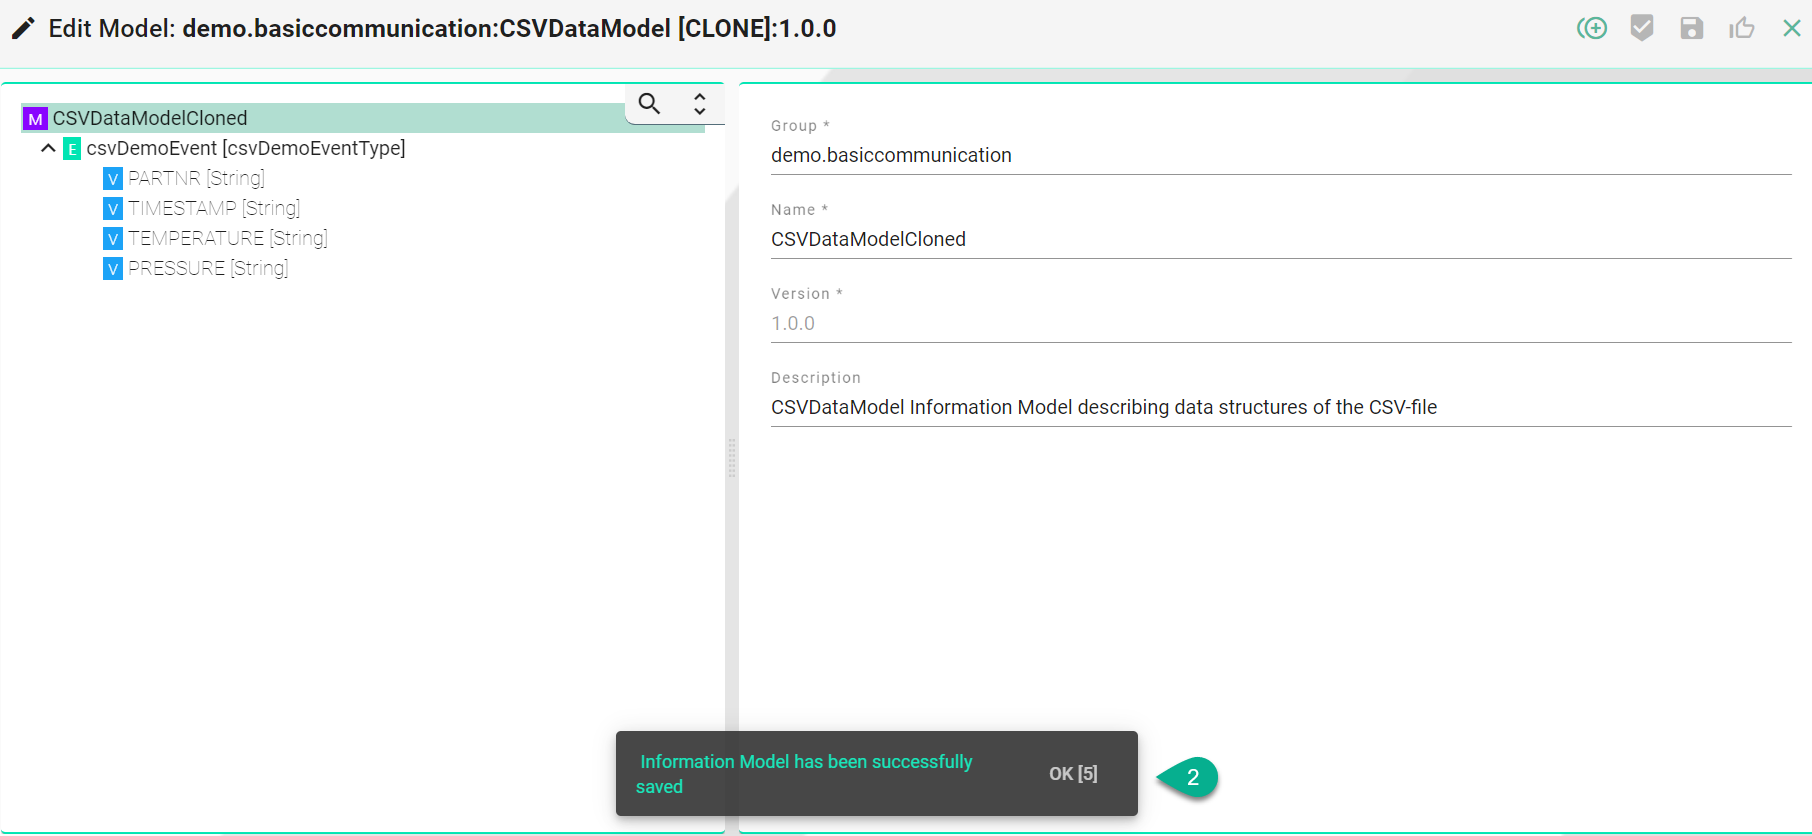
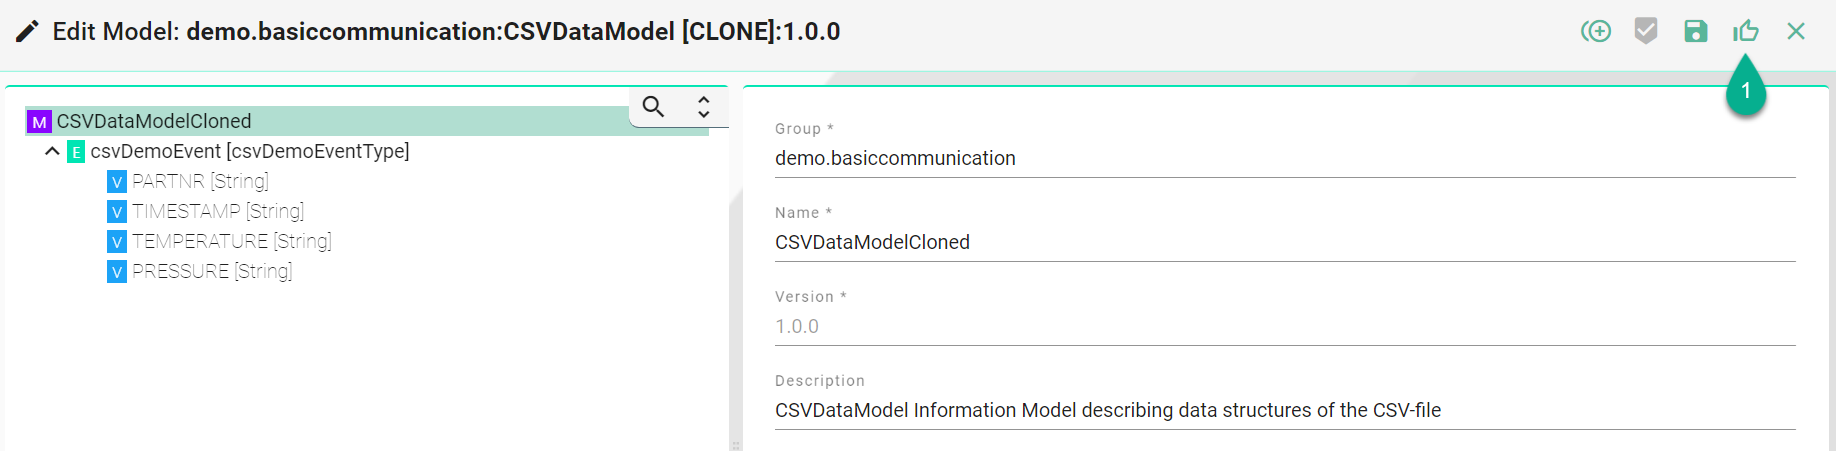
Save
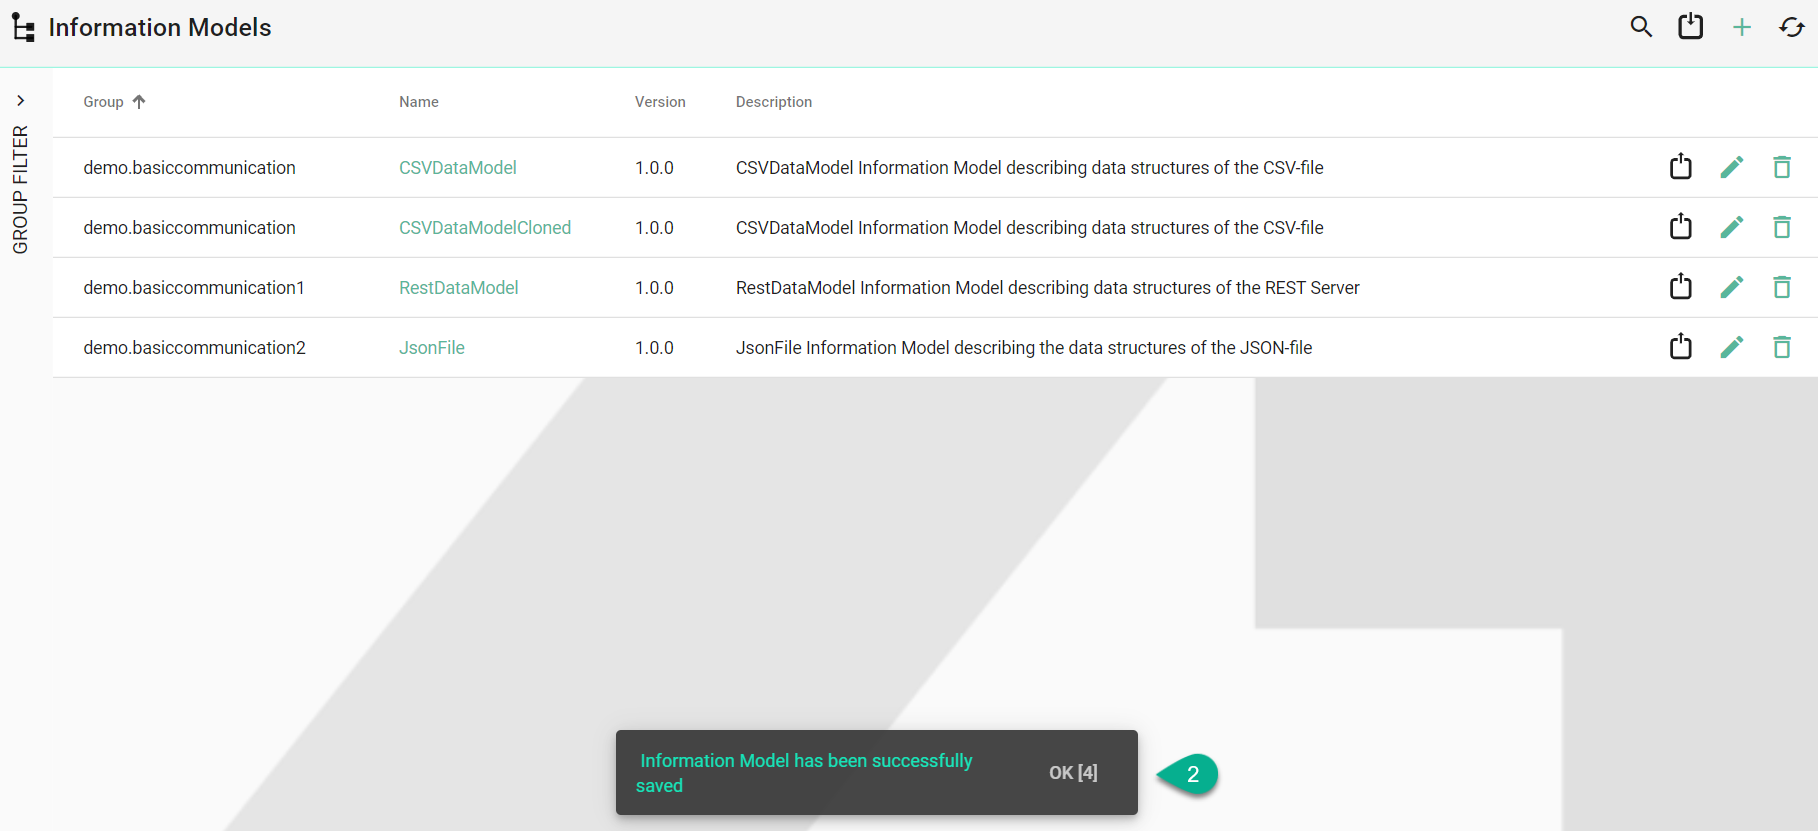
In the Edit Mode, after applying the input data, the user can save the changes by clicking on the Save button (1).
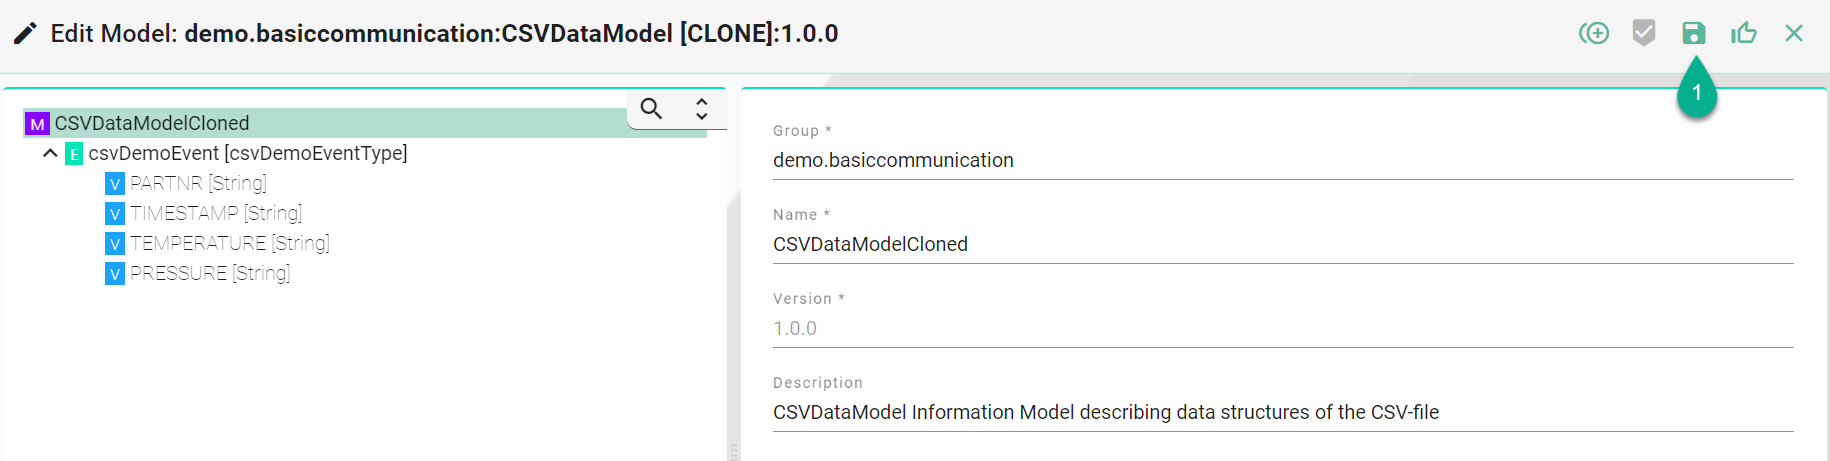
A confirmation message appears (2). The edit mode remains active.
Save and Close
When editing a component, after applying the input data, the user can save the changes and exit the edit mode by clicking on the Save and Close button (1).
A confirmation message appears (2). The view mode is active.
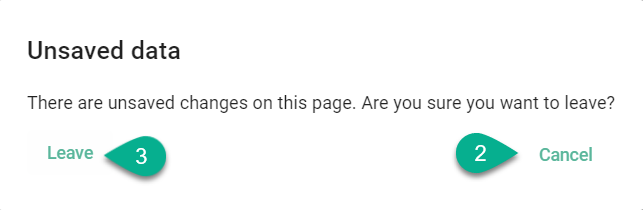
Close Edit Mode
The user can exit the edit mode by clicking on the Close button (1).
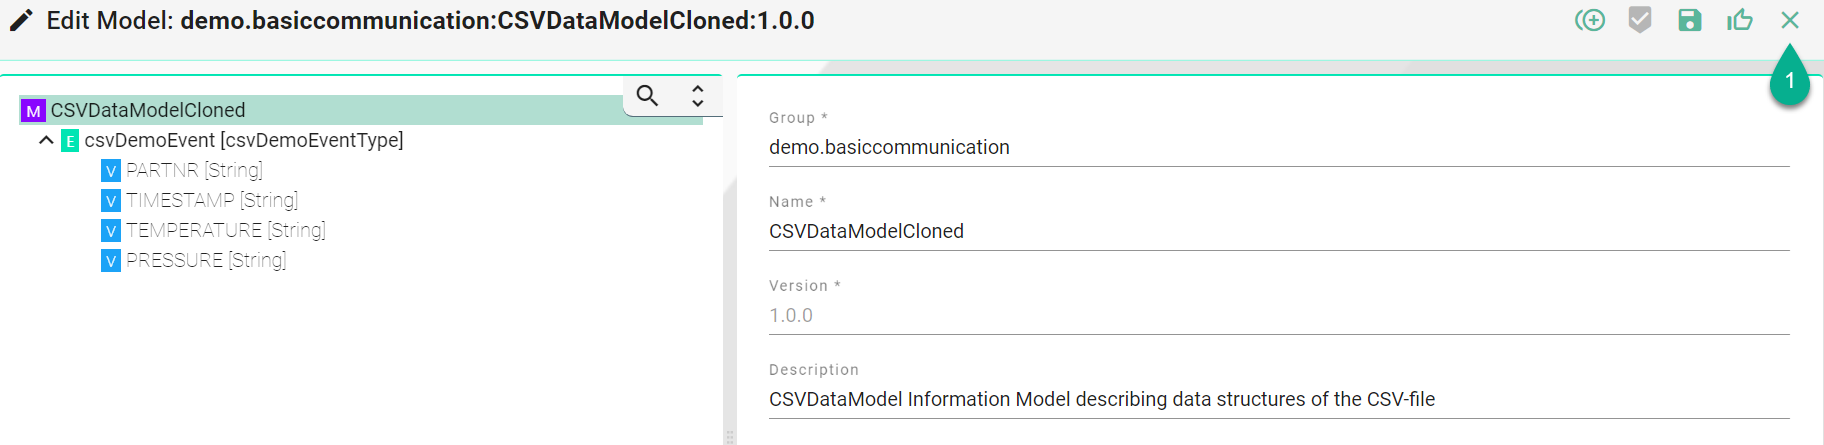
If the data is not saved, a pop-up appears and the user can select the Cancel button (2) to return to the edit mode and save the data or select the Leave button (3) to exit without saving.