Operations
Add
- The option to add/create a new component is described in the Instance Setup chapter, for each component type:
Edit
Components can be edited by clicking the Edit button (1).

Apply
In edit mode, selecting the Apply button (1) is required to validate or compile new data input.

Exit Editing
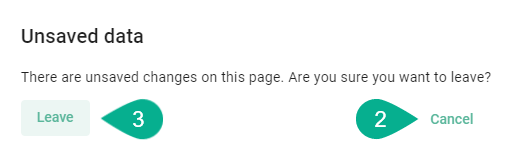
Edit mode can be exited by clicking the Close button (1).

If the data is unsaved, a pop-up will appear, offering the option to click the Cancel button (2) to return to edit mode and save the data, or the Leave button (3) to exit without saving.
Save
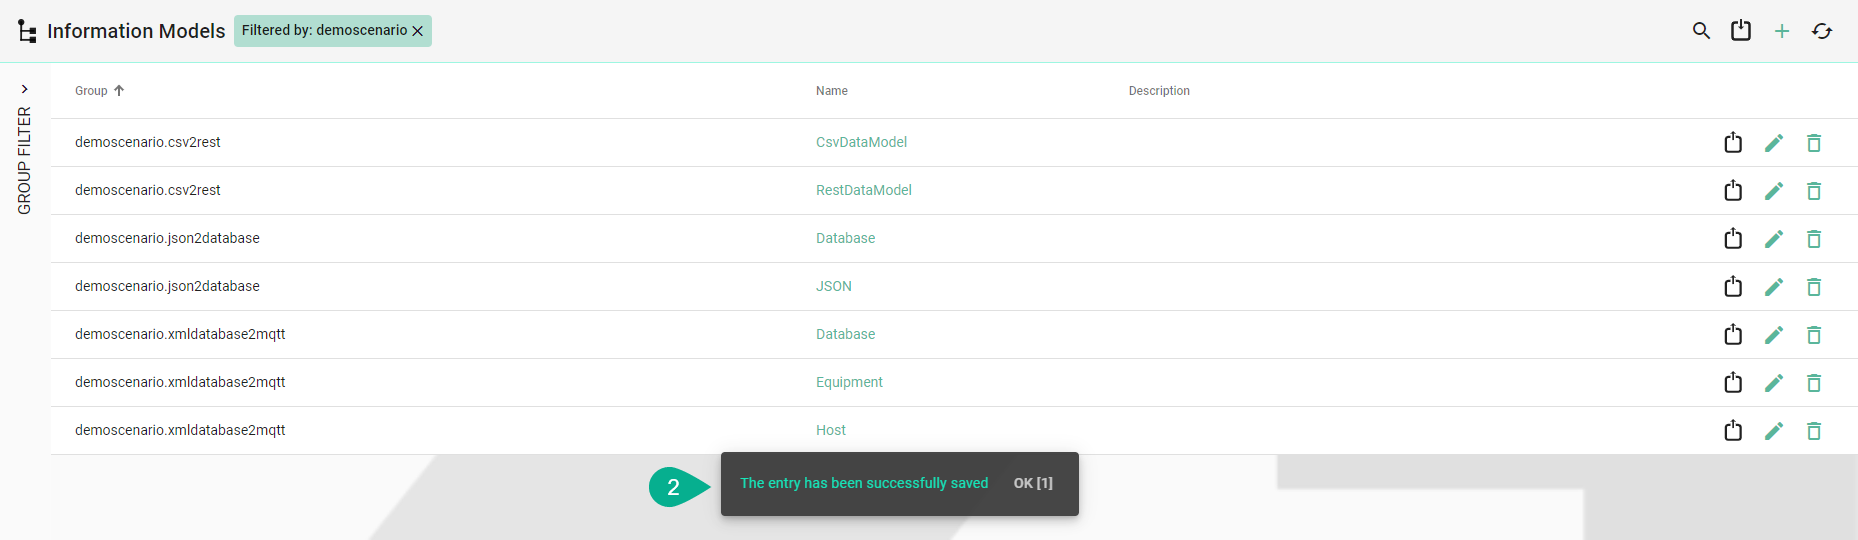
In Edit Mode, changes can be saved by clicking the Save button (1) after the input data has been applied.

A confirmation message appears (2).

Save and Close
After applying input data while editing a component, changes can be saved and edit mode exited by clicking the Save and Close button (1).

A confirmation message appears (2), the edit mode is then closed.
Search
- The Search option enables filtering of results according to multiple criteria, including:
Name
Version
Description
The search is case-insensitive and operates as a partial search, displaying all results that match the searched characters.
To find a component, click the Search button (1) located in the upper right corner.

Enter a search term (2).

To cancel the search click on the Close Search button (3).

Sort
- The information in the view mode can be sorted ascending or descending for each column:
Group
Name
Version
Description
Click on the column header (1) to sort the information within a column. An arrow icon will show whether the components are sorted in ascending or descending order.

- In the table view, next to each component on the right, the following operations are available:
Export
Edit
Delete
Reload
Selecting the Reload button (1) in the upper right corner refreshes the components from the repository.

Import
This feature enables the addition of a newly created or exported component to the scenario.
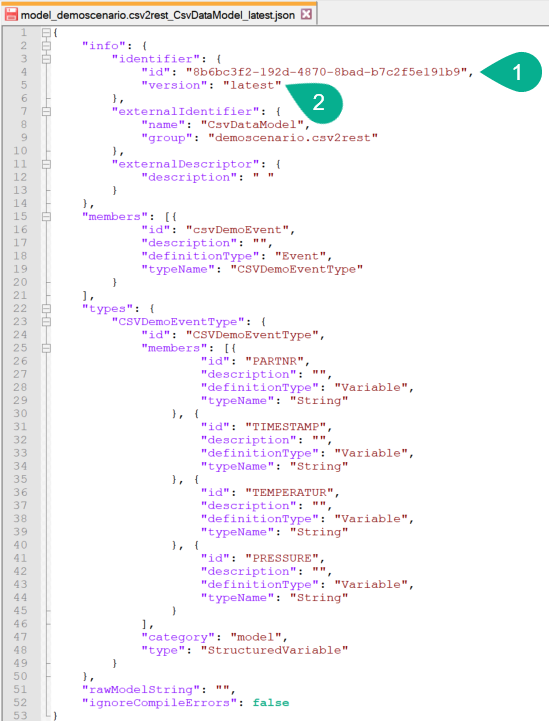
To import an exported component, first open the JSON file and remove the component id (1); upon import, the database will assign a universally unique identifier (uuid). Additionally, copy (2) and paste (3) the version into the info section, as illustrated below.

To proceed with the import, click the Import button (4) located in the upper right corner.

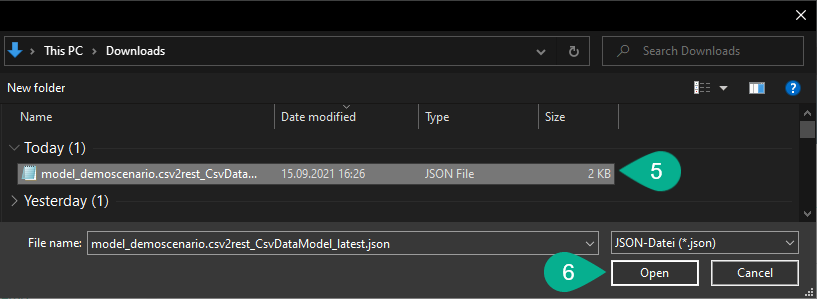
Select the file (5) and then click the Open button (6).
Now, the imported component appears in the list (7).

Export
To export a component, click the Export button (1).

Clone
In edit mode, a component can be cloned by selecting the Clone button (1).

Click on the Ok button (2).

The cloned component is then visible in edit mode, requiring a valid name to be input (3)

Note
The option to clone is unavailable for the Deployment component.
Delete
A component can be deleted by clicking the Delete button (1).

Select Delete (2).
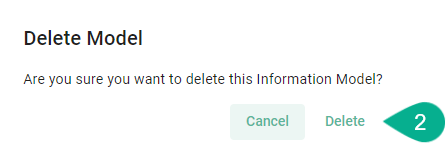
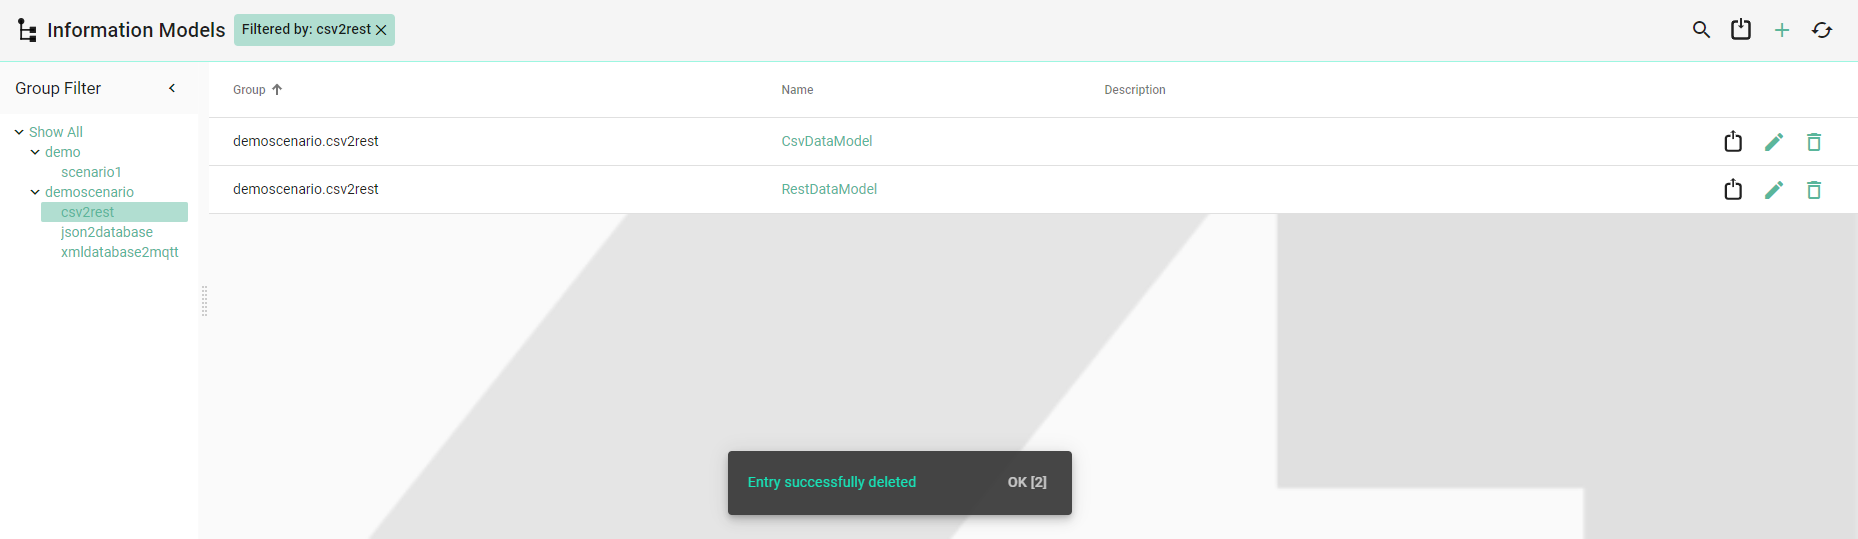
The component is deleted and removed from the list.
Bulk Action
Note
This operation is available only for the Deployment.
The following bulk operations are available (1):
Start
Stop
Deploy
Undeploy

To begin, tick the boxes for specific Deployment Instances (2) or the box to select all (3).Then click on the ellipsis menu button (4).

Choose a bulk operation; here, the selected instances should be deployed (5).

A status popup appears, displaying the following information:
Performed action (6)
The Instances included in the bulk action (7)
The status of the action (8)
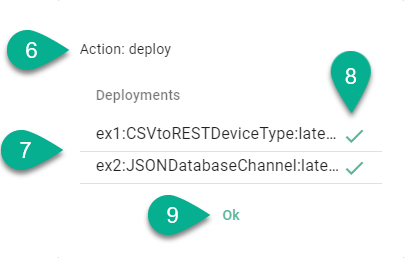
Click the Ok button (9) to close the popup.
When the selected Instances (10) are in different states (11), the bulk action (12) will only affect Instances with the compatible states (13).

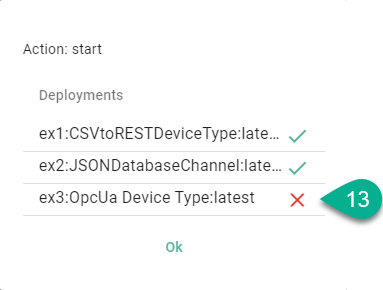
Note
Instances which are protected will not work using bulk actions.