Extensions
Note
Please contact Amorph Systems for guidance on how to enable and use extensions.
OpcUa Model Import
SMARTUNIFIER provides the possibility to generate an OpcUa Information Model using a XML-file or connecting to the OpcUa server.
Create a new Information Model (OPCUA)
Follow the steps described below to generate an Information Model:
Select the SMARTUNIFIER Information Model Perspective (1).
Click on the Extensions button (2).
Select the OpcUa model generator: ADD option (3).

OpcUa Nodeset XML Import
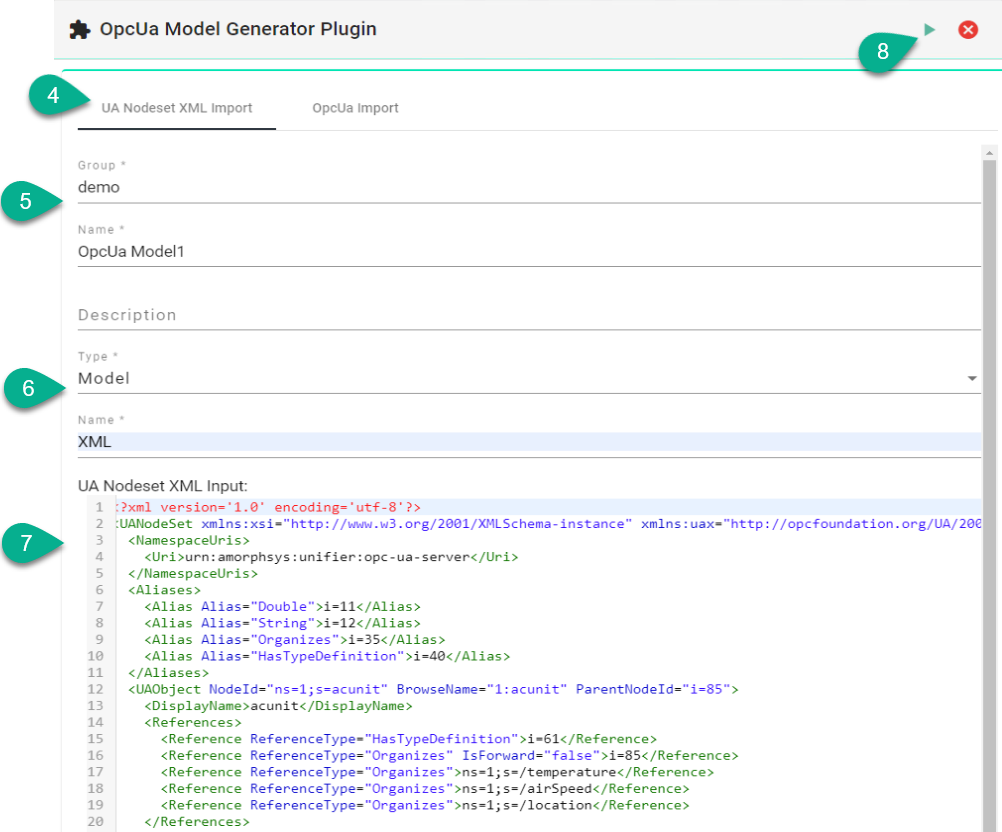
Select the UA Nodeset XML Import option (4).
Provide the following mandatory information: Group and Name (5).
Select the type of the Information Model Node and provide a Name (6) :
Model - the OpcUa data is converted inside the root model node
Event - the OpcUa data is converted inside an Event node type
Variable - the OpcUa data is converted inside a Variable node type
Paste the content from the XML file (7).
To finish, click on the Save Button (8).
The Information Model is generated.

OpcUa Direct Import
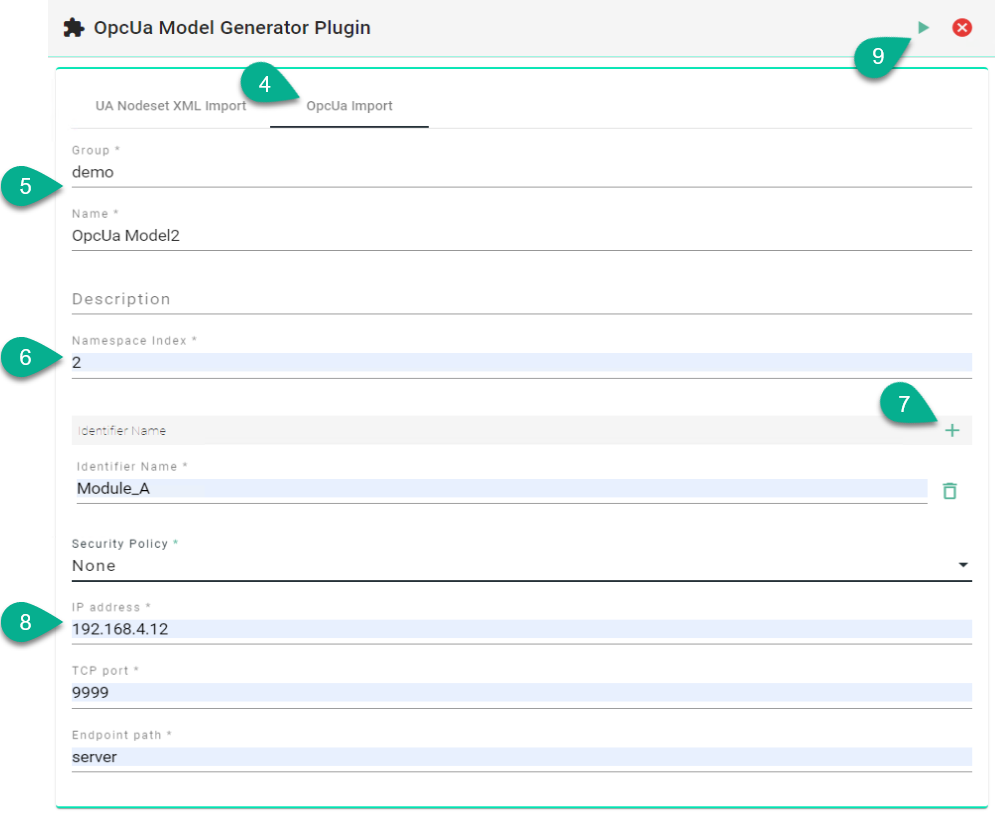
Select the OpcUa Import option (4).
Provide the following mandatory information: Group and Name (5).
Input the Namespace Index (6).
Click on the Add identifier name button and provide an Identifier Name (7).
Provide the server details (8):
Security Policy
IP address
TCP port
Endpoint path
To finish, click on the Save Button (9).
The Information Model is generated.

Update an existing Information Model (OPCUA)
Follow the steps described below to update an Information Model:
Open an Information Model to edit and click on the Extensions button (1).
Select the OpcUa model generator: UPDATE option (2).

OpcUa Nodeset XML Import (Update)
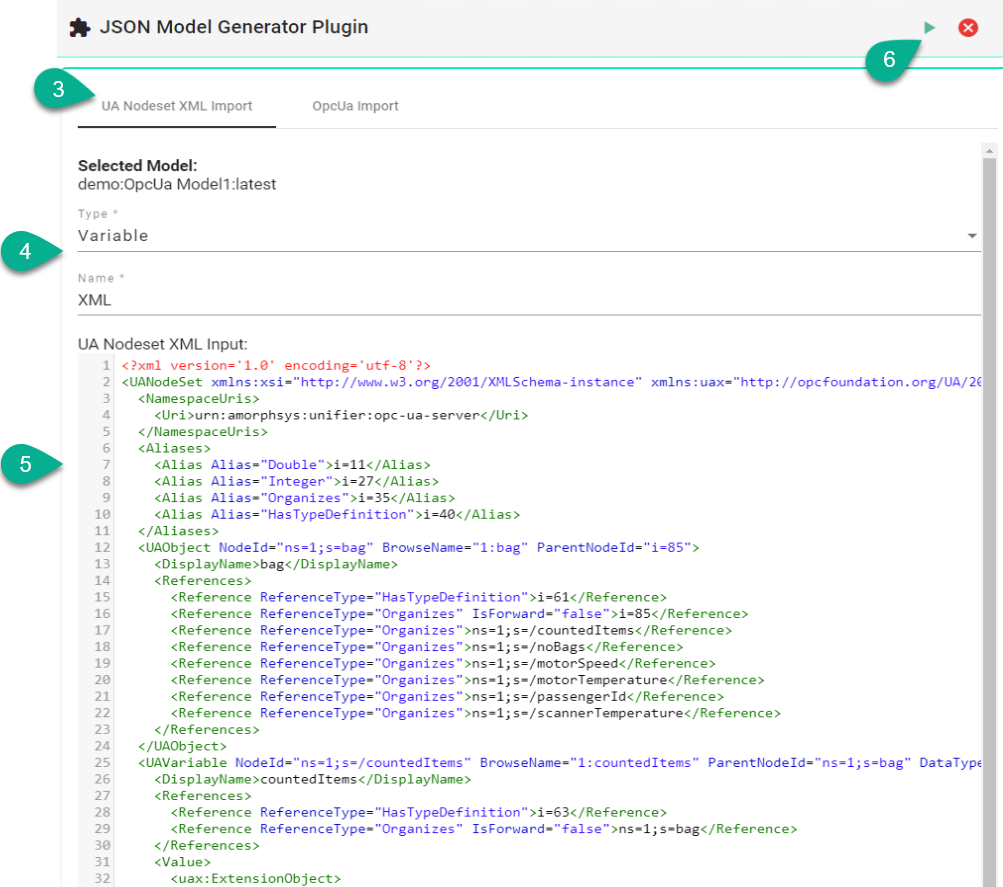
Select the UA Nodeset XML Import option (3).
Update the Type and the Name (4).
Paste the updated content from a XML-file (5).
To finish, click on the Save button (6).
OpcUa Direct Import (Update)
Select the OpcUa Import option (3).
Input the Namespace Index (4).
Click on the Add identifier name button and provide an Identifier Name (5).
Provide the server details (6):
Security Policy
IP address
TCP port
Endpoint path
To finish, click on the Save Button (7).

JSON Model Import
SMARTUNIFIER provides the possibility to generate an Information Model using a JSON-file.
Create a new Information Model (JSON)
Follow the steps described below to generate an Information Model:
Select the SMARTUNIFIER Information Model Perspective (1).
Click on the Extensions button (2).
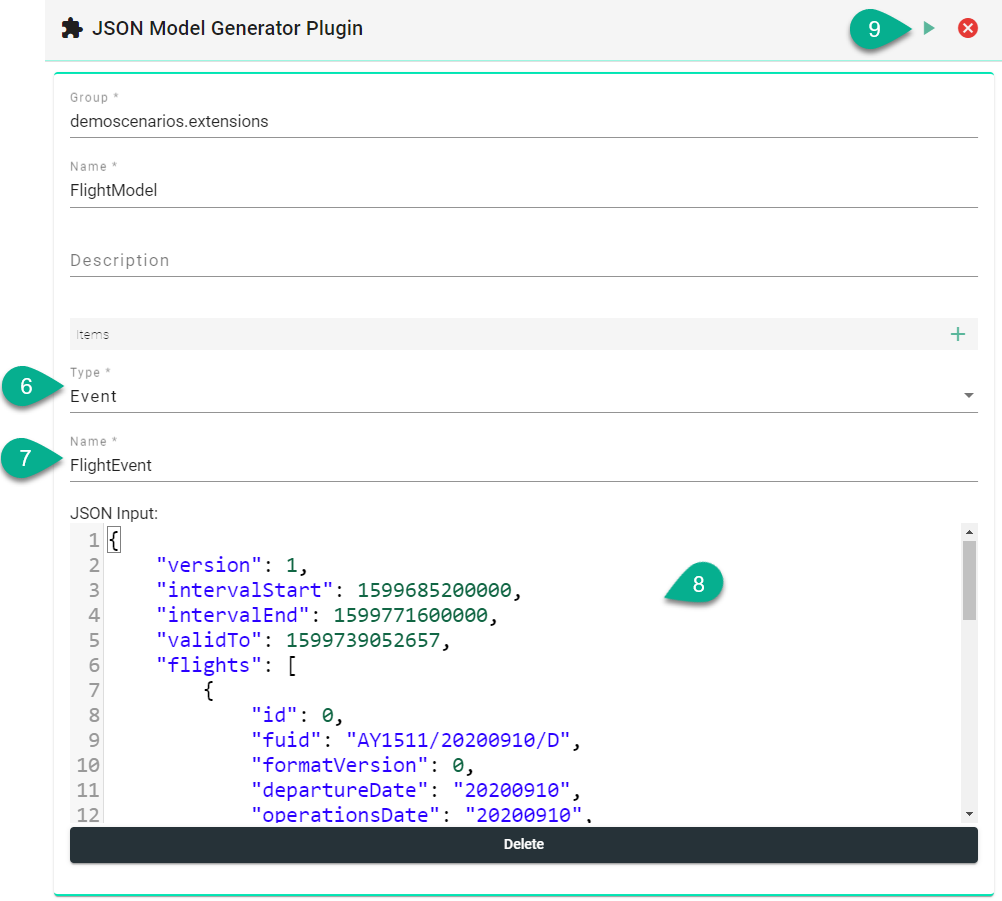
Select the Json model generator: ADD option (3).

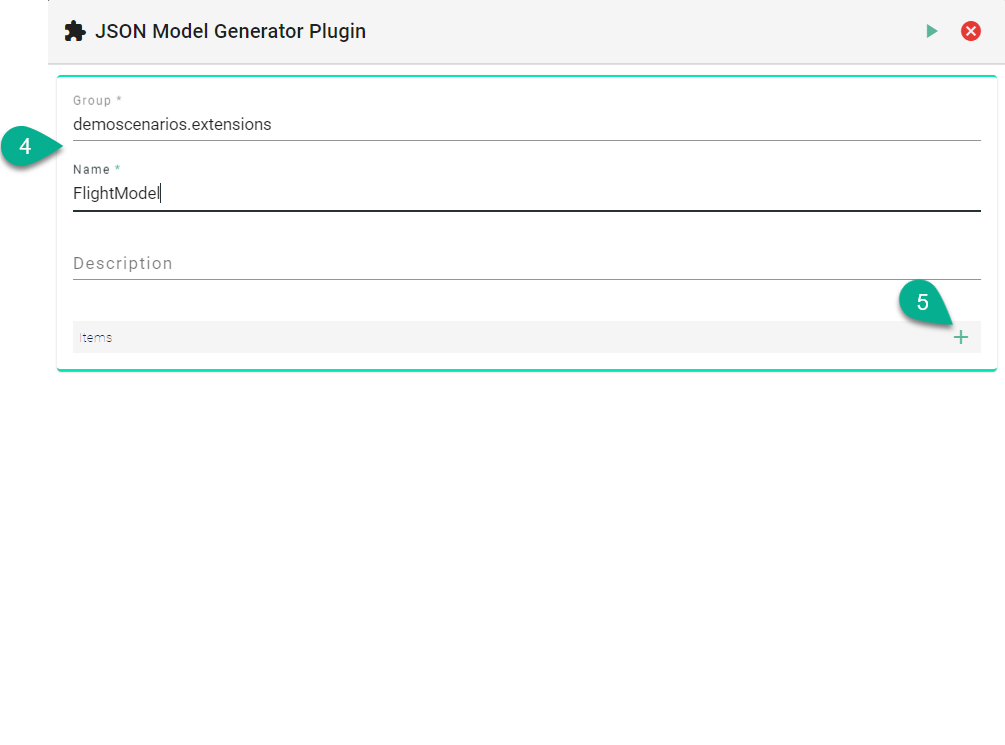
Provide the following mandatory information: Group and Name (4).
Click on the Add item button (5).
Select the type of the Information Model Node (6):
Model - the Json data is converted inside the root model node
Event - the Json data is converted inside an Event node type
Variable - the Json data is converted inside a Variable node type
Command - the Json data is converted inside a Command node type
Enter a Name (7).
Paste the content from a Json file (8).
Note
Make sure to copy the JSON object { }.
To finish, click on the Save Button (9).
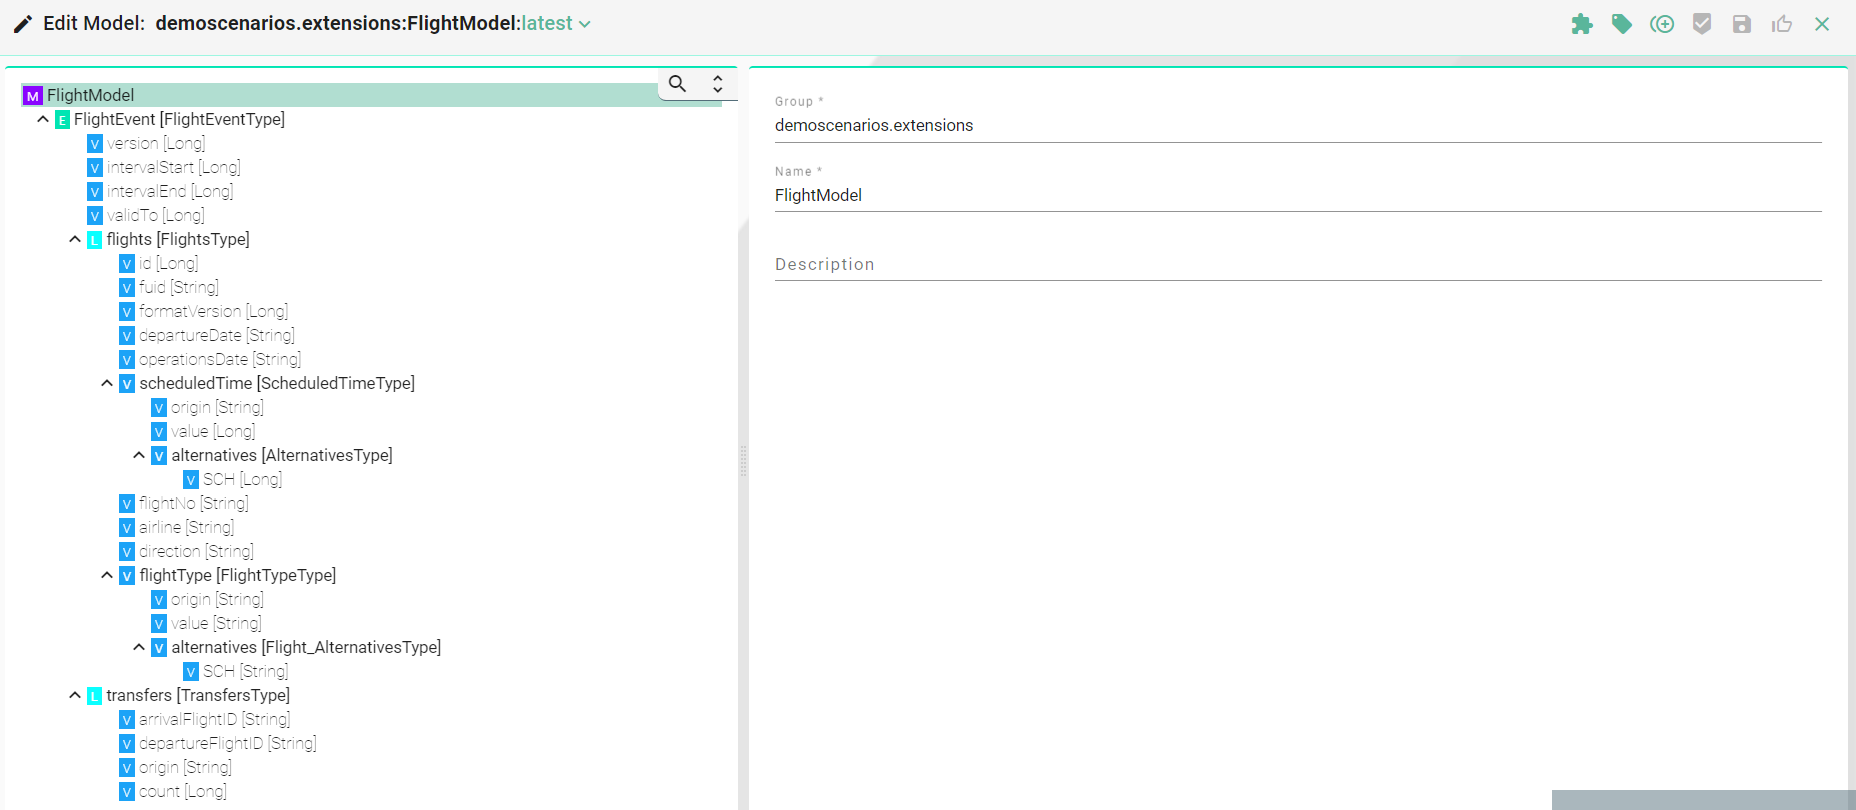
The Information Model is generated.
Update an existing Information Model (JSON)
Follow the steps described below to update an Information Model:
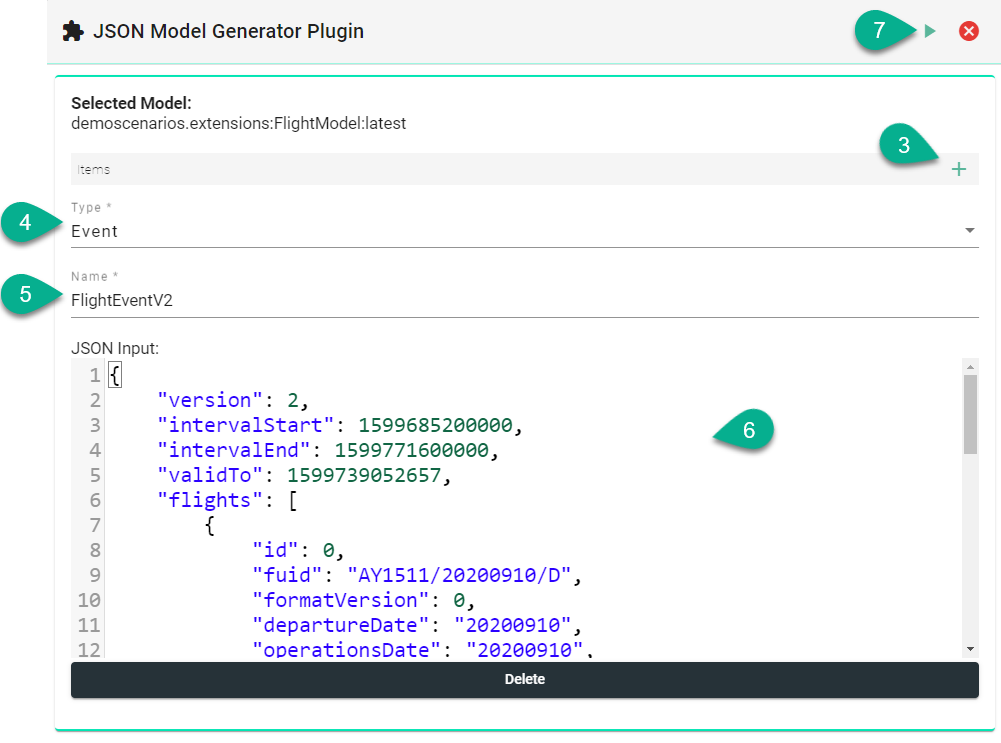
Open an Information Model to edit and click on the Extensions button (1).
Select the Json model generator: UPDATE option (2).

Click on the Add item button (3).
Update the Type (4) and the Name (5).
Paste the updated content from a Json-file (6).
To finish, click on the Save button (7).
AWS IoT SiteWise Model Export
This extension allows you to export an SMARTUNIFIER Information Model to AWS IoT SiteWise.
How to access
To access the AWS IoT SiteWise extension, click on the Account icon (1), go to the Administrative option (2) and select the Extensions (3).
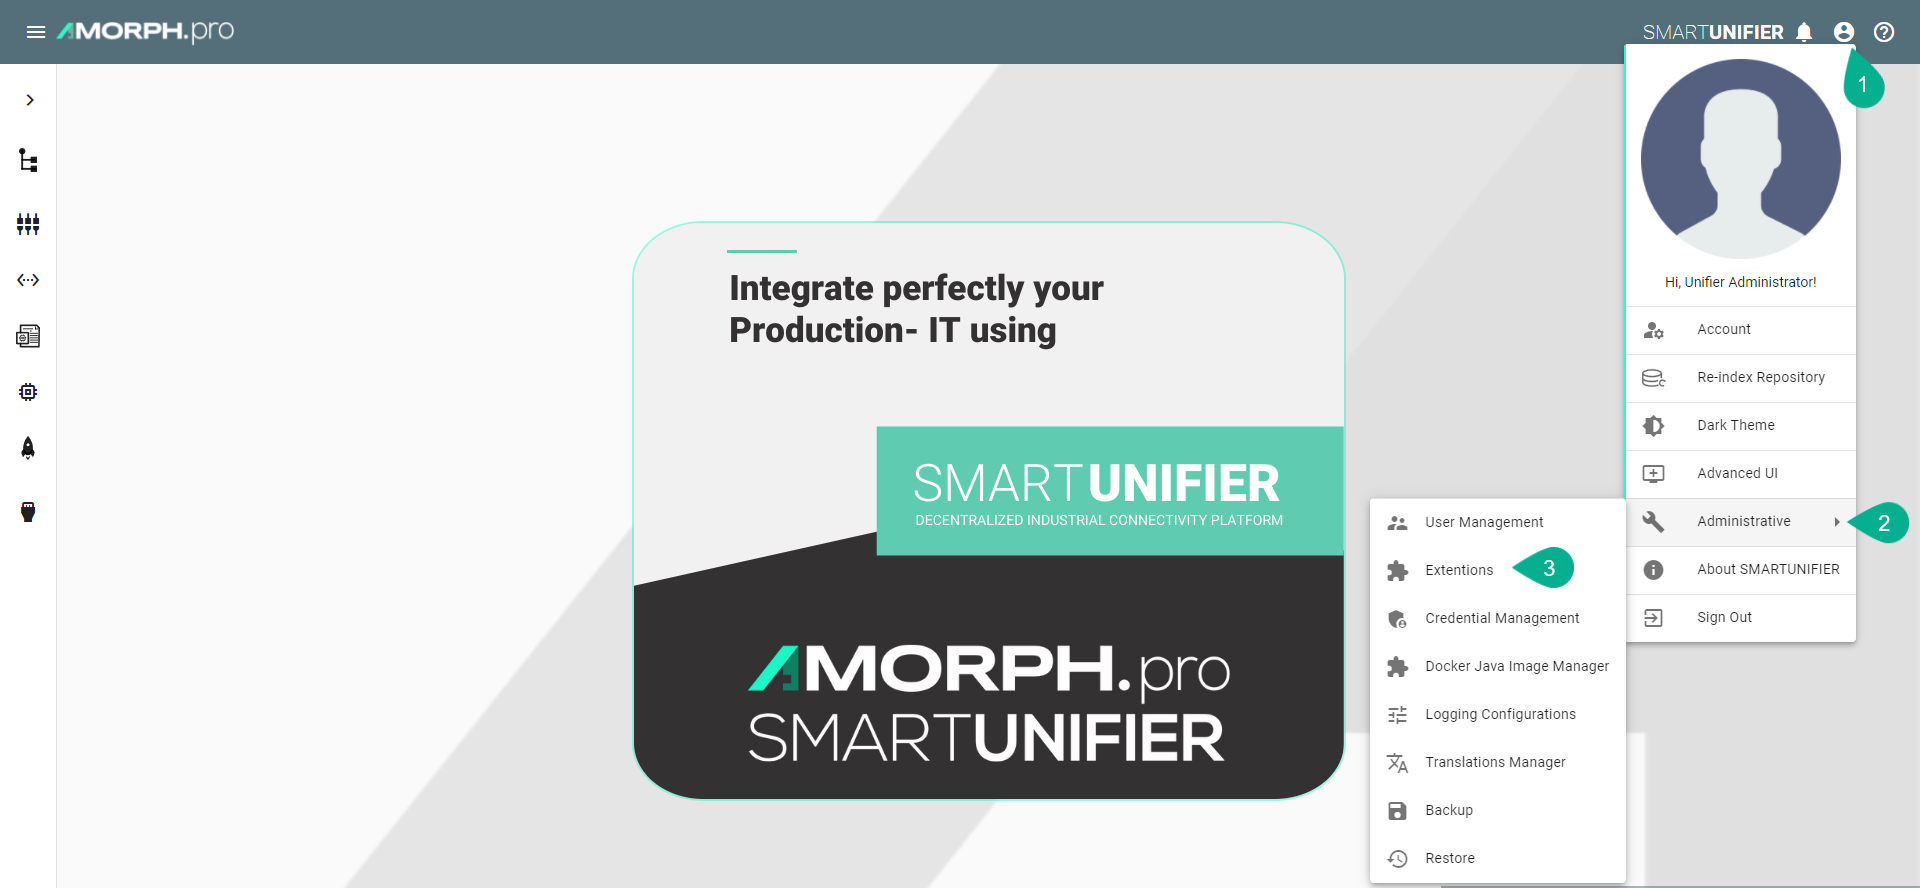
Then select the configuration button of the (4)

How to export Information to AWS IoT SiteWise
We recommend to have one user dedicated for SMARTUNIFIER.
Attach the following permission:
Policy ARN |
Description |
|---|---|
arn:aws:iam::aws:policy/AWSIoTSiteWiseFullAccess |
Provides full access to IoT SiteWise. |
If you do not have already an access key available you have to create a new access key. We recommend to create a new access key after 90 days.
Follow the steps described below to export a the SMARTUNIFIER Information Model:
Configuration of the extension (1):
Select the region of the AWS Iot SiteWise service you are using
Enter the access key id and the secret access key id
Select the Information Model you want to export
Click on the Run button to execute the export (2)
